
Here’s how to purchase your GitKraken subscription.
Do you work in an air-gapped network? Or looking for GitKraken Desktop option that does not require account creation? Then check out our GitKraken Stand-Alone solution. for teams of 10+
1. Create an account
If you are purchasing a GitKraken product, first create an account.
If you are buying the subscription on behalf of an organization, don’t worry. Gitkraken allows you to hand over the ownership of the account to another user.
Note: Check your email to verify your account registration. You will not be able to manage your organization until this step is complete.
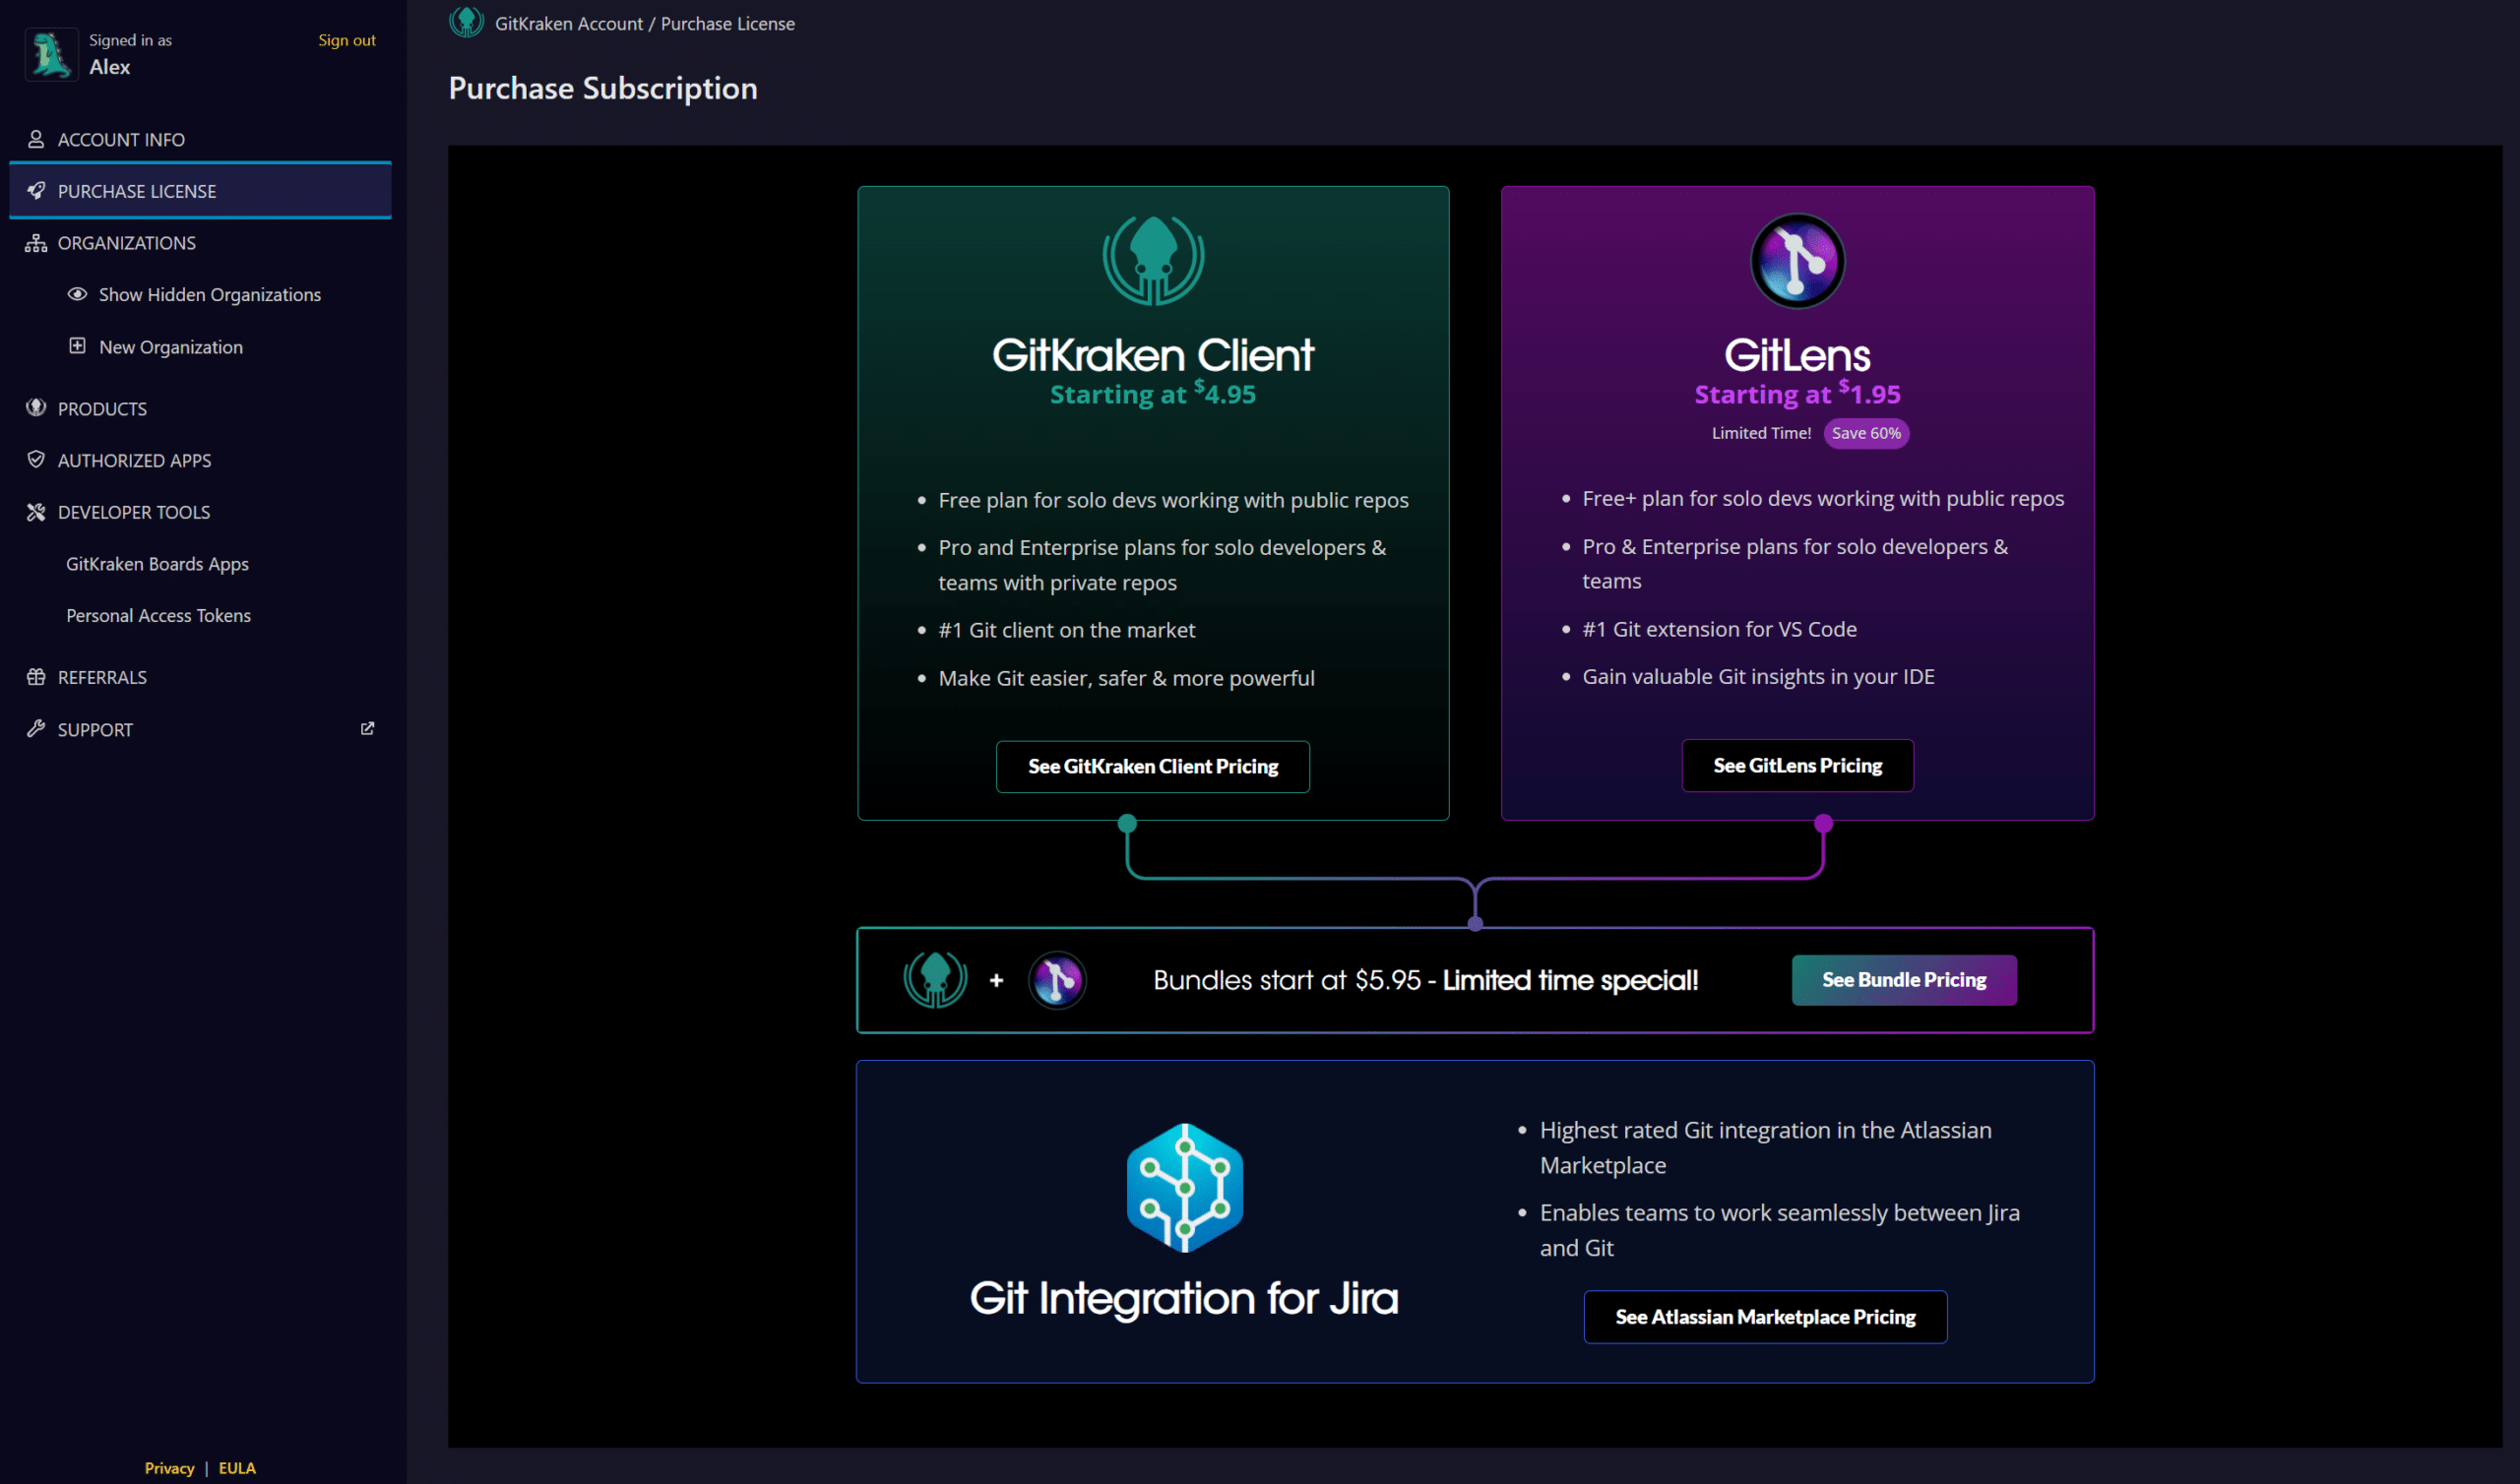
2. Choose a plan
After account creation, choose your plan. Select the corresponding tab to choose your plan. You may select full pricing options to see all options available.
If you need to come back to this page later, navigate directly to https://app.gitkraken.com, or click Manage Account from the user menu dropdown in-app when ready.
3. Enter billing
Next, enter the Organization name followed by the billing details.
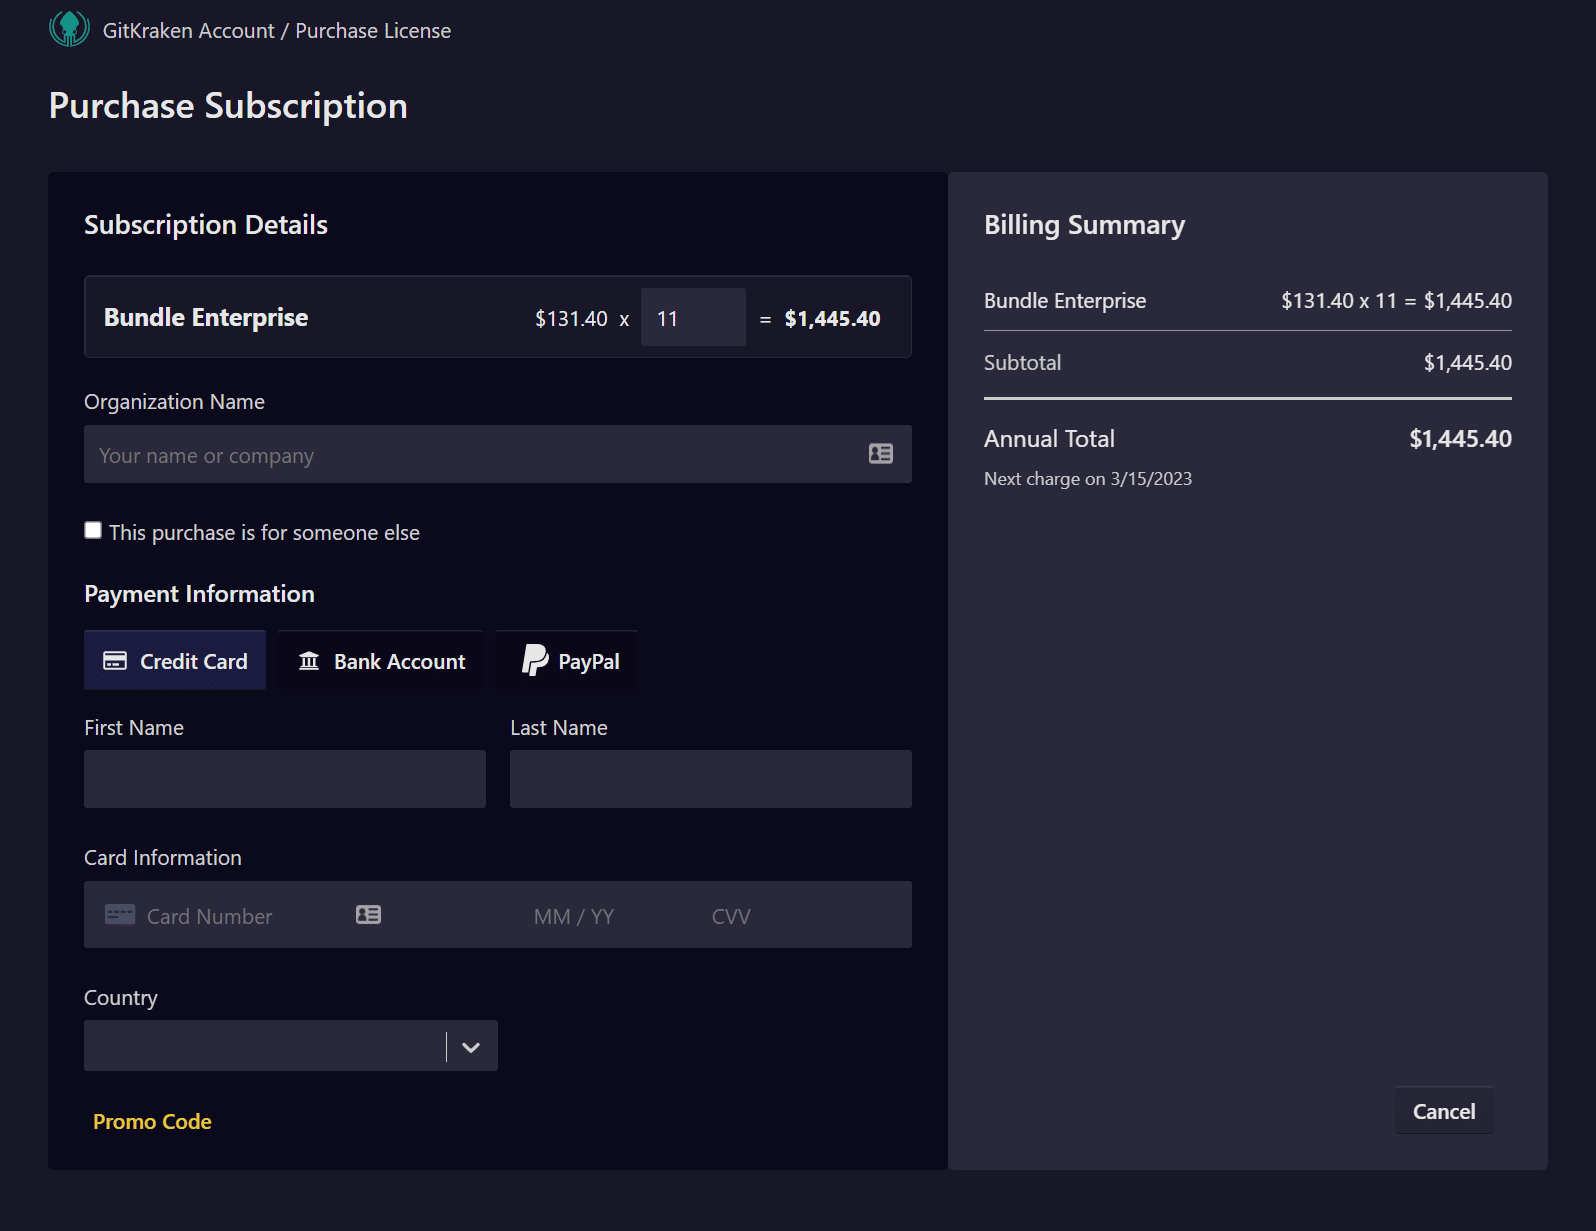
If paying via Paypal, please first follow the prompts to authenticate with Paypal.
Bank Account
You may purchase a GitKraken product via ACH, SEPA, BACS transfer by selecting the Bank Account button. Please note that the transaction may remain in a processing status for up to 7 days.
Note: Invoicing for payment by check, wire transfer, ACH payment etc is not available for existing subscriptions or upgrades.
Entering a VAT number
To enter a VAT number, first select your Country. If the selected country supports VAT, the Enter VAT number link will appear which you may click.

Then you may enter the details as part of your purchase.
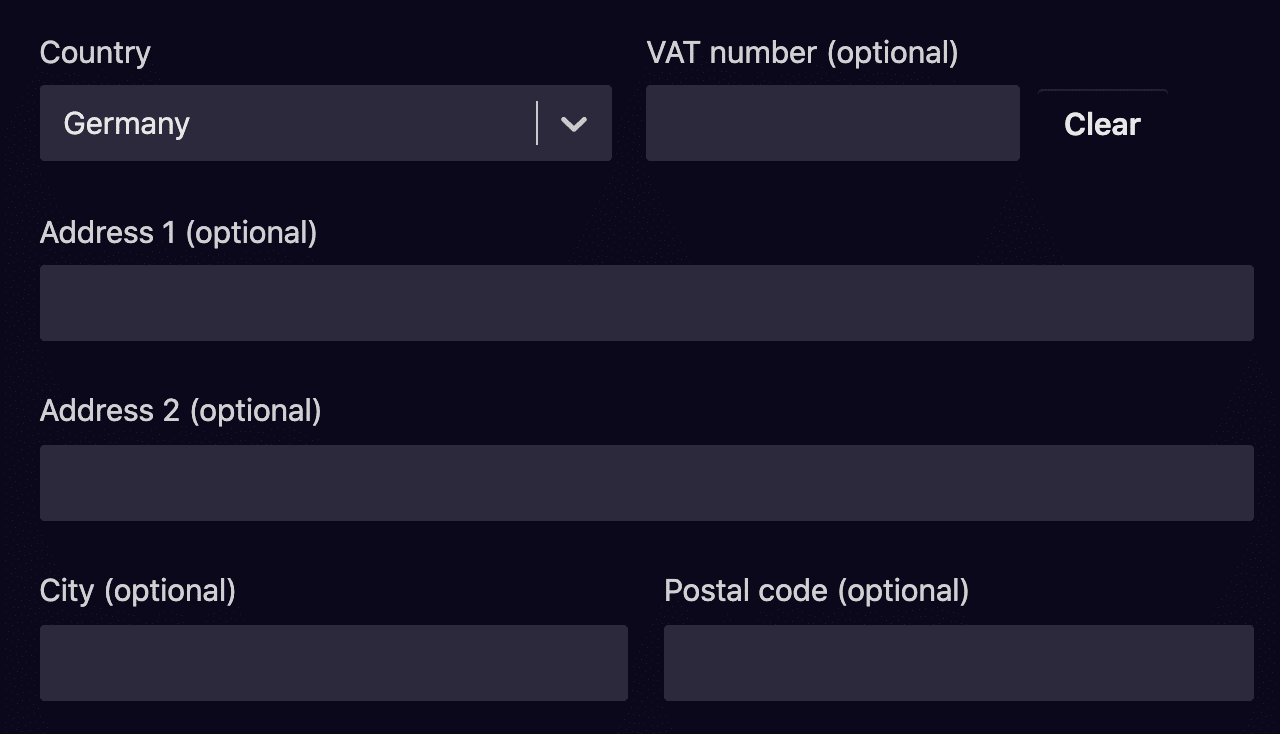
VAT details will display on the GitKraken invoice automatically emailed to the purchaser from [email protected].
Getting an error entering your VAT number? Then please contact accounting and we’d be glad to assist.
4. Add users
After purchase, add users to your subscription!
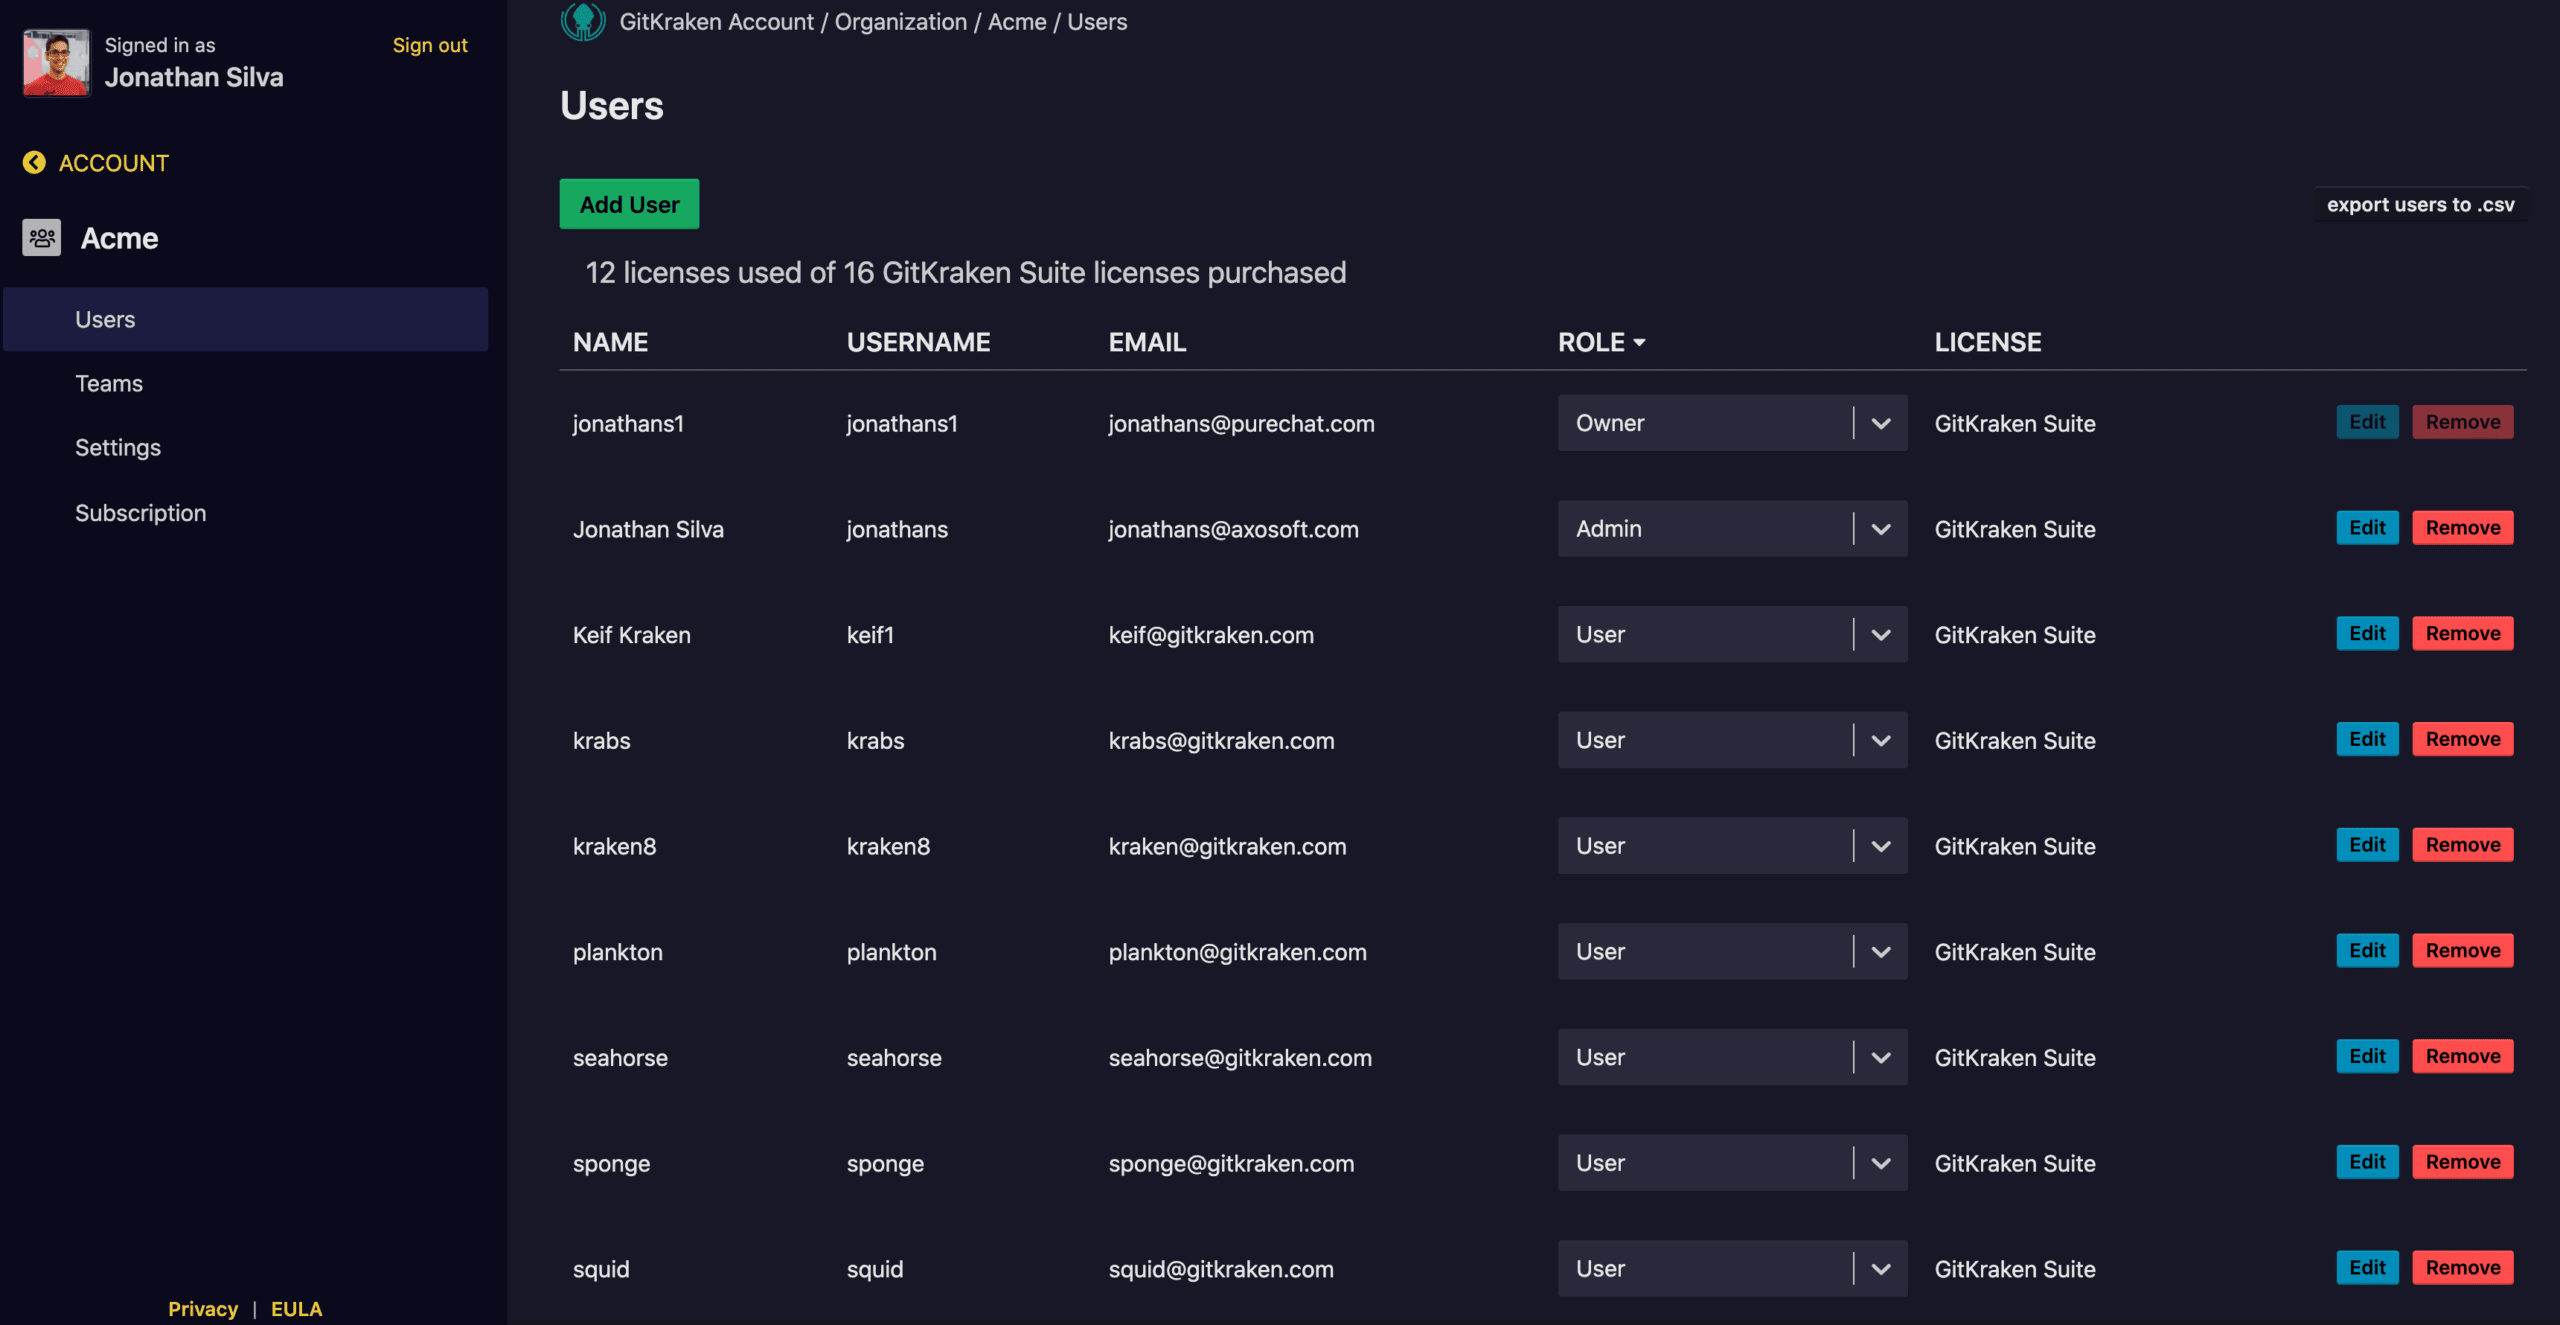
Each user will need a GitKraken Desktop license, here is how to bestow a license:
Allocating licenses
- Under Organization [Your organization name] , click
- Enter the user email address
- Select the user role
- Click
- Celebrate
If users are new to GitKraken, they will receive an email invitation with a link to activate their account.
Once the license is allocated, make sure the user is logging into the app with the email address listed in the Pro organization.
If a user does not see the red Pro icon in the bottom right, have them login again.
Additionally, you can set up a user as a Billing Contact (unlicensed). This is perfect for people who don’t need to use GitKraken Desktop, but wish to have access to manage the account subscription and settings.
Tip: Questions about upgrading your plan or an order? Contact our Success or Accounting teams as needed!
5. Get your receipt
A copy of the invoice receipt will be automatically emailed to the purchaser’s email address from [email protected]. Make sure to check your email filters!
You may request a copy of your receipt by emailing Accounting.
