
Last updated: March 2026
Use this page to upgrade GitKraken Self-Hosted Server, client installers, and license files when your deployment runs on Docker. It also covers the Super User password reset flow, so administrators can handle both standard upgrades and recovery tasks from the same procedure.
Note: GitKraken Desktop Self-Hosted and On-Premise Serverless versions are sold separately from standard subscriptions. To purchase, see our On-Premise Pricing page.
Quick Start
To upgrade the server:
- Navigate to the folder containing
docker-compose.ymland runsudo docker-compose down. - Back up the existing
docker-compose.yml. - Extract the new
GitKrakenEnterpriseServer.zipinto the same folder. - Compare the old and new
docker-compose.ymlfor port, volume, or environment variable changes. - Run
sudo sh loadImages.shto load the new Docker images. - Run
sudo docker-compose upto restart the server.
To upgrade client installers: Locate the release volume path in docker-compose.yml under gk-enterprise-controller, navigate to the host path, and extract the new release.zip into that directory.
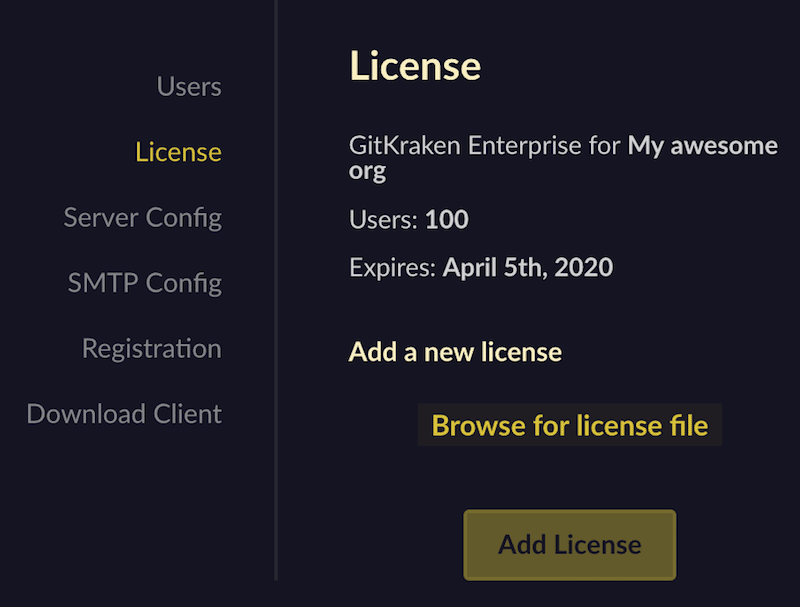
To update the license: Copy the new license.dat file to the server, open the License tab on your Enterprise site, and upload the file.
To reset the Super User password: Stop the server, add SUPER_USER_RESET: 1 to the gk-services environment in docker-compose.yml, restart, and visit /reset/super-user in your browser.
How to upgrade the self-hosted server
-
Navigate to the folder where GitKraken Self-Hosted is installed (the folder with
docker-compose.yml). -
Take down the current instance:
sudo docker-compose down -
Back up the
docker-compose.ymlfile. -
Extract
GitKrakenEnterpriseServer.zipin the same folder. This will overwritedocker-compose.yml. -
Compare the new and old
docker-compose.ymlfor differences, such as:- Port configurations
- Volume mount paths
- Environment variable updates
-
If you are not using
docker-compose(e.g., Nomad setup), adjust image names/tags in your swarm manager accordingly. -
Load Docker images:
sudo sh loadImages.sh -
Restart the server from the same directory:
sudo docker-compose up
Note: Always run docker-compose up from the original directory. On CentOS or RHEL7, you may need full paths:
sudo systemctl start docker.service
sudo /usr/local/bin/docker-compose up
How to upgrade self-hosted clients
-
Open your
docker-compose.ymlfile. -
Find the
gk-enterprise-controllerservice. Undervolumes, identify the client volume:- ./gk-data/release:/controller/release -
This line splits into:
- Host path:
./gk-data/release - Container path:
/controller/release
- Host path:
-
Navigate to the release folder on the host machine. Extract
release.zipand overwrite existing content. -
After extracting, your folder should look like:
./gk-data/ └── release/ ├── linux/ ├── darwin/ ├── win32/ └── win64/ -
GitKraken Self-Hosted users will now receive the latest client.
How to update the license
To update your GitKraken Self-Hosted license:
- Copy the new
license.datfile to the server. - Open the License tab on your Enterprise site.
- Browse to and select the new license file.
How to reset the Super User password
-
Stop GitKraken Self-Hosted:
sudo docker-compose down -
Add the environment variable
SUPER_USER_RESET: 1undergk-servicesindocker-compose.yml:environment: SUPER_USER_RESET: 1 -
Start the instance:
sudo docker-compose up -
Visit
/reset/super-userin your browser to set a new password. -
Confirm login works, then shut down the server:
sudo docker-compose down -
Remove the
SUPER_USER_RESETvariable fromdocker-compose.yml. -
Restart GitKraken Self-Hosted:
sudo docker-compose up
