
⇩
> Check if Git Integration for Jira app is installed, licensed and active
JIRA ADMIN
-
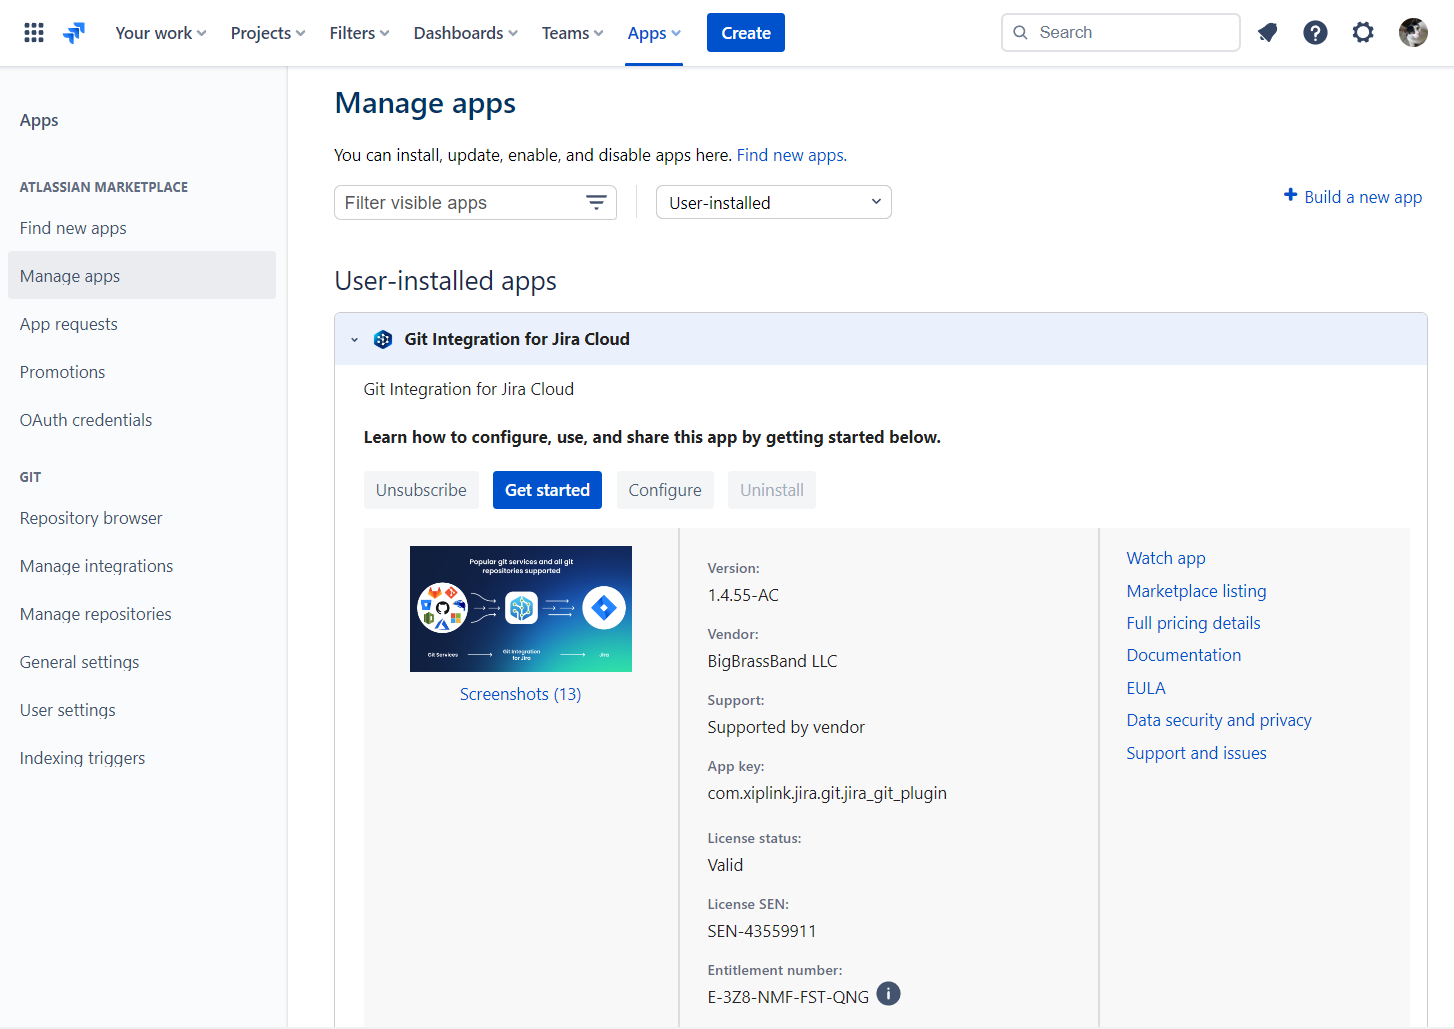
Follow the link to install from the Atlassian Marketplace. You can verify that the Git Integration for Jira Cloud app is installed by visiting
 Jira Settings ➜ Apps ➜ Manage apps.
 -
Verify that the license is valid and that the application is active (installed, subscription is active).
⇩
Git Integration for Jira Cloud is installed, licensed and active
⇩
> Check if user has “Development Tools” permission
JIRA ADMIN
Using the Permission Helper within Jira Cloud – verify that the user in question has the Development Tools permission.
The Permission Helper is available to Jira admins: ![]() Jira settings ➜ System ➜ Permission Helper.
Jira settings ➜ System ➜ Permission Helper.
⇩
Permissions are correct
⇩
> Check if repository with commit is connected to Jira
JIRA ADMIN
A couple ways to do this:
-
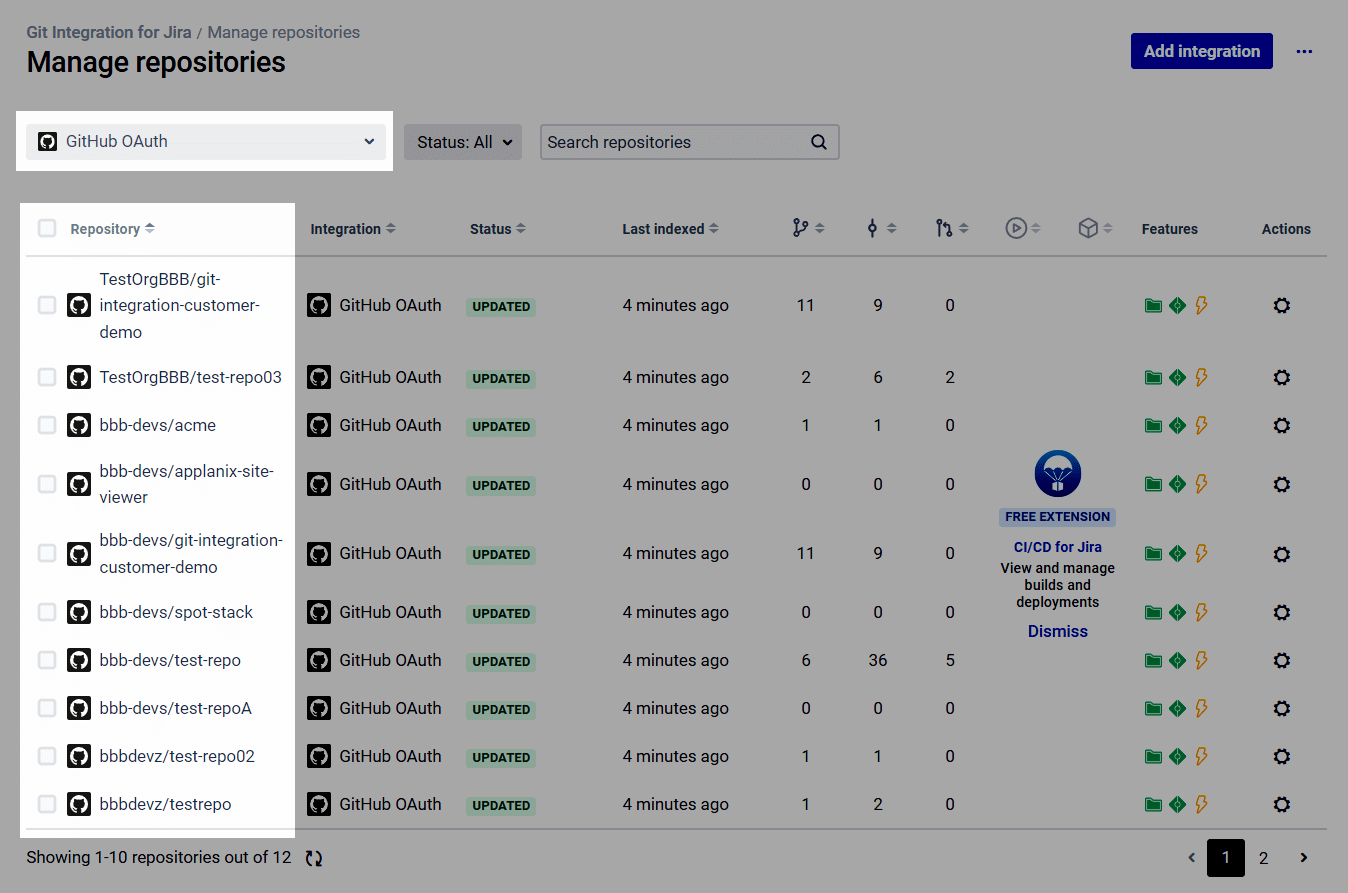
Via repotories in Manage Repositories page
-
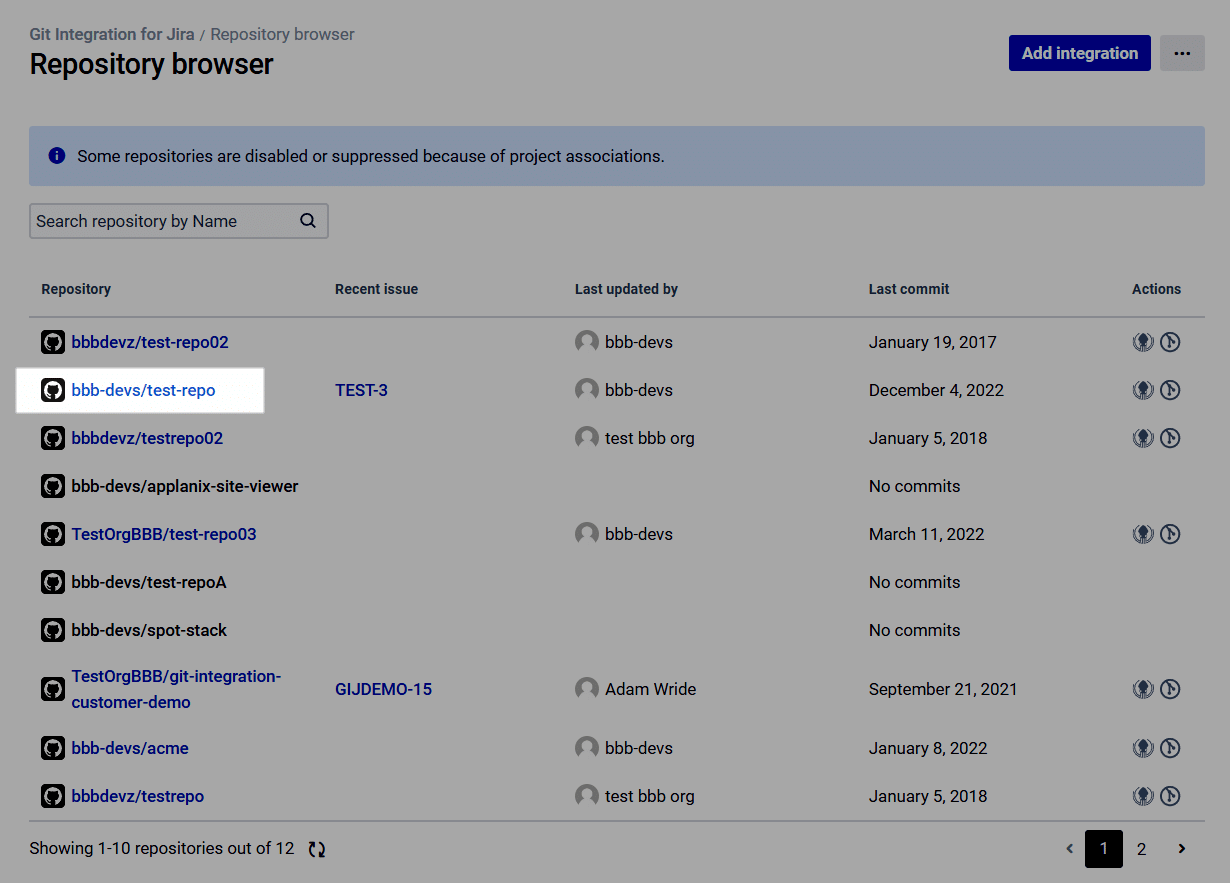
Via Repository Browser (shows the list of all the repositories that are connected in one list)
⇩
The repository with the missing commit is connected
⇩
> Check if repository has been reindexed since commit
JIRA ADMIN
Reindexing integrations (or repositories) manually. Note: all repositories are updated regularly without any manual updating required.
Approximately every 8-15 minutes.
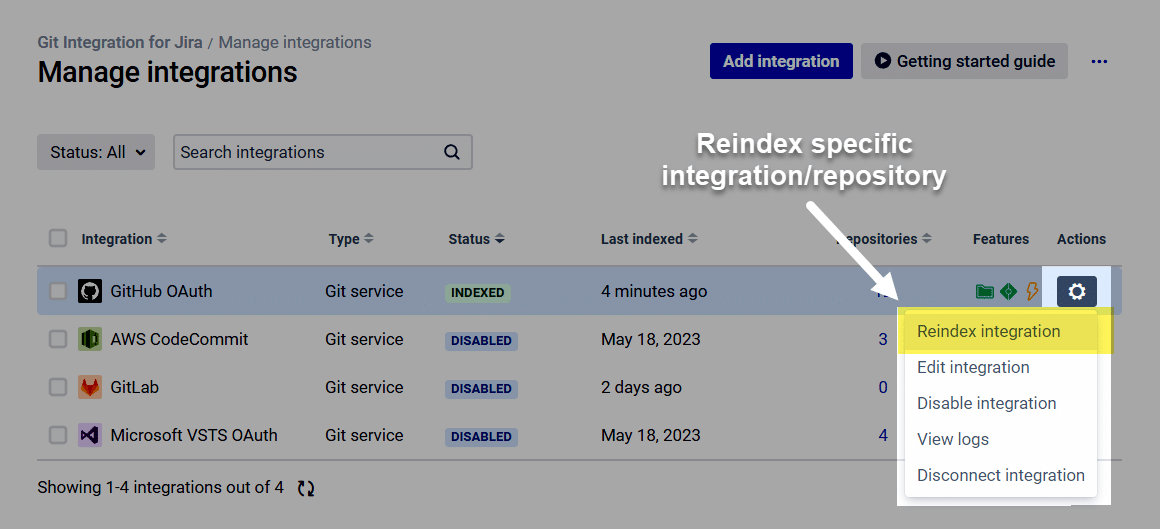
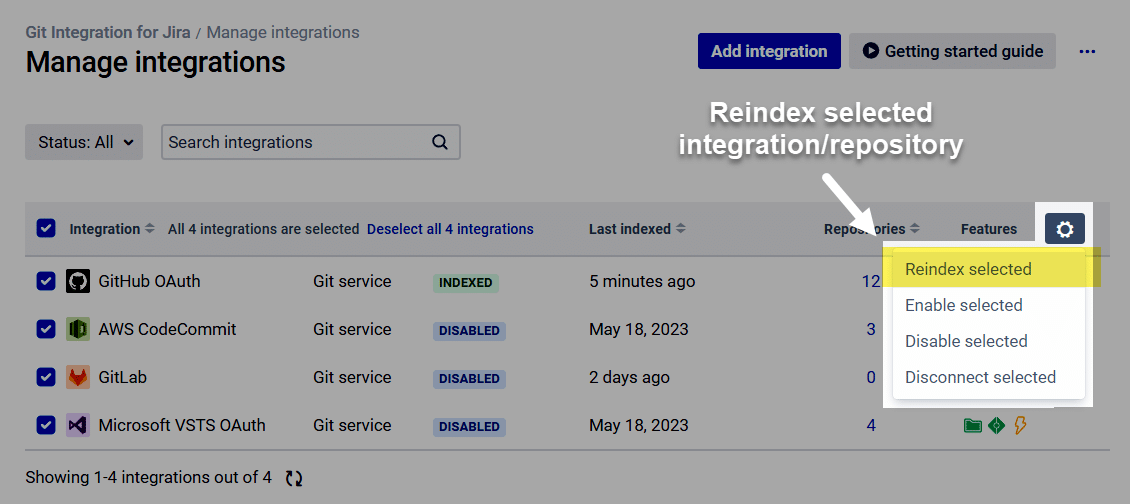
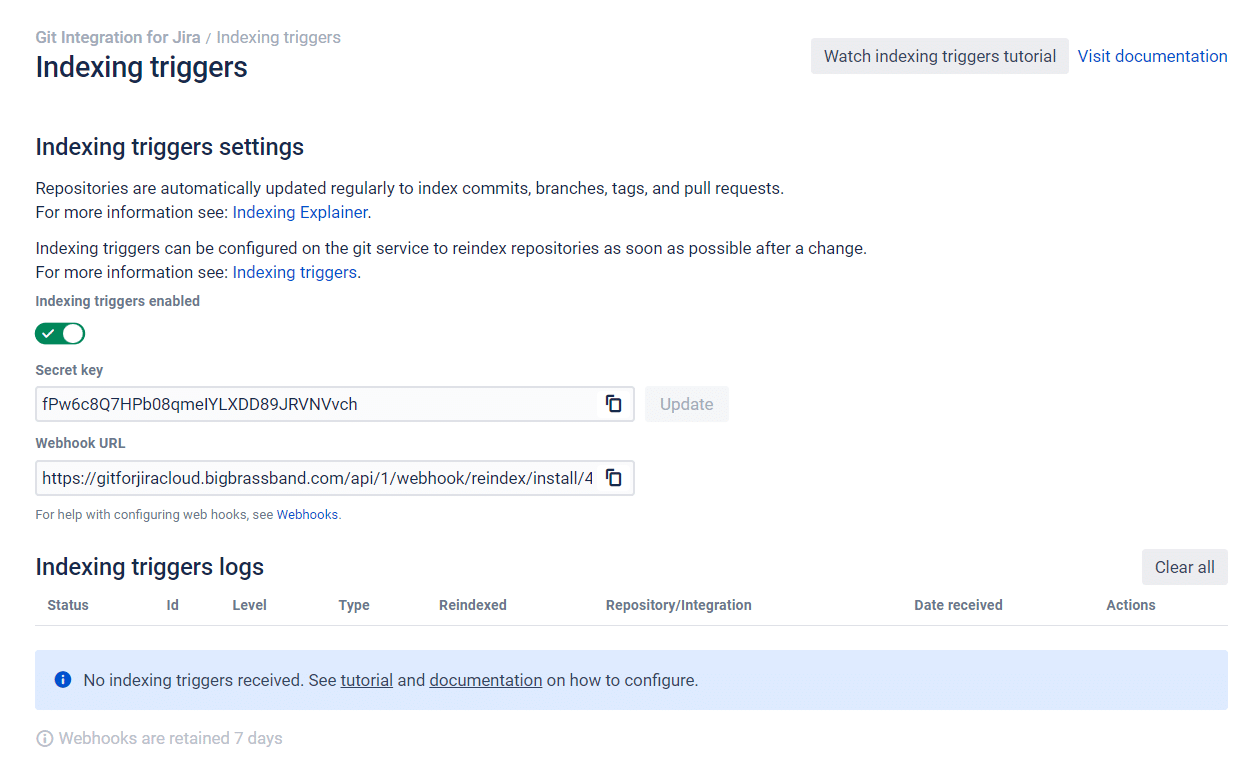
Admins can setup webhooks to index commits immediately
⇩
The repository has indexed since the commit was pushed
⇩
> Check if repository is associated with Jira project
JIRA ADMIN
It allows an admin to associate an integration (and all the repositories) or just a single repository to a set of Jira projects (one, many, or all).
Go to Manage integrations page.
On selected integration/repository, click on ![]() Actions ➜ Edit integration.
Actions ➜ Edit integration.
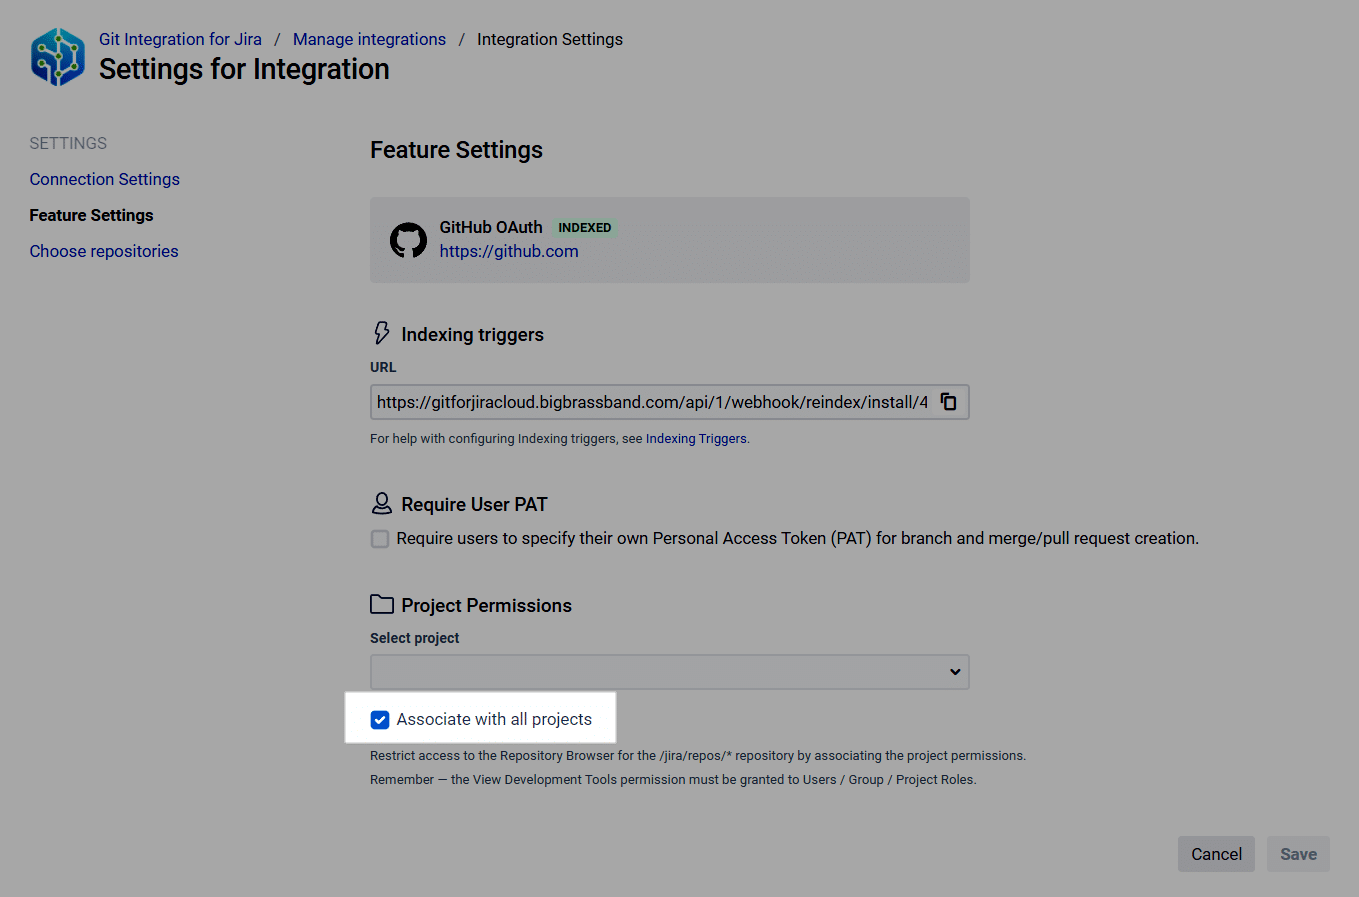
Scroll down to Project Permissions.
Set project associations to the current integration/repository on the provided box.
Check Associate all projects — if you want the repository to be associated with all Jira projects.
⇩
The Jira project is associated with the repository
⇩
> Check if commit has a valid Jira issue key
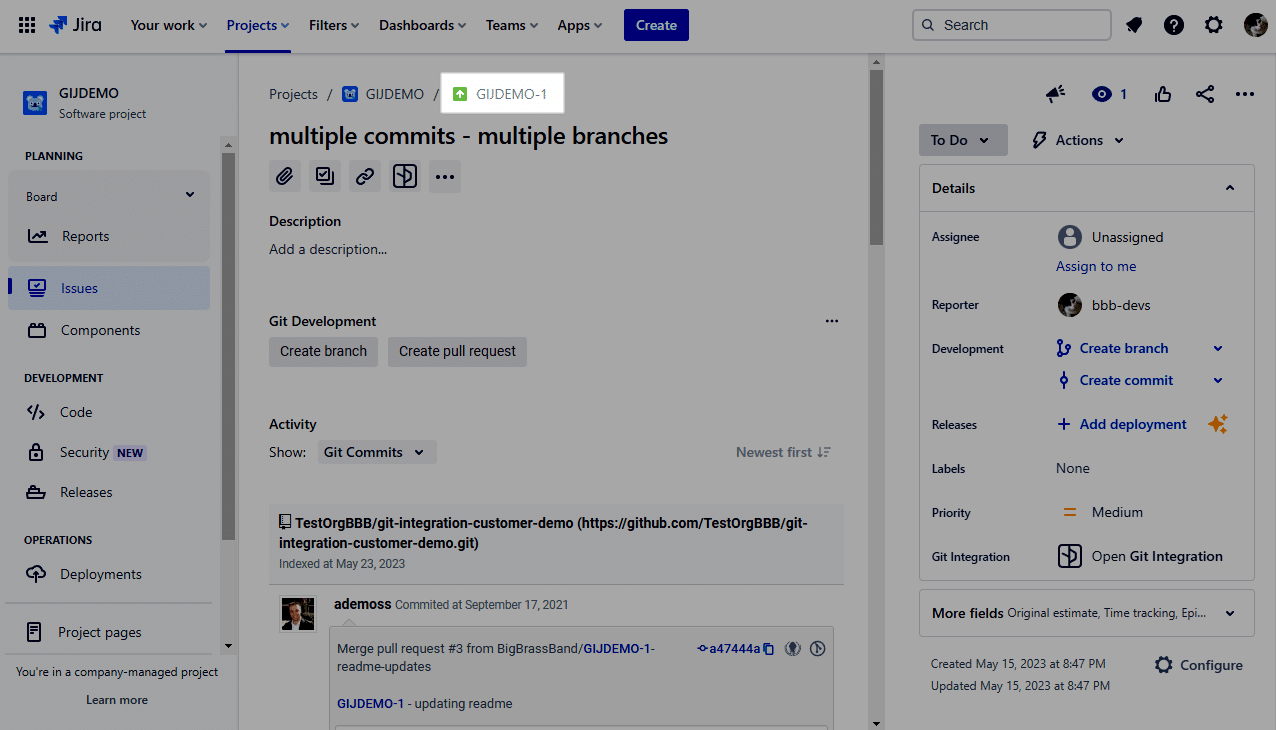
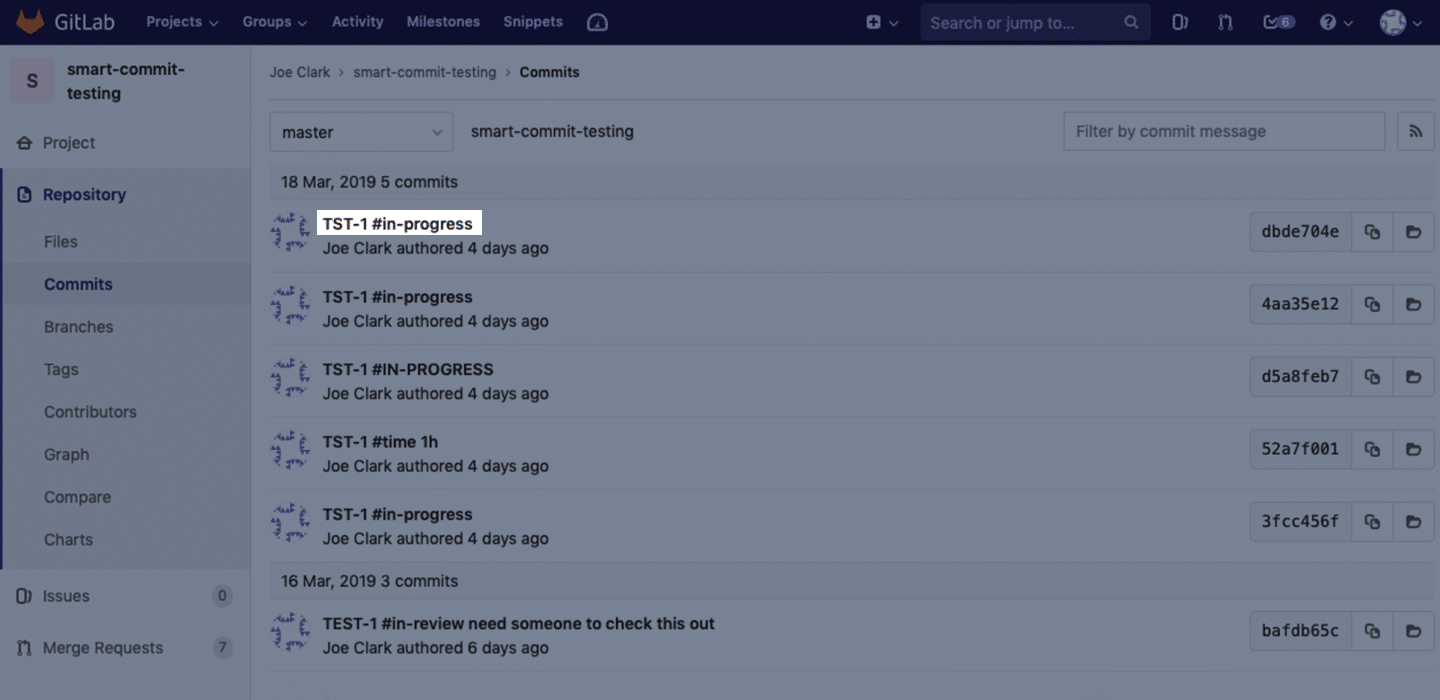
The association between Jira issues and commits is created by adding the Jira issue key (ABC-123 or MAIN-345) in the commit message.
Example commit messages:
ABC-123 added a bug fix
MAIN-345 adding important new feature.
Valid Jira issue key examples are shown in the following screenshot:
GitLab showing an actual commit and the commit message:
Check the video for more instructions:
⇩
Commit has a valid Jira issue key
⇩
> Try to find indexed commit in Jira Cloud
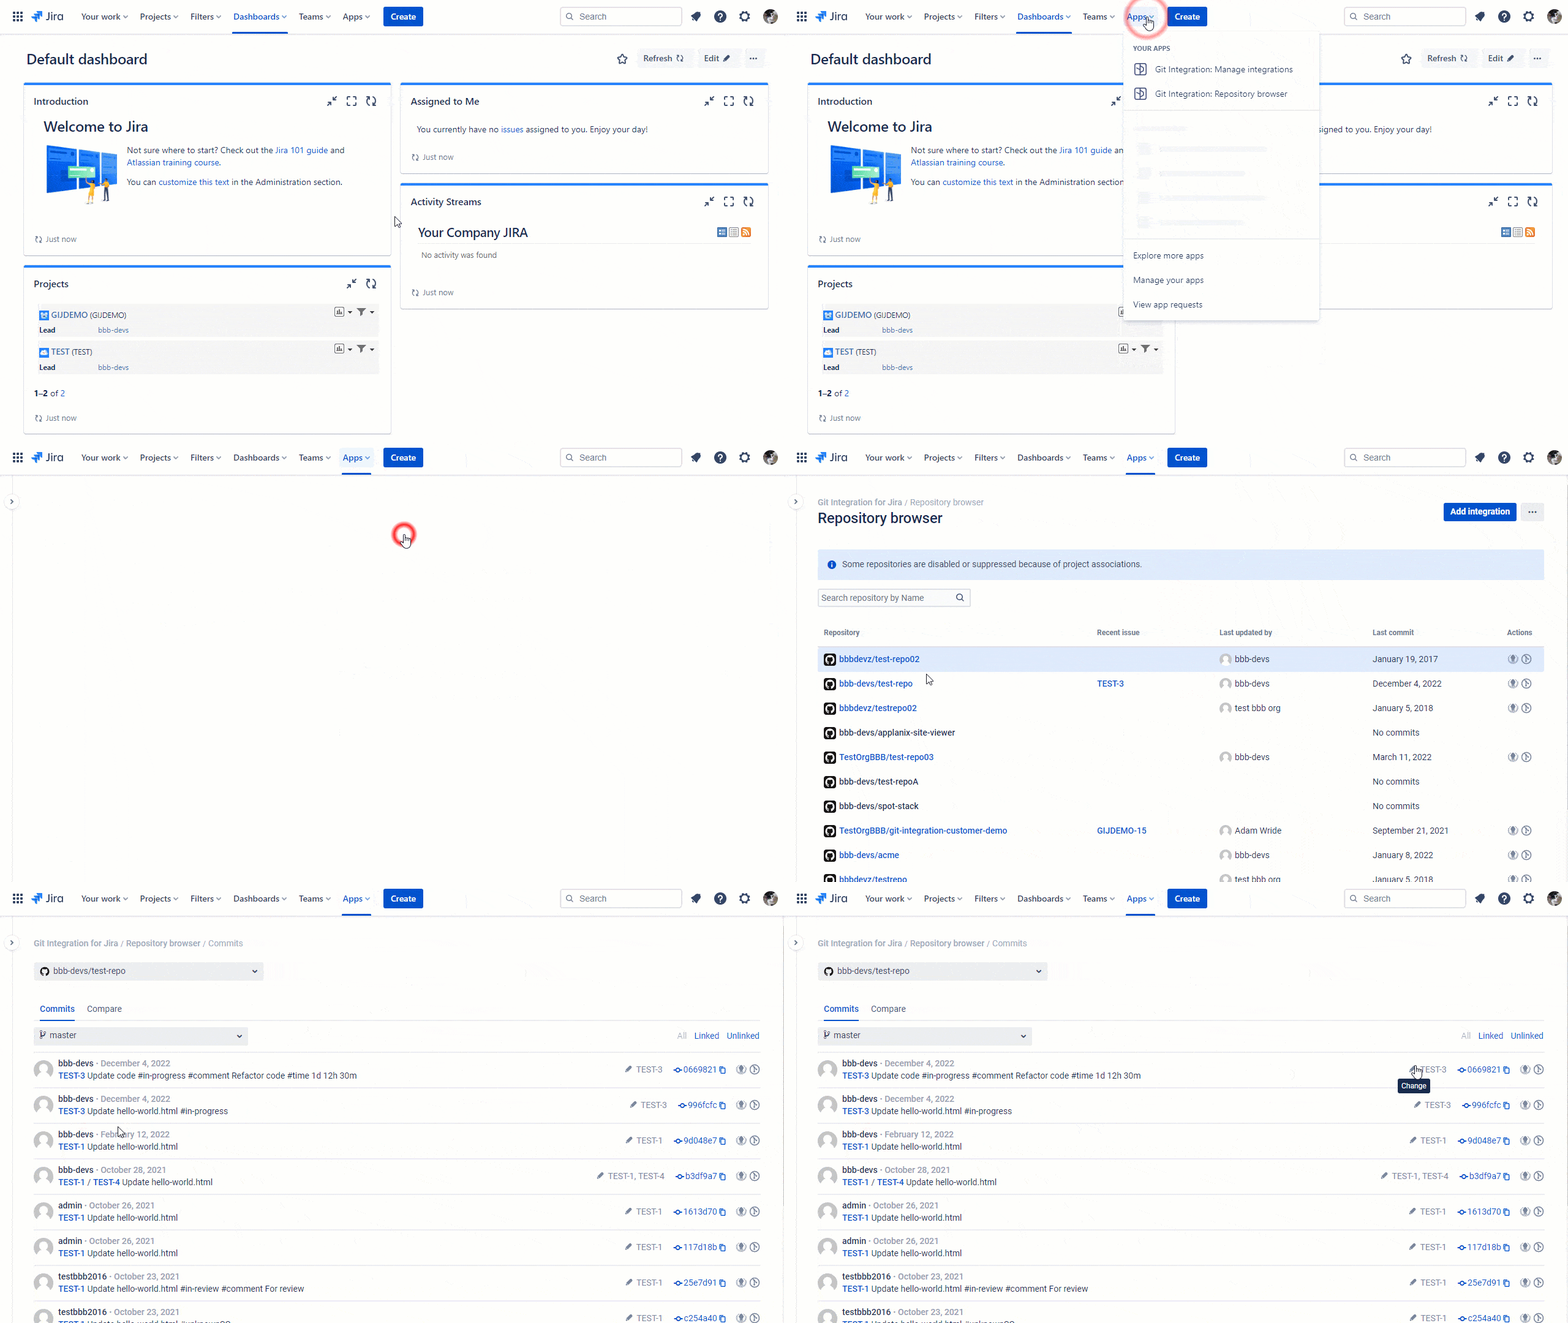
The commit may be indexed by Jira Cloud – but not associated with any Jira issues. You can verify this with the following steps:
-
Navigate to Repository browser.
-
Find the repository and then the indexed commit (may need to select the branch).
-
If you find the commit – you can then fix commit association by clicking on Change.
⇩
Commit is indexed
⇩
> Try to find indexed commit in Jira Cloud
Check if commit is showing now
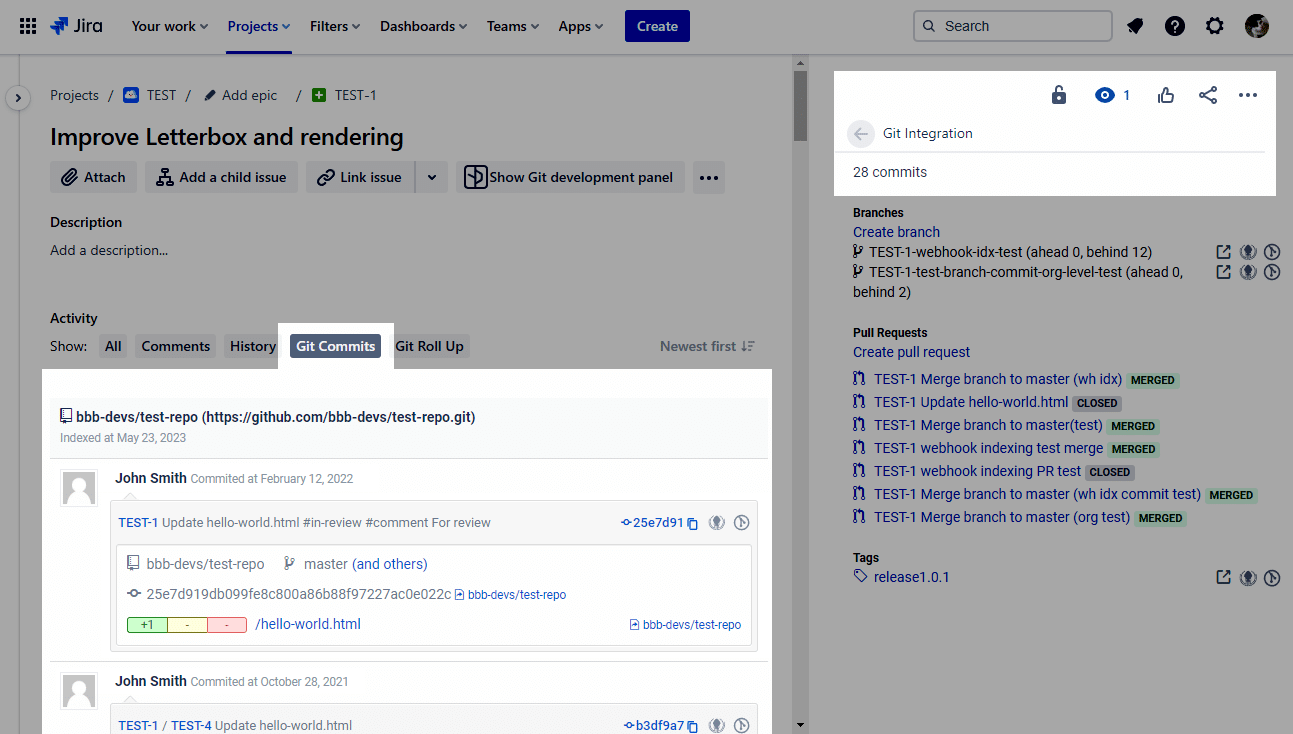
Where you can see commits:
-
New Jira issue view
⇩
I still do not see my commits
⇩
Contact [email protected] by email or via the GIJ Cloud Support Portal.
