
Last updated: March 2026
Use this page to compare uncommitted changes, inspect commit diffs, switch between diff views, review file history or blame, and create or apply patches in GitKraken Desktop. It also covers external diff tools and key limits such as patch support being a preliminary feature that does not generate binary-file patches.
Key constraints
- Diff coverage: Use this page for built-in diff viewing, file history, blame, and patch workflows in GitKraken Desktop
- Patch support: Patch creation and application are preliminary features
- Binary files: GitKraken Desktop does not currently generate patches from binary files
- External diff tools: Beyond Compare, FileMerge, Kaleidoscope, KDiff, Araxis, and P4Merge are supported directly
- Other tools: Use Git Config Default and your global
.gitconfigif your preferred diff tool is not listed in Preferences
Quick Start
To view a diff:
- Click a file in the staging area (WIP node) to see your uncommitted changes.
- Click a commit in the graph, then click any file in the Commit Panel to view that commit’s changes.
- Select two commits using Shift + Click to compare them directly.
To switch diff view modes, use the Hunk, Inline, or Split toggles in the diff viewer. To revert a specific block of changes, use the Revert button in Hunk view.
To view file history or blame:
- Open the diff for any file and click the History or Blame button in the upper-right corner.
- Or right-click a file after selecting a commit in the graph.
To create or apply a patch:
- Right-click a commit and select Create patch from commit.
- To apply a patch, open the Command Palette (Cmd/Ctrl + P), type
Apply Patch, and select your.patchfile.
To use an external diff tool, go to Preferences > External Tools and select your preferred application.
What Is a Diff in GitKraken Desktop?
A diff displays lines added and removed from a file:
- Red indicates removed lines.
- Green indicates added lines.
Use the built-in diff when: you want to inspect changes, compare commits, or review file history directly in GitKraken Desktop. Use an external diff tool when: you need a specialized comparison workflow that is not covered well by the built-in viewer.
GitKraken Desktop’s built-in diff viewer includes:
- Word diffing
- Syntax highlighting
- File mini-map
- Toggleable views: Hunk, Inline, Split
- Word wrap toggle
- Arrows to navigate between change sets
Use the button to directly edit the file. Learn more in the Editing Files section.
Where Can I Access the Diff?
You can view diffs from:
- Staging area: Click a file to open its diff
- Commit node: Select a commit and click any file
Selecting two commits shows the differences between them.
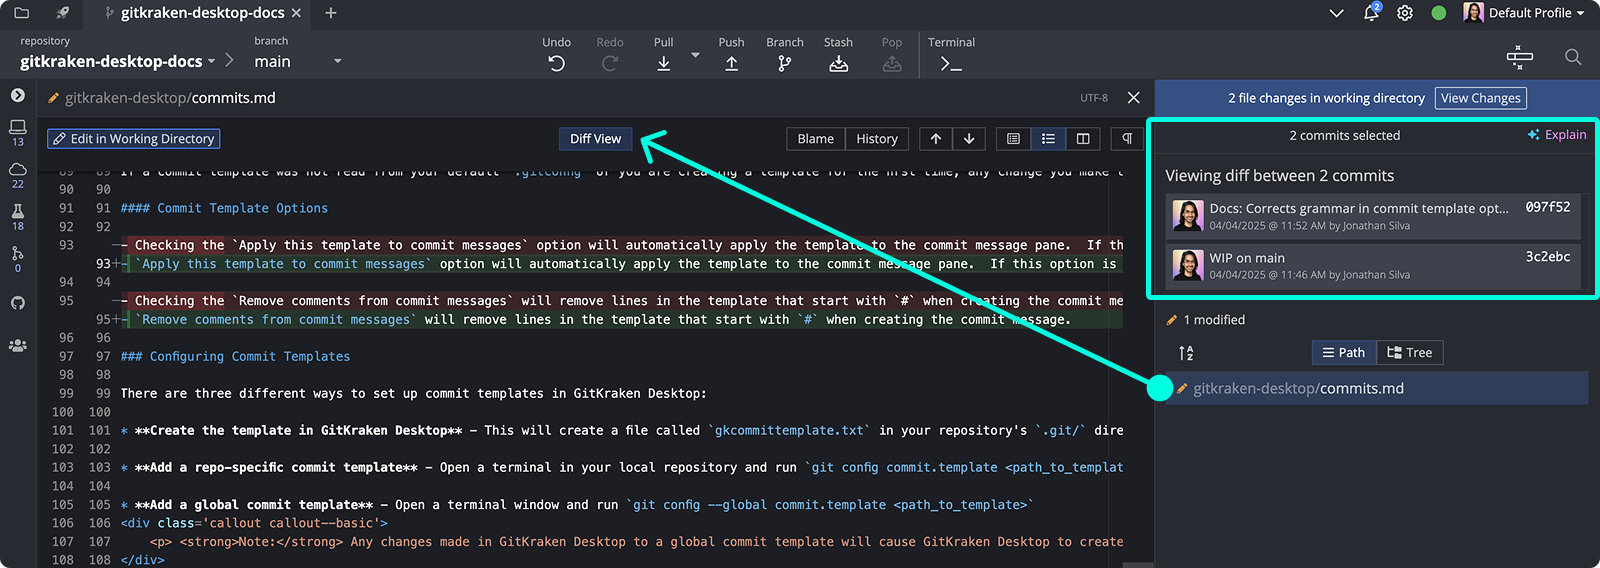
You can also select multiple commit rows using Shift + Click to show a combined diff:

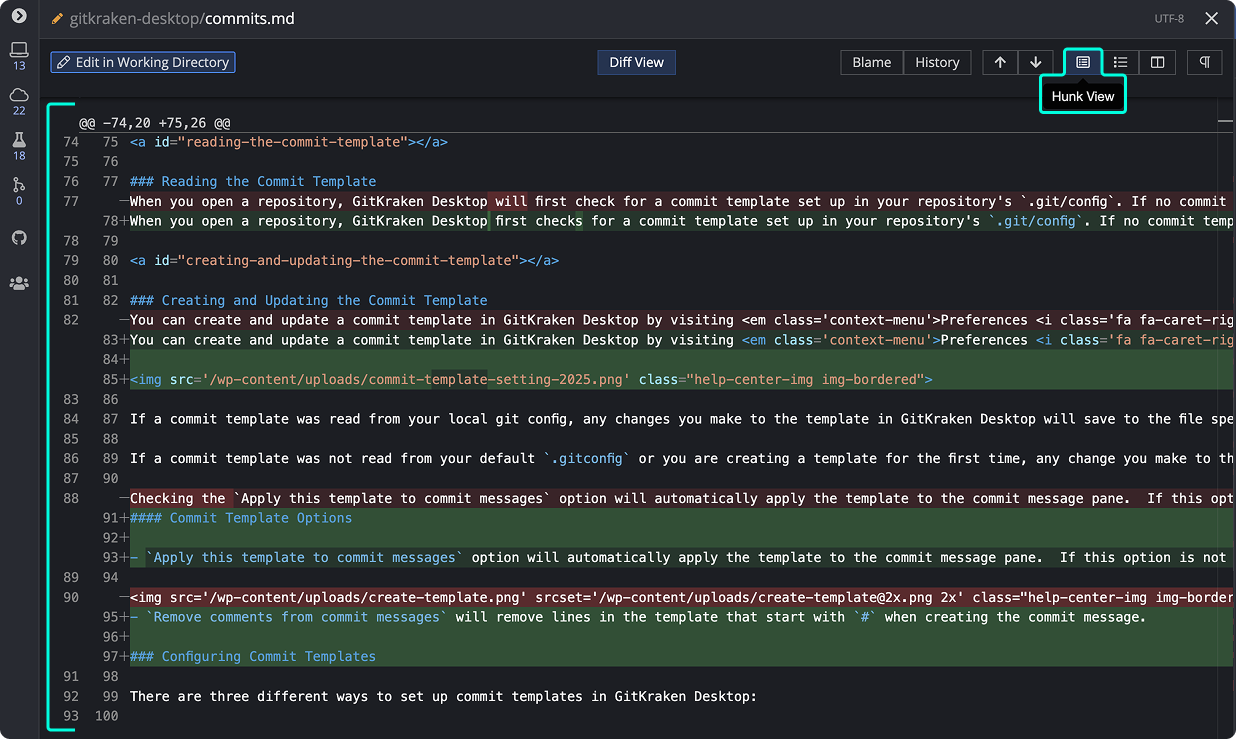
When to use Hunk View
Displays only the changed blocks of a file.
Use Hunk View when: you want to focus only on changed blocks or revert a specific hunk quickly. Don’t use it when: you need full-file context around the changes.
How to revert a hunk
GitKraken offers a convenient option in the diff view: Revert Hunks.
In Hunk View, you can roll back a specific block of changes. Click the Revert button next to any hunk to apply an equal and opposite change to your working directory.
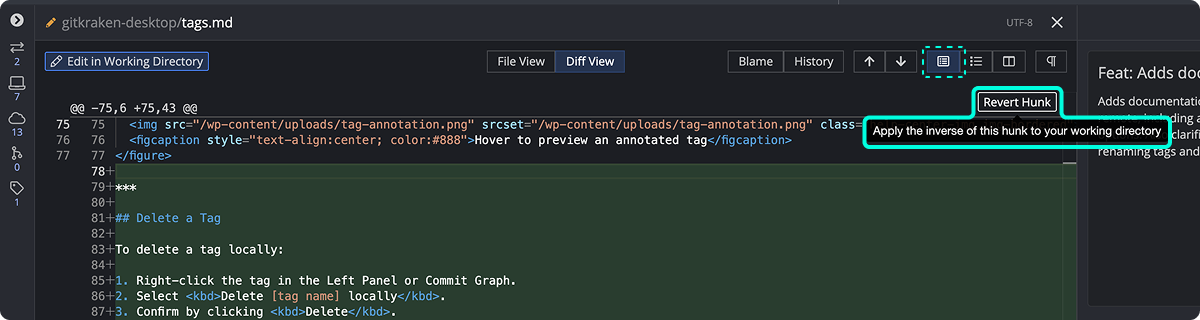
This lets you revert only what you need—no reset or manual edits required.
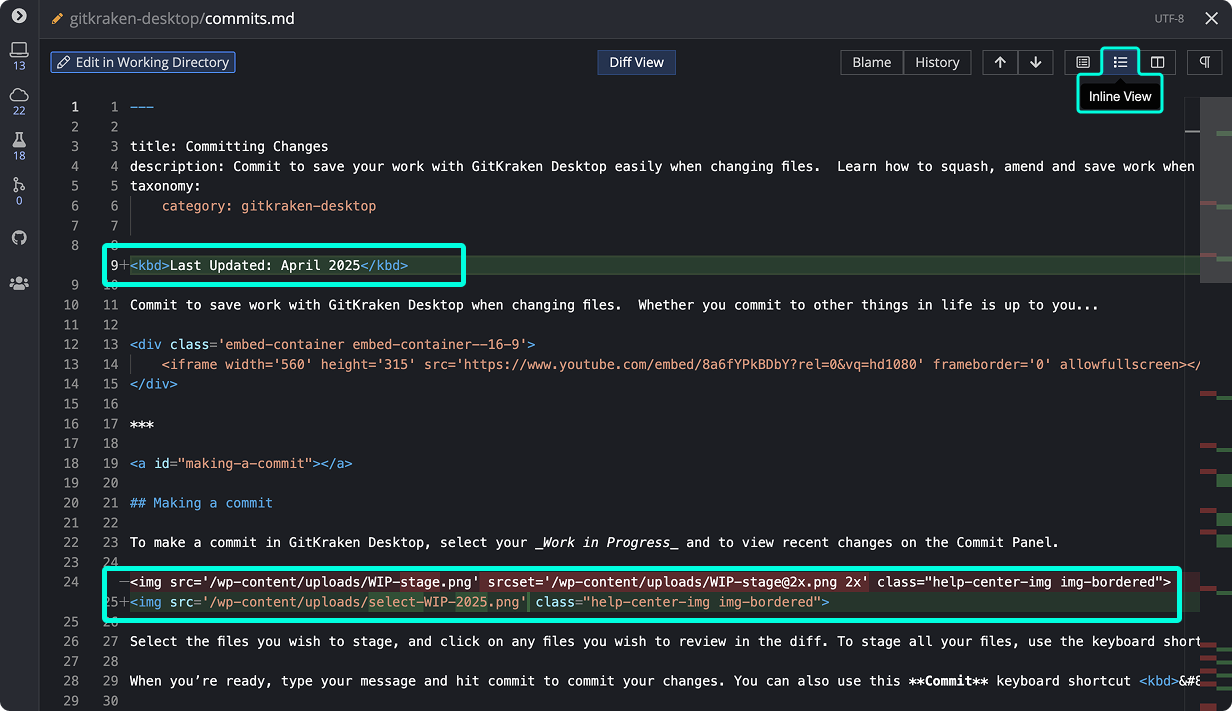
When to use Inline View
Displays changes within the full context of the file.
Use Inline View when: you want to read edits in the flow of the full file. Don’t use it when: side-by-side comparison is easier for the change you are reviewing.
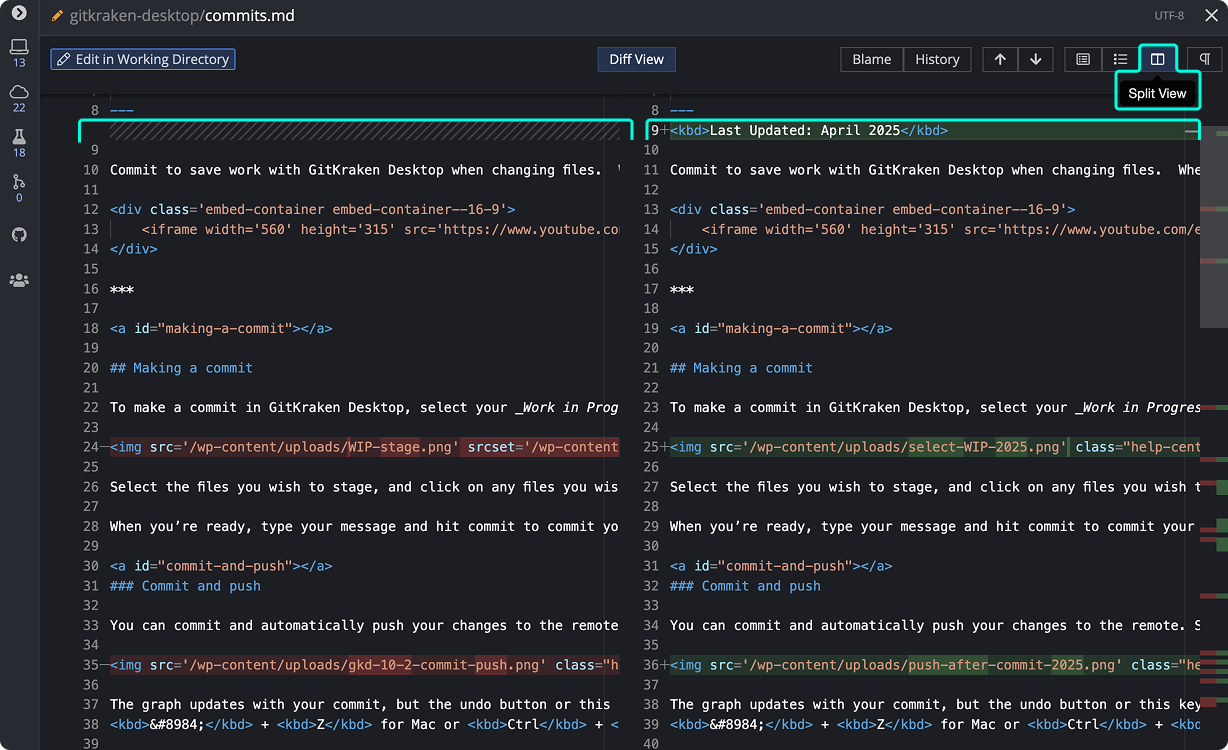
When to use Split View
Displays changes side-by-side, with the original file on the left and the updated version on the right.
Use Split View when: you want to compare old and new content line-by-line. Don’t use it when: you want a more compact, single-column review for small changes.
How to use Word Wrap in the diff view
The Word Wrap toggle wraps long lines in the diff view so that the full content of each line is visible without horizontal scrolling. This is particularly useful when reviewing files with long lines, such as Markdown documents, minified JavaScript, or LaTeX files.
To toggle word wrap, click the Word Wrap button in the toolbar of the diff view, file view, file history, or merge conflict resolution panel.
How to use external diff tools
Configure an external diff tool in Preferences External Tools:
Use an external diff tool when: you already rely on a supported third-party app or need its advanced comparison features. Don’t use an external tool when: GitKraken Desktop’s built-in diff already gives you the context and controls you need.

Supported tools include:
- Beyond Compare
- FileMerge
- Kaleidoscope
- KDiff
- Araxis
- P4Merge
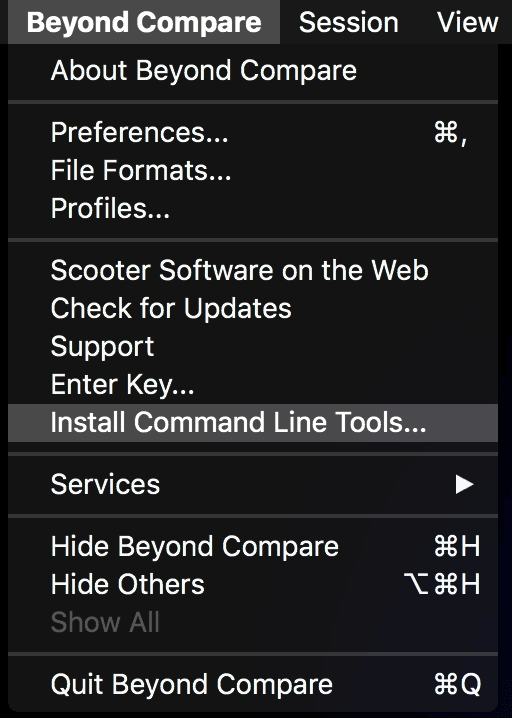
If a supported tool does not appear in the dropdown, verify that its command line tools are installed.
To use a different diff tool, go to Preferences General and set the Diff Tool to Git Config Default. Then add the appropriate configuration in your global .gitconfig:
macOS
[diff]
    tool = meld
[difftool "meld"]
    cmd = open -a Meld --args "$LOCAL" "$REMOTE"
Linux
[diff]
    tool = meld
[difftool "meld"]
    cmd = meld "$LOCAL" "$REMOTE"
Windows
[diff]
tool = meld
[difftool]
prompt = false
[difftool "meld"]
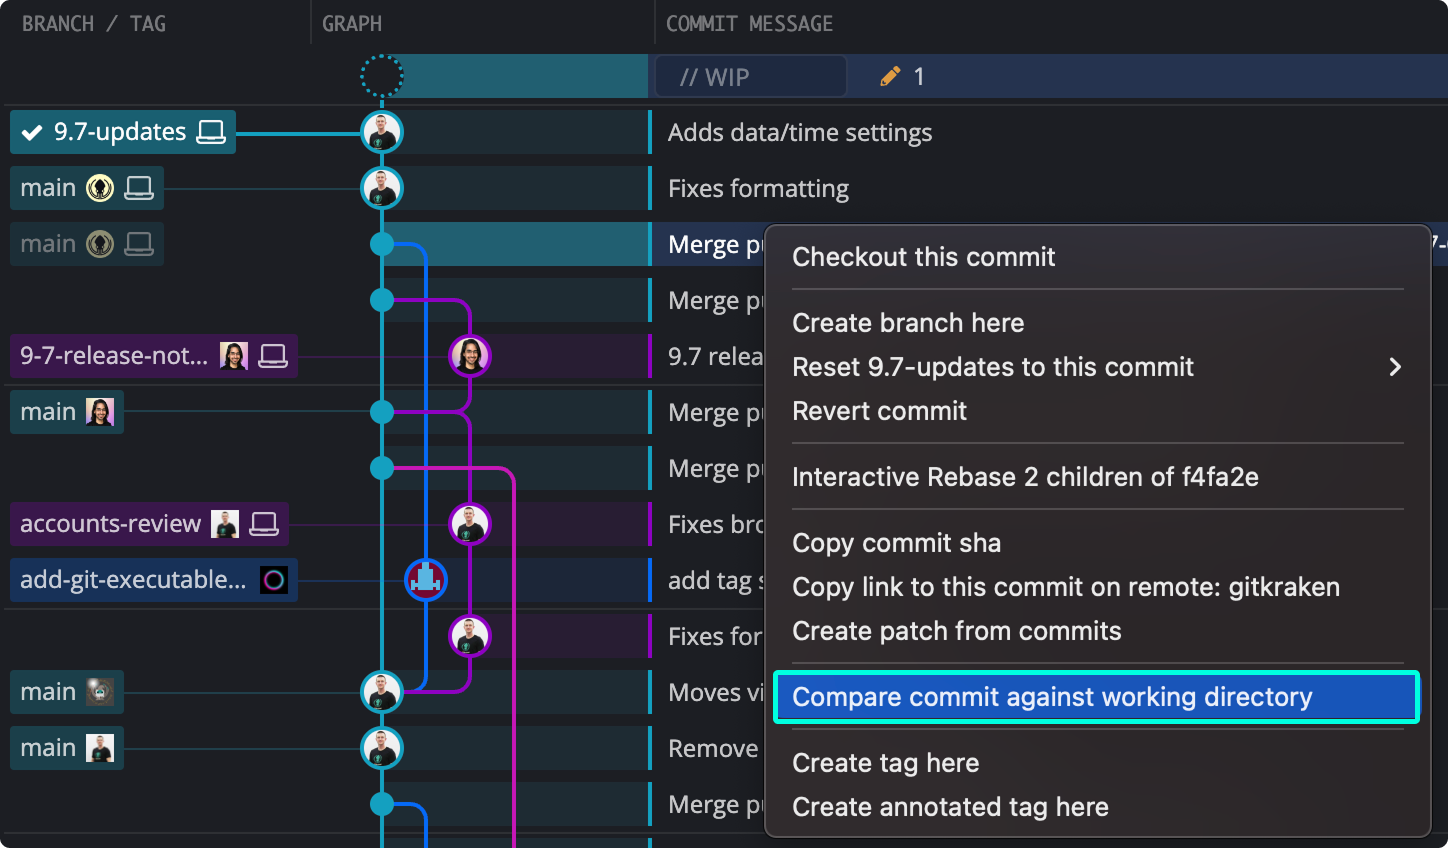
cmd = meld "$LOCAL" "$REMOTE"How to compare a WIP against another commit or branch
To compare your Work in Progress (WIP) with another commit or branch:
- Use Ctrl/Cmd + click to select the WIP and another commit
- Or, right-click a commit or branch and select Compare commit against working directory
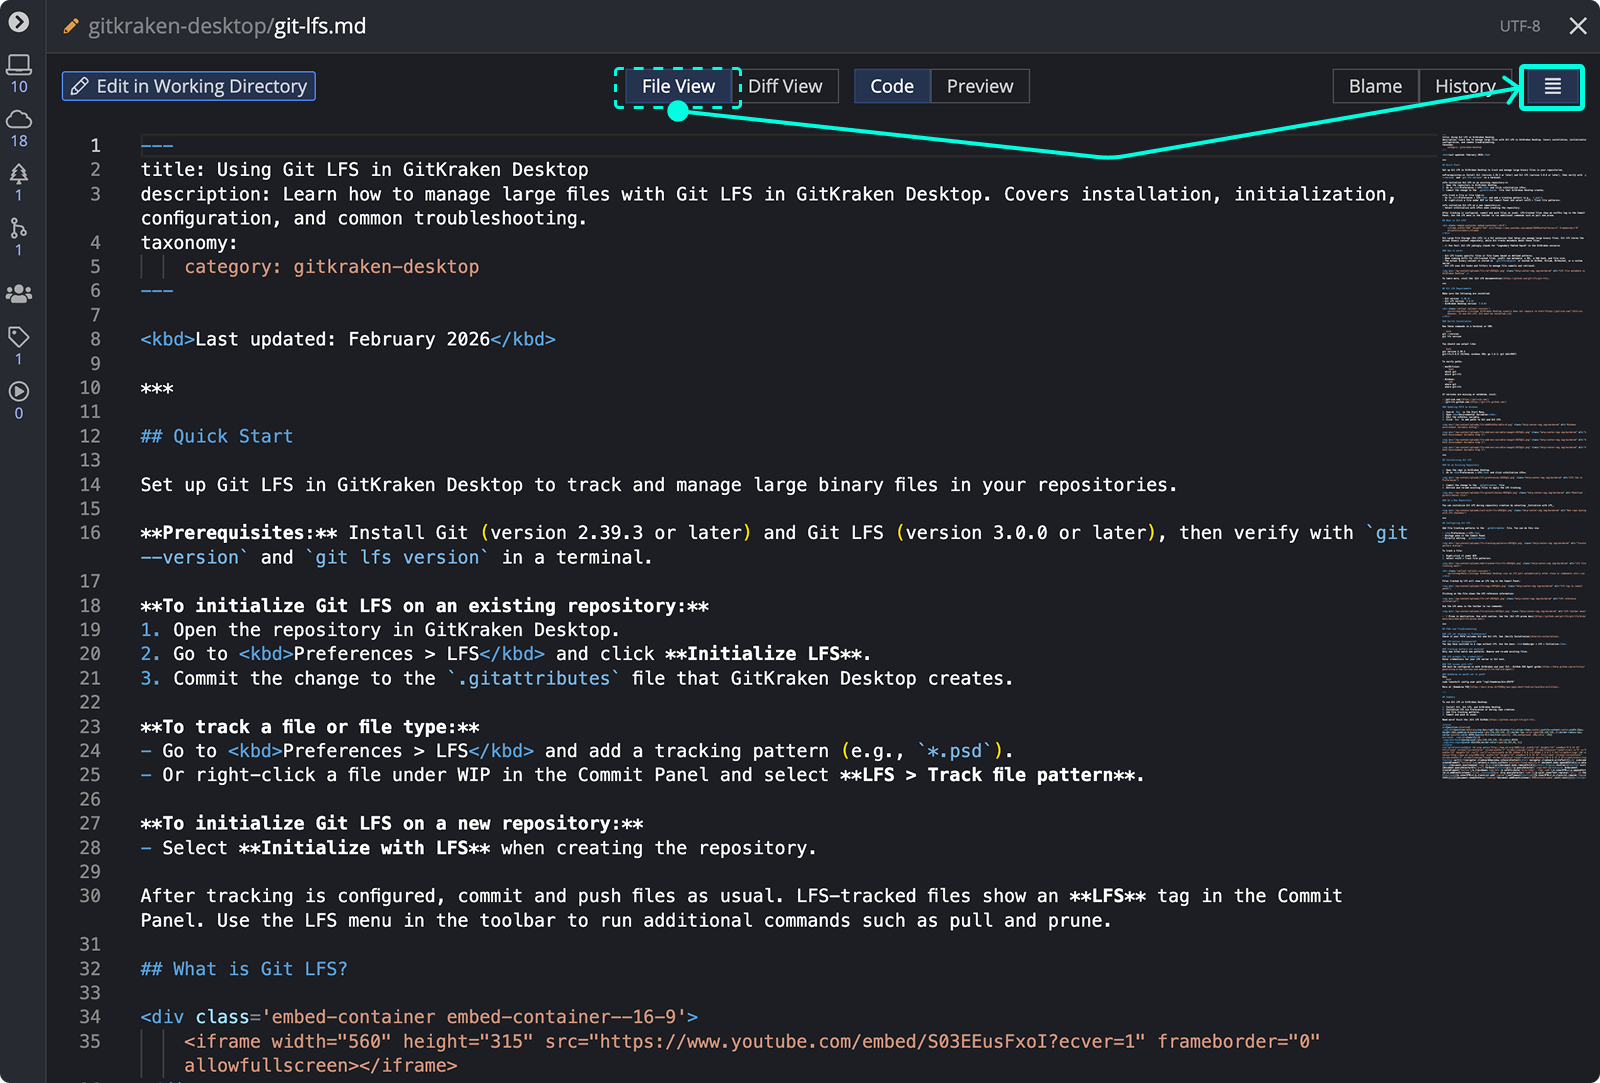
How to view file blame and history
Access File History and File Blame from the file diff view. Options appear in the upper-right corner.

Alternatively, right-click a file after selecting a commit in the graph.
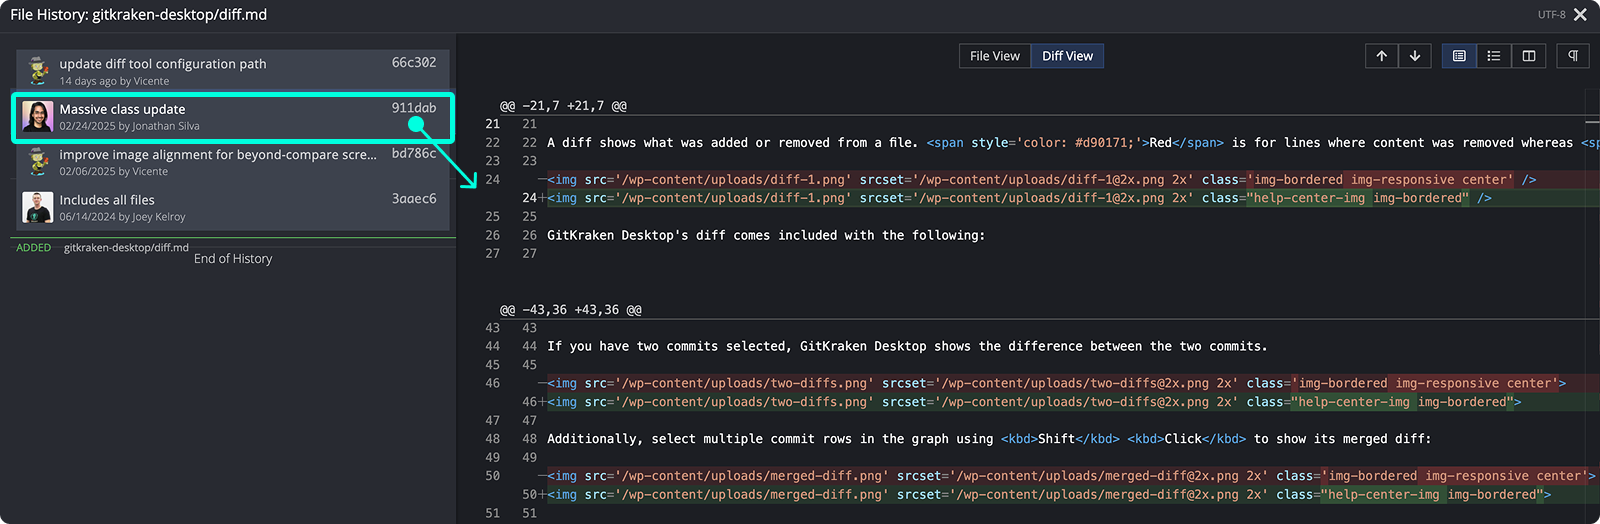
File Blame color-codes each line or hunk by author.

Use the toggle in the top-right to switch between Diff View (showing changes) and File View (showing the full file with blame).
How patch files work in GitKraken Desktop
Use patches when: you need to share changes without pushing them to a remote. Do not rely on patches for binary files: GitKraken Desktop does not currently generate patches from binary files.
A patch (or patch file) records the differences between files. Patches allow users to share changes without pushing them to a remote repository.
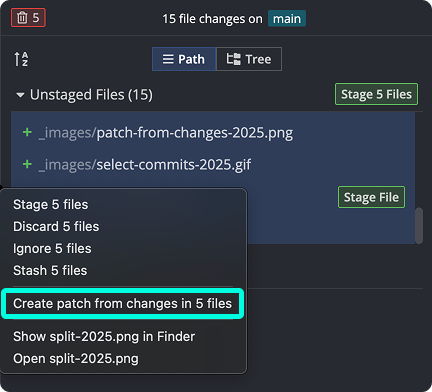
How to create a patch from files or commits
To create a patch:
- Right-click a commit and choose Create patch from commit
- Right-click a file and choose Create patch from file changes
You will be prompted to name the patch file.
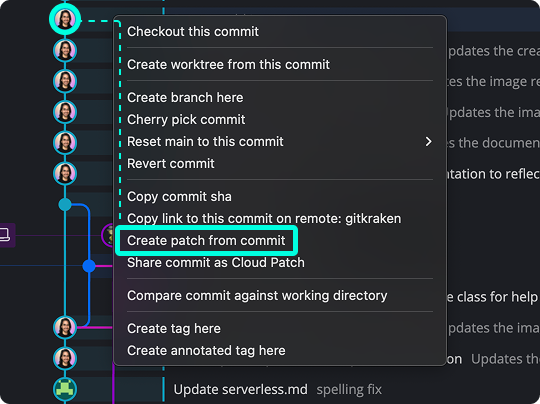
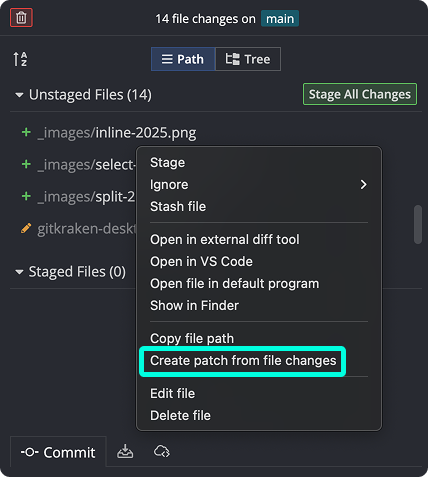
You can also multi-select files or commits using Shift or Cmd/Ctrl + click, then right-click to create a patch.
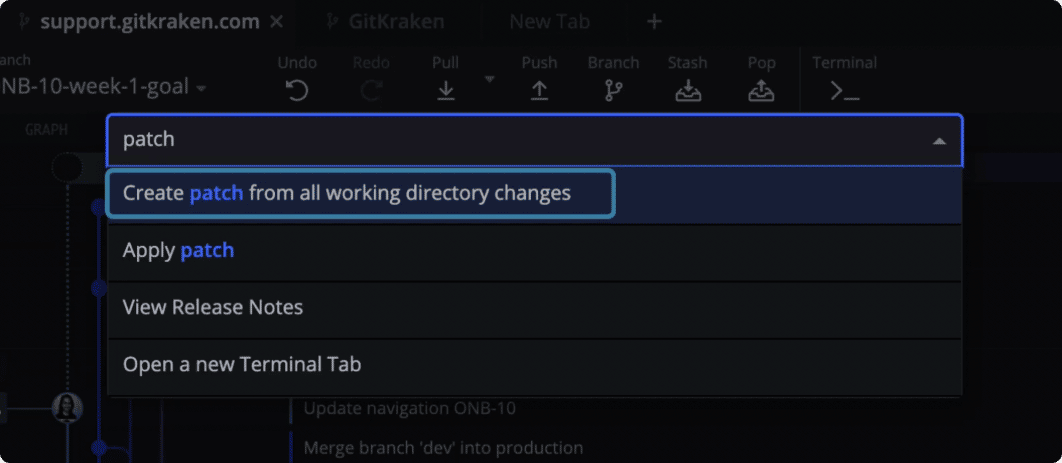
How to create a patch from the Command Palette
Launch the Command Palette from the toolbar or with Cmd/Ctrl + Shift + P, then search for “Create Patch.”
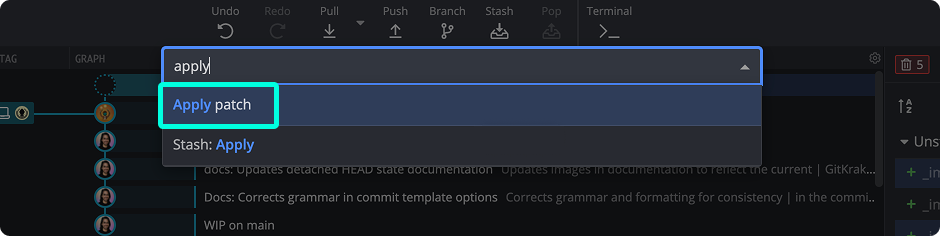
How to apply a patch from the Command Palette
To apply a patch:
- Open the Command Palette (Cmd/Ctrl + Shift + P)
- Type “Apply Patch” and select the command
- Choose your
.patchfile in the file explorer
Note: GitKraken Desktop does not currently support generating patches from binary files. This is a preliminary release. For feedback, contact our support team.
