Last updated: March 2026
Use this page to create, annotate, push, move, delete, and filter Git tags in GitKraken Desktop. Tags are useful when you want to mark releases, deployment points, or other important commits and then share or inspect those references from the commit graph or Left Panel.
Requirements and limits
- Scope: Local and remote Git tag management in GitKraken Desktop
- Creation points: Commit Graph or Left Panel tag actions
- Checkout limitation: Tags cannot be checked out directly as branches
- Rename limitation: Tags cannot be renamed directly; delete and recreate them instead
- Move limitation: Moving a tag works only when fast-forwarding is possible; otherwise delete and recreate it
- Deletion warning: Deleting a tag locally or remotely is permanent
- Visibility control: The Tags pane can be filtered, shown, or hidden from the Left Panel
Quick Start
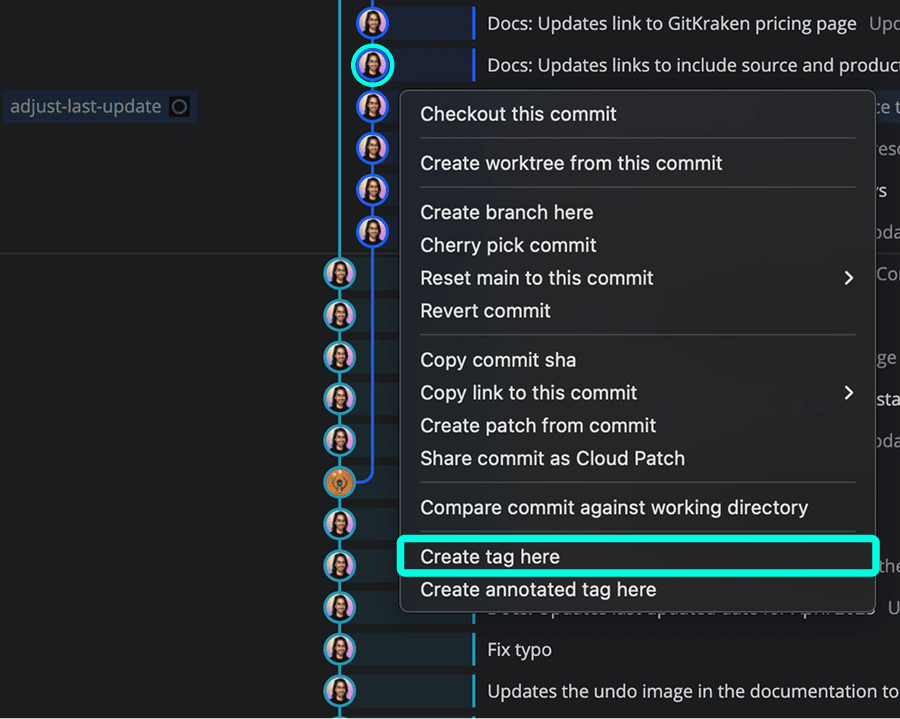
To create a tag: Right-click a commit in the graph and select Create tag here. Enter the tag name and press Enter.
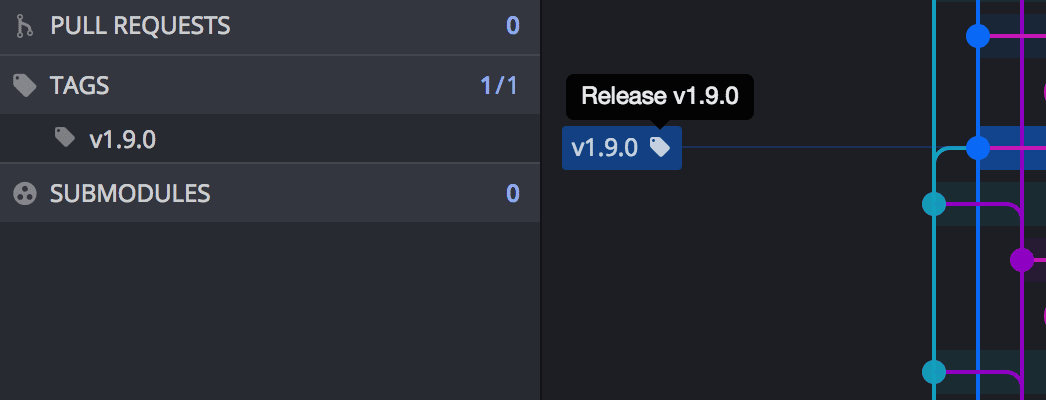
To create an annotated tag: Right-click a commit and select Create annotated tag here. Annotation messages appear as tooltips in the graph and Left Panel.
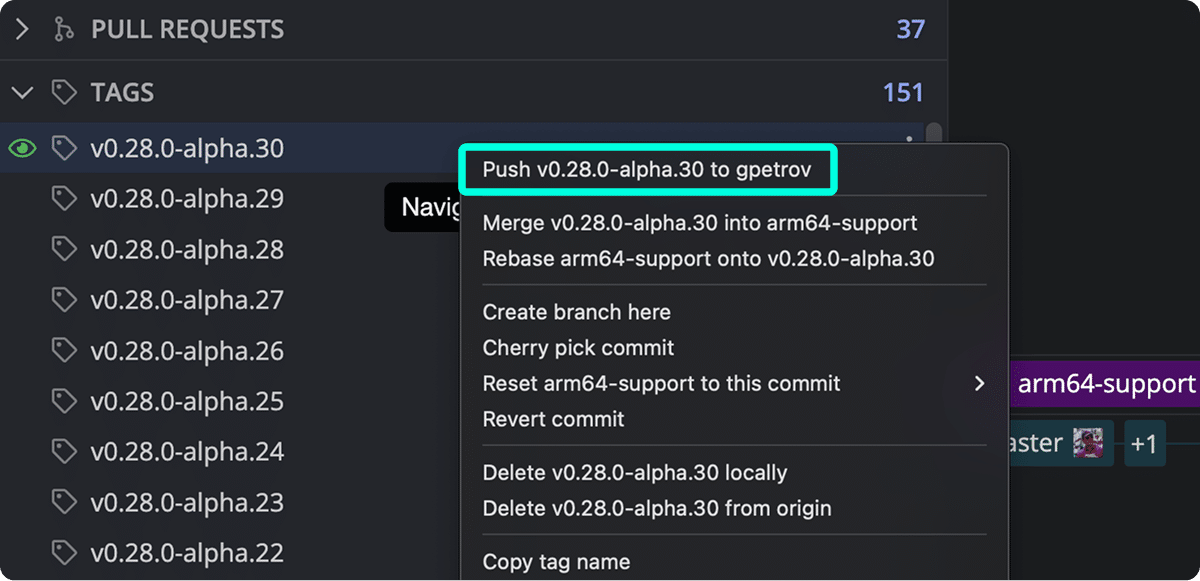
To push a tag to a remote: Right-click the tag in the Left Panel or graph and select Push tag.
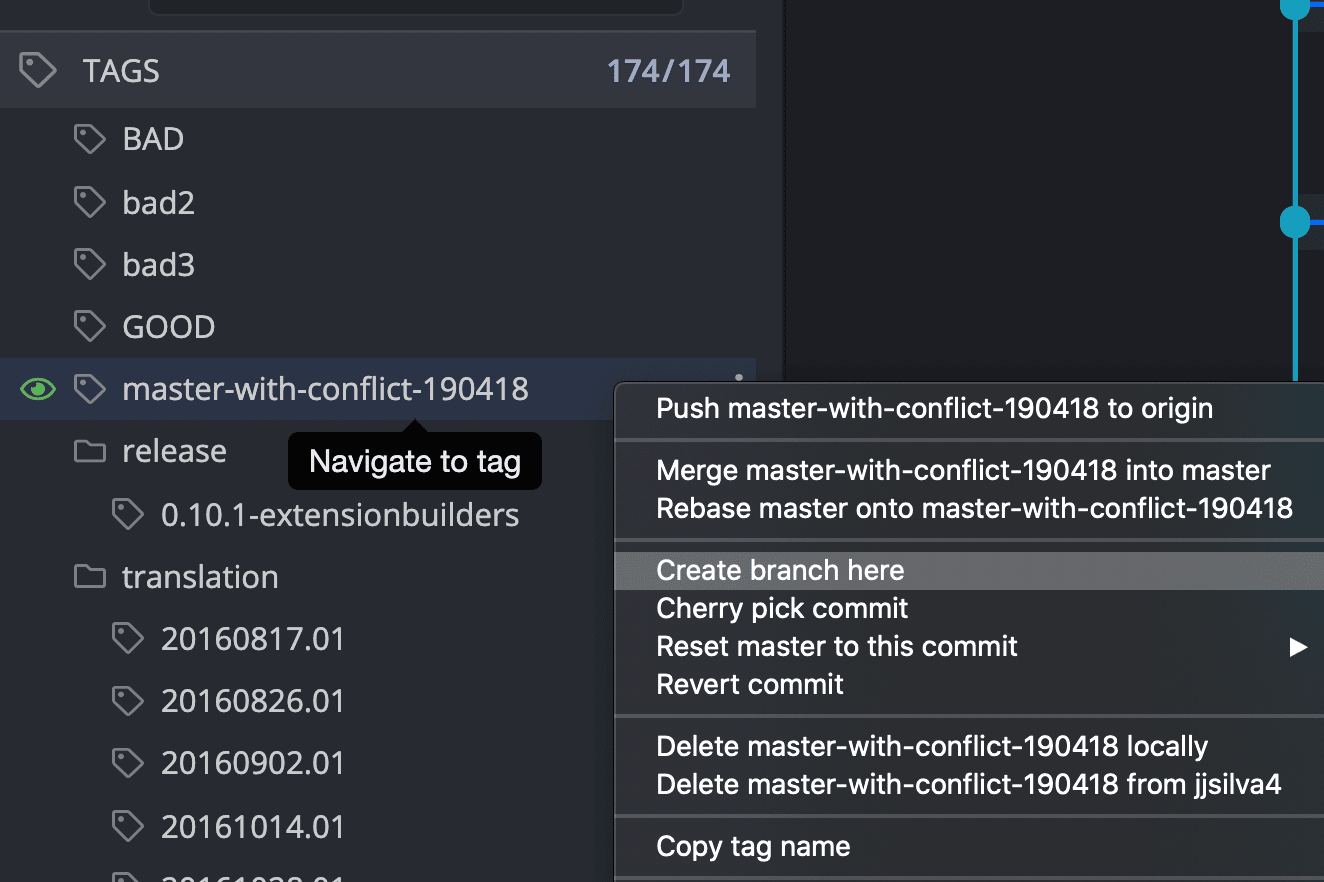
To create a branch from a tag: Right-click the tag and select Create branch here.
To delete a tag: Right-click the tag and choose to delete it locally, from the remote, or both. Deletion is permanent.
To rename a tag: Tags cannot be renamed directly. Delete the existing tag locally and from the remote, then recreate it with the desired name on the same commit.
To filter tags: Use the filter bar at the top of the Tags section in the Left Panel. Toggle the Tags pane by right-clicking any Left Panel header.
How to add a tag
To create a new tag:
- Right-click a commit.
- Select Create tag here.
To share a tag with collaborators, right-click it and choose Push tag.
Double-click a tag in the Left Panel to jump to that commit in the graph. You can also hide or solo tags via the context menu.

How to create a branch from a tag
While you can’t check out a tag directly, you can branch from it:
- Right-click the tag.
- Select Create branch here.
Alternatively, use the detached HEAD state to inspect a tagged commit.
How to move a tag
To move a tag to a new commit:
- Check out the new branch.
- Right-click the tag.
- Choose Fast-forward.
If fast-forwarding is not possible, delete the tag locally and remotely, then recreate it on the new commit.
How to annotate a tag
To add a message to a tag:
- Right-click a commit and choose Create annotated tag here.
- Or right-click an existing tag and select Annotate tag.
Annotated messages appear in the graph and Left Panel on hover.
How to delete a tag
To delete a tag locally:
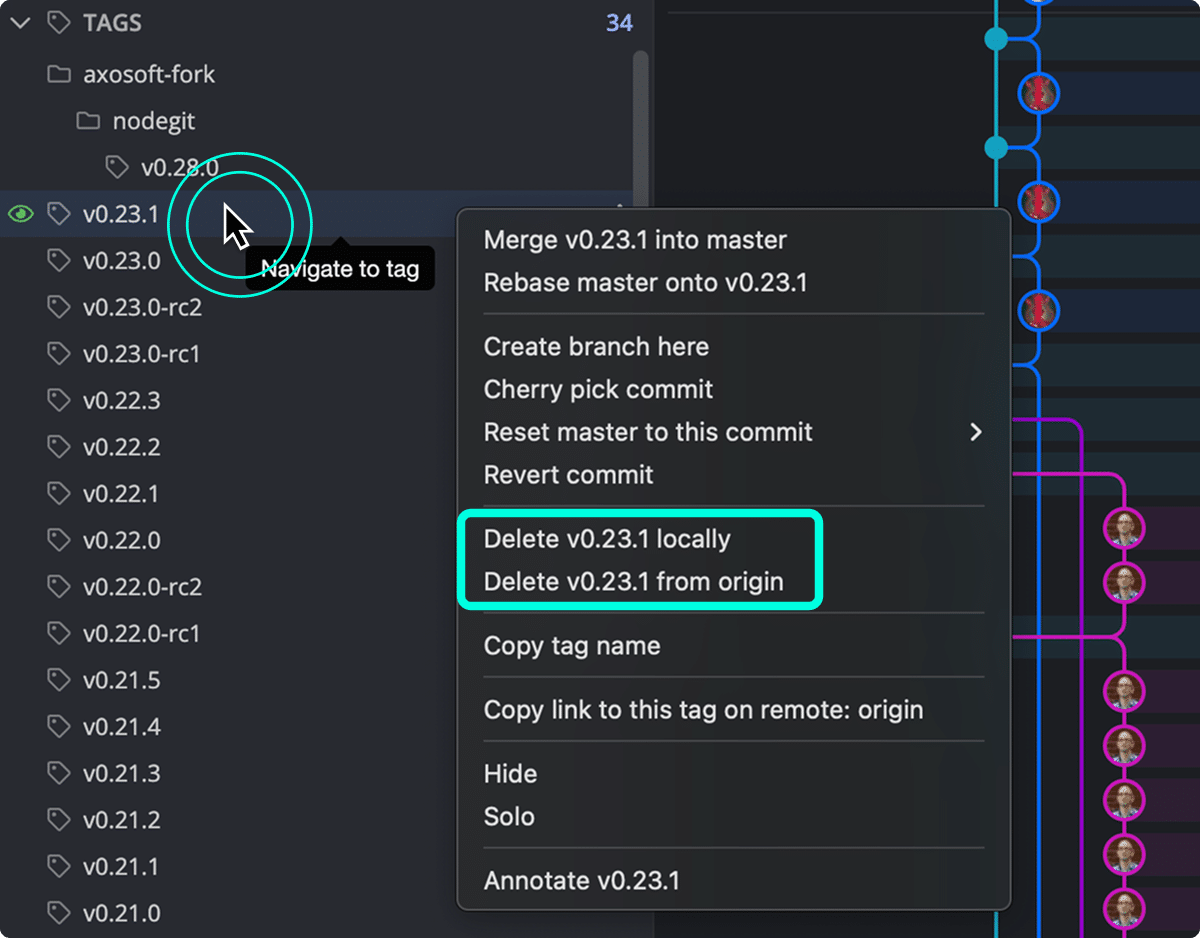
- Right-click the tag in the Left Panel or Commit Graph.
- Select Delete [tag name] locally.
- Confirm by clicking Delete.
To delete a tag from the remote:
- Right-click the tag in the Left Panel or Commit Graph.
- Select Delete [tag name] from [remote].
- Confirm by clicking Delete
Deleting a tag is permanent and cannot be undone.
How to rename a tag
GitKraken Desktop does not support renaming tags directly. To rename a tag, delete the existing one and create a new tag with the desired name.
- Right-click the tag in the Left Panel or Commit Graph.
- Select Delete [tag name] locally.
- If the tag also exists on a remote, right-click it again and select Delete [tag name] from [remote].
- Right-click the commit where you want to place the tag.
- Select Create tag here and enter the new name.
This workaround reflects Git’s limitations—Git tags are immutable once created.
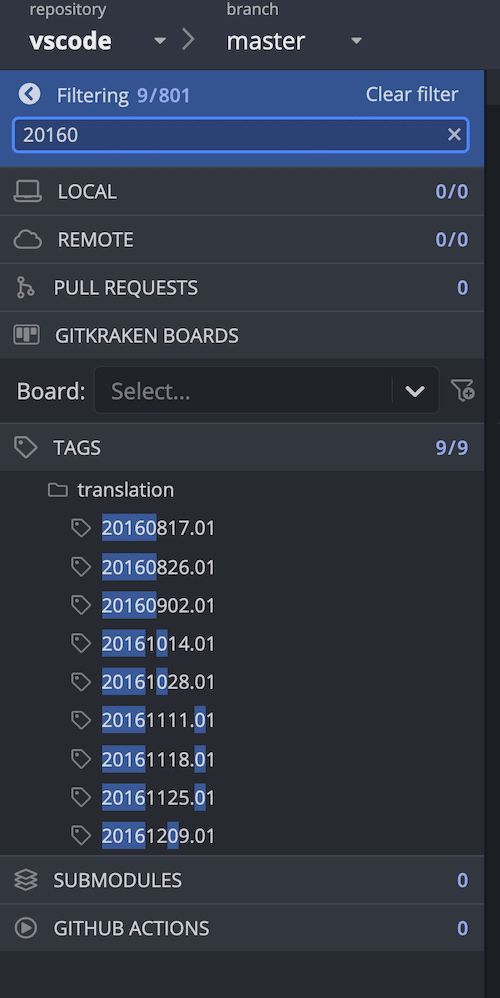
How to search or filter tags
Use the filter bar in the Left Panel to search for tags.
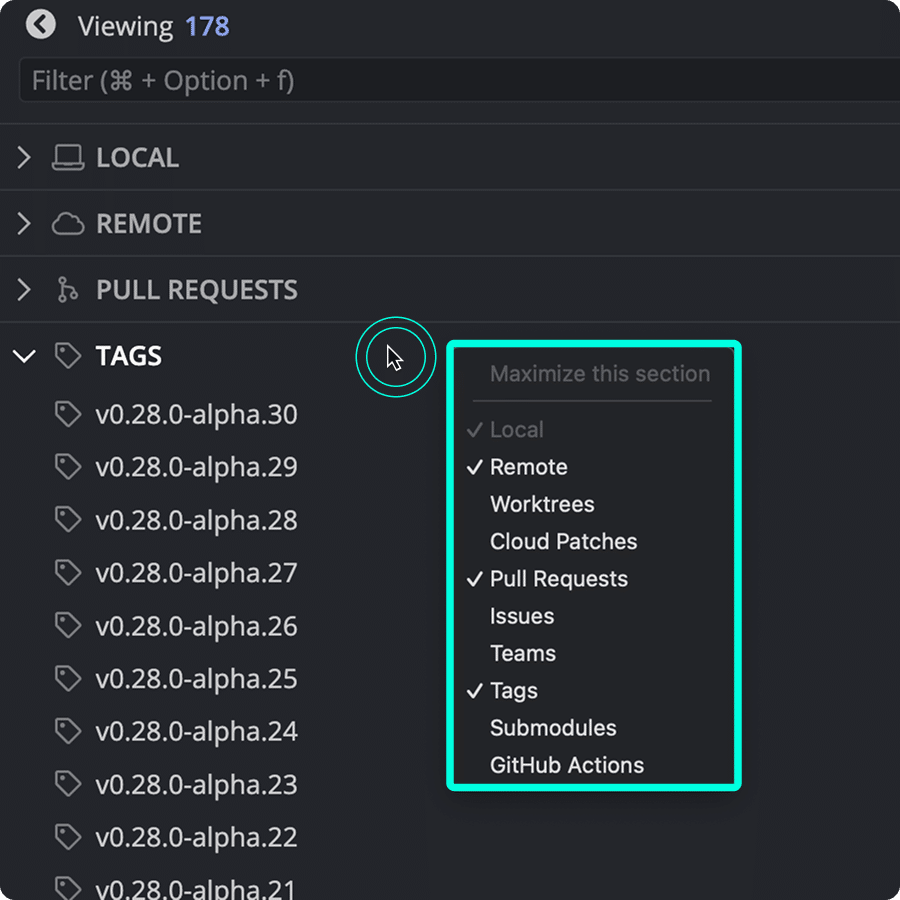
How to show or hide the Tags panel
To toggle visibility of the Tags section:
- Right-click any header in the Left Panel.
- Check or uncheck Tags.