
Last updated: May 2026
Use this page to use the GitKraken Desktop terminal while staying in the context of the open repository, commit graph, and active worktree. It covers how to open the terminal, how command and flag auto-complete works, how terminal sessions behave across worktrees, how to run coding agents manually, and where to change shell and terminal appearance settings.
Requirements and limits
- Scope: In-app terminal for the currently open repository context
- Repository context: Commands run in the active repository or worktree working directory automatically
- Supported shell note: macOS and Linux use the OS default shell; Windows supports PowerShell and Bash via Preferences
- Auto-complete limitation: Conflicting third-party auto-complete tools can disable GitKraken suggestions
- Settings location: Preferences > In-App Terminal for appearance and autocomplete behavior
- Panel behavior: The embedded terminal resizes smoothly when surrounding panels change, can be minimized to keep the terminal panel header visible, and exposes a trash icon in the panel header to kill terminal sessions
- Coding agents: You can run supported or unsupported coding agent CLIs manually in the embedded terminal
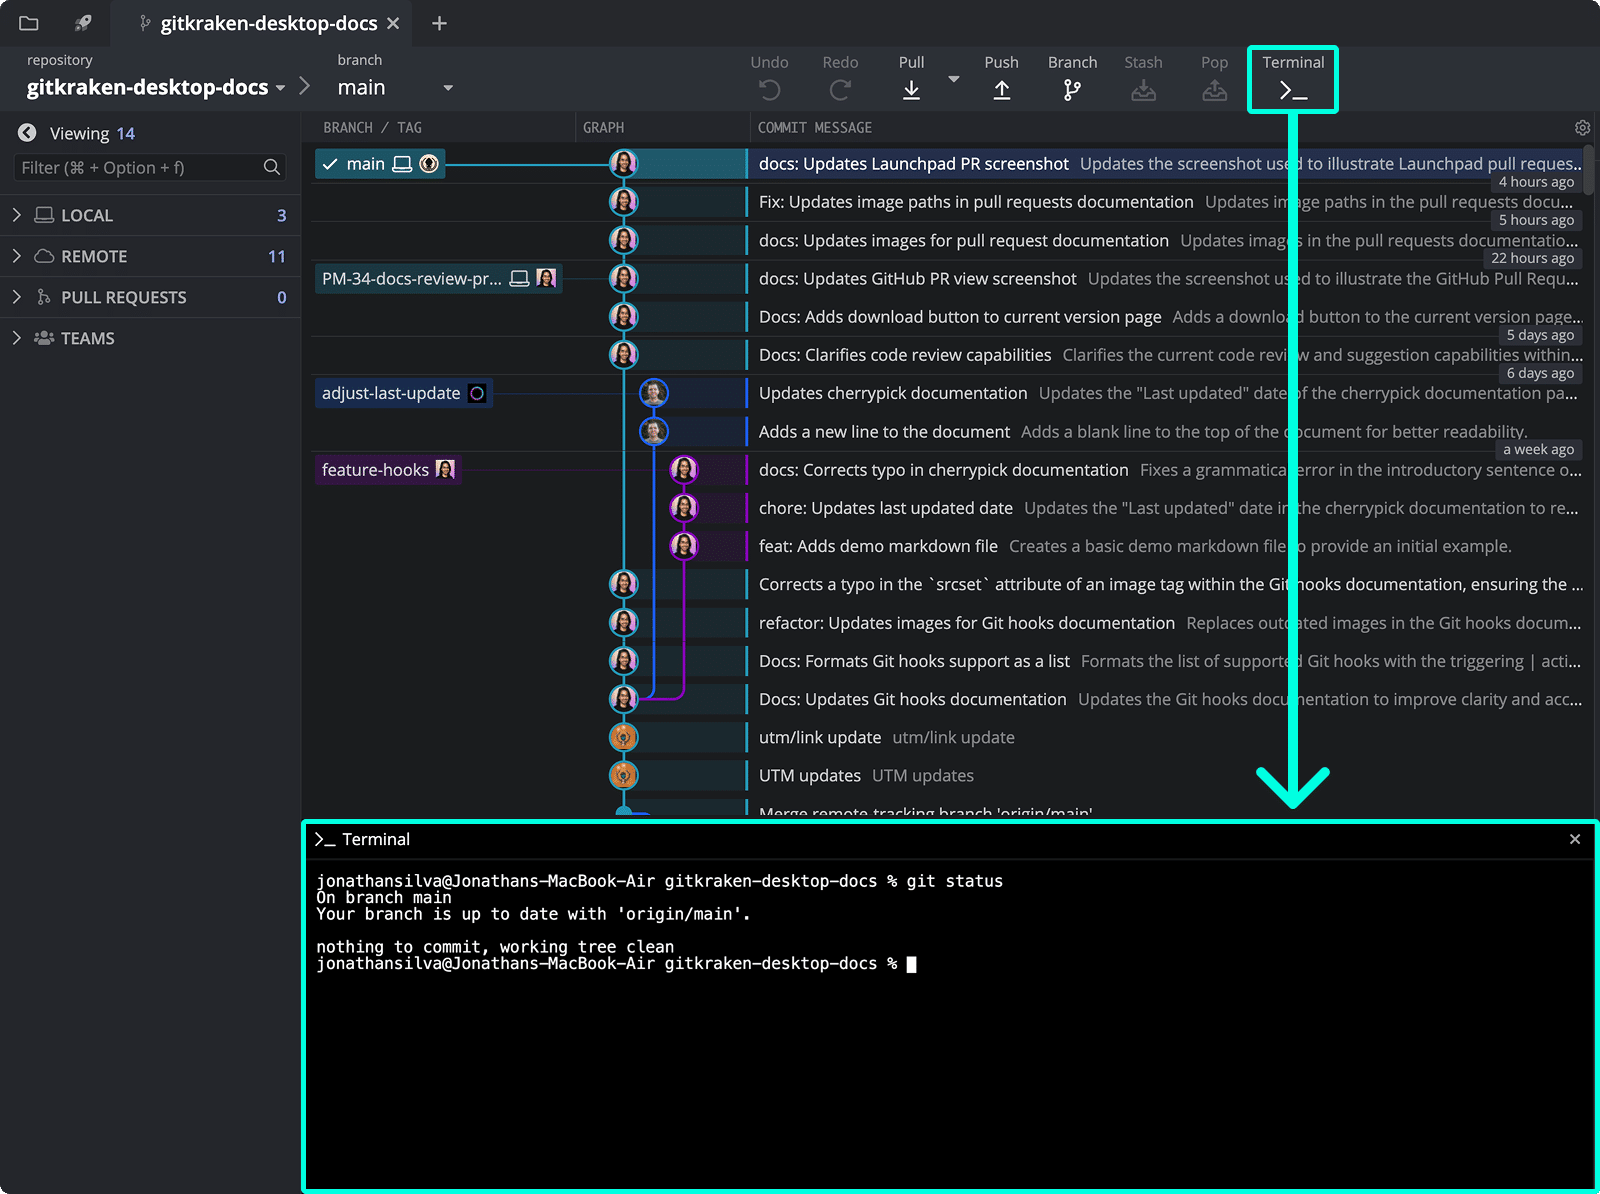
To get started, open a repository and click the Terminal button in the toolbar, or search for “terminal” using the Command Palette.
Quick Start
To open the terminal: Click the Terminal icon in the toolbar or search for “terminal” in the Command Palette.
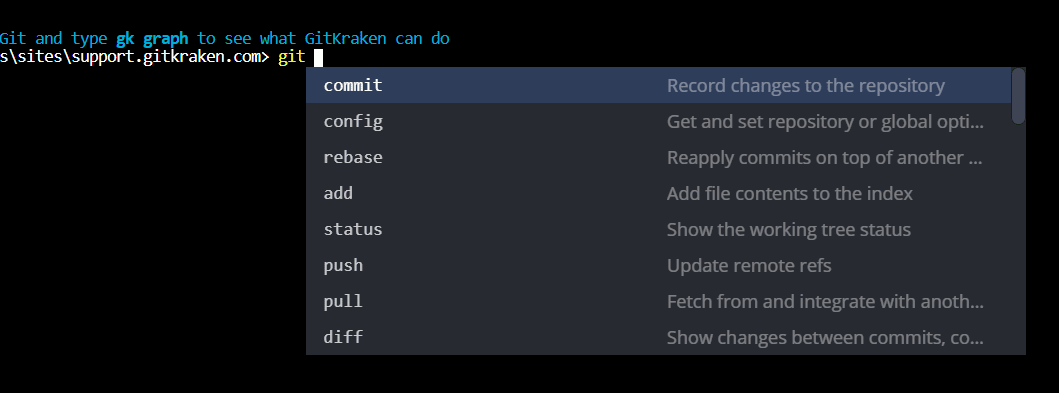
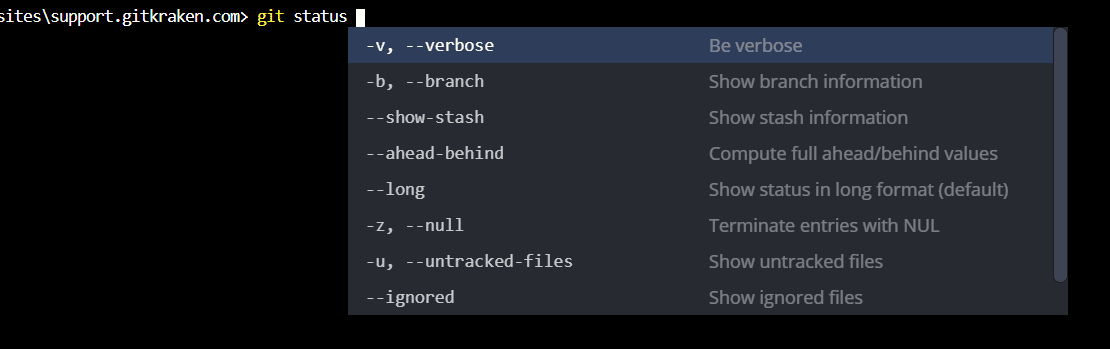
To run commands: Type any Git command such as git status, git commit -m "message", or git log --oneline. Auto-complete suggestions appear as you type, including flag suggestions for each command.
To run a coding agent manually: Open the terminal in the worktree you want to use, then start your coding agent CLI there.
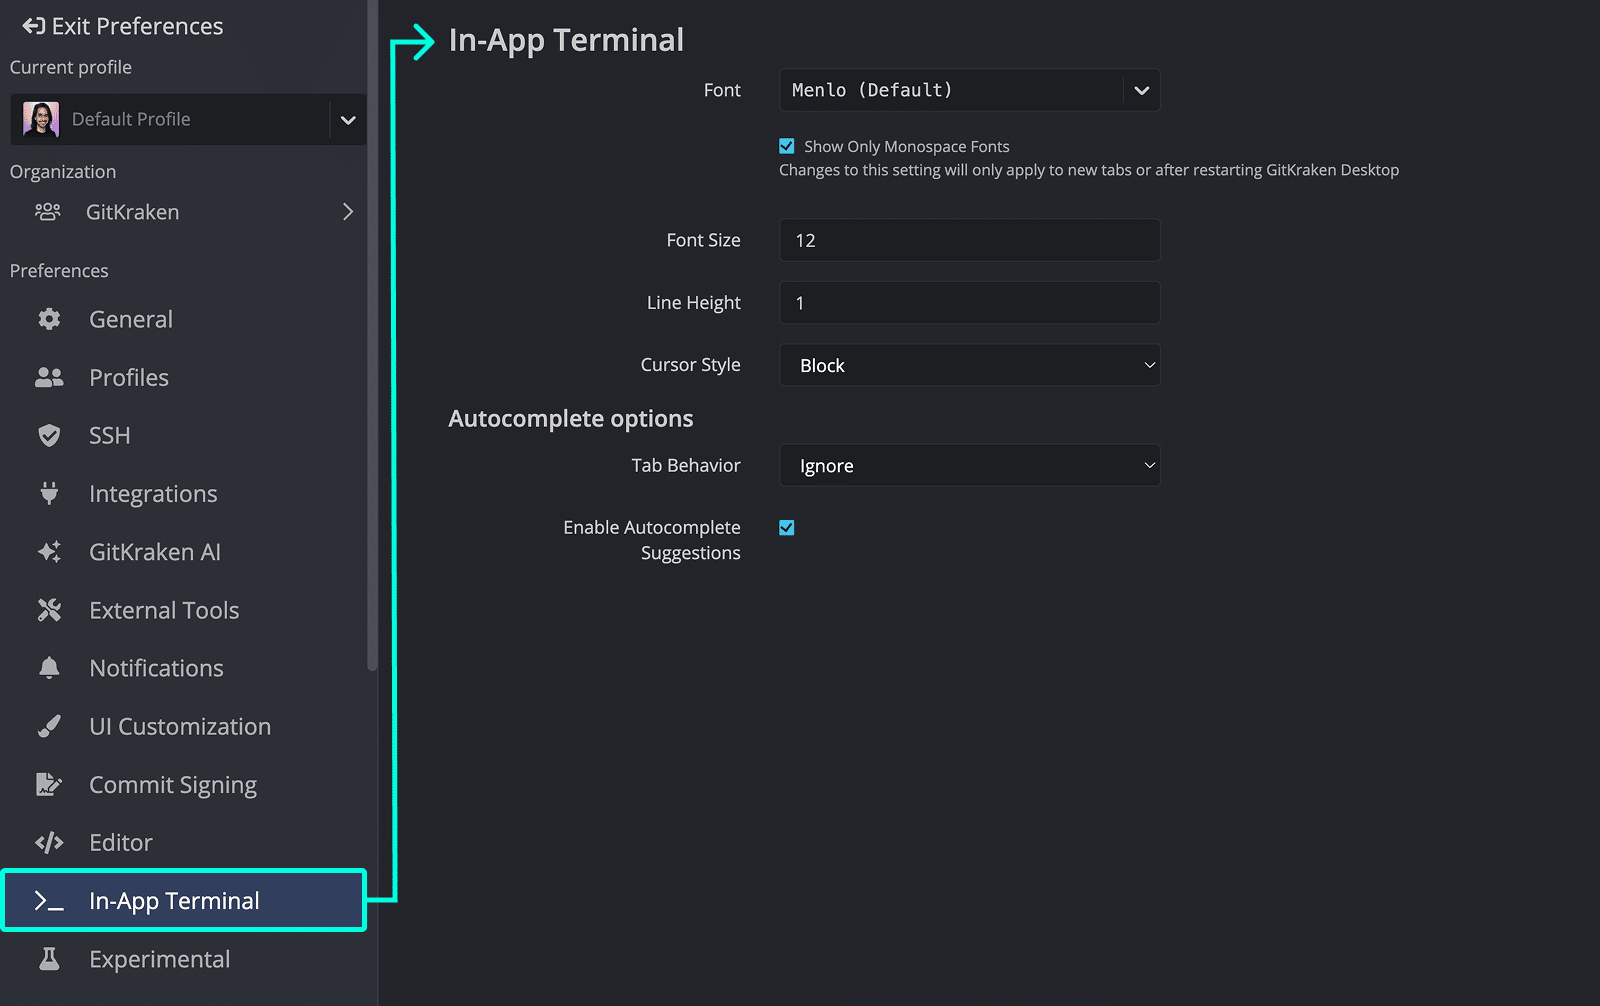
To customize terminal appearance: Go to Preferences > In-App Terminal to change font, size, line height, cursor style, and autocomplete behavior.
To minimize the terminal panel: Use the minimize control in the terminal panel header. The panel header stays visible so you can restore the terminal when you need it.
To kill a terminal session: Click the trash icon in the terminal panel header. This ends the current terminal session for that worktree.
To set your default shell:
- macOS/Linux: Set ZSH or Bash as the default shell in your OS settings and restart your machine.
- Windows: Open Preferences > Terminal and select PowerShell or Bash.
The terminal shares context with the open repository or worktree, so commands run against the correct working directory automatically.
How Git commands and auto-complete work
The GitKraken Terminal supports most Git commands. Start typing git to see command suggestions via auto-complete.
Flag suggestions are also supported:
Note: Conflicting auto-complete programs may disable suggestions. You may need to uninstall or disable such programs for GitKraken’s suggestions to work correctly.
How to customize terminal preferences
Visit Preferences > In-app Terminal to modify your terminal settings.
How the default terminal works on macOS and Linux
GitKraken supports ZSH and Bash. To switch shells:
- Set the preferred shell as default in your OS settings.
- Restart your machine to apply changes.
How the default terminal works on Windows
PowerShell and Bash are currently supported. To change the shell:
- Open Preferences > Terminal.
- Set the Default Terminal to your desired shell.
How multi-session support works
The embedded terminal supports independent sessions per worktree in a single tab. GitKraken Desktop uses the same underlying worktrees in both List view and Agent Sessions View.
When you switch to another worktree, the terminal view refreshes to that worktree’s session and opens in its working directory. For example, you might switch worktrees from List view or by clicking an agent session card in Agent Sessions View.
Each session runs independently, so long-running commands in one worktree keep running when you switch away and come back.
This is also how manual coding agent workflows work. If a coding agent is not explicitly integrated with GitKraken Desktop, you can still open the terminal for a worktree and run that agent there.
How to run a coding agent manually in the terminal
Use this workflow when you want to run a coding agent CLI that GitKraken Desktop does not explicitly integrate with, or when you prefer to start the agent yourself.
- Open the repository or worktree you want to use.
- Open the terminal from the toolbar or Command Palette.
- Confirm that the terminal is running in the correct working directory.
- Start your coding agent CLI in the terminal.
- Continue working in GitKraken Desktop while the terminal session stays attached to that worktree.
If you want GitKraken Desktop to create and manage coding agent sessions for explicitly supported agents, see Coding Agents in GitKraken Desktop.
How to drag and drop files into the terminal
You can drag a file from your OS file manager or from the Commit Panel into the terminal to insert the file’s full path at the cursor. You can also drag text into the terminal to insert it at the cursor. This is useful when you want to paste a path or snippet into a command without retyping it.
Common Git commands to try
Use the terminal to quickly execute common Git operations:
git status– View working directory and staging statusgit commit -m "message"– Commit changes with a messagegit log --oneline– View a condensed commit history
These commands complement GitKraken’s visual graph for a comprehensive Git experience.
