
Integrate Gerrit with Jira Cloud
Quickly learn how to connect Gerrit git repositories via Git Integration for Jira Cloud.
What’s on this page:
Git service integration
-
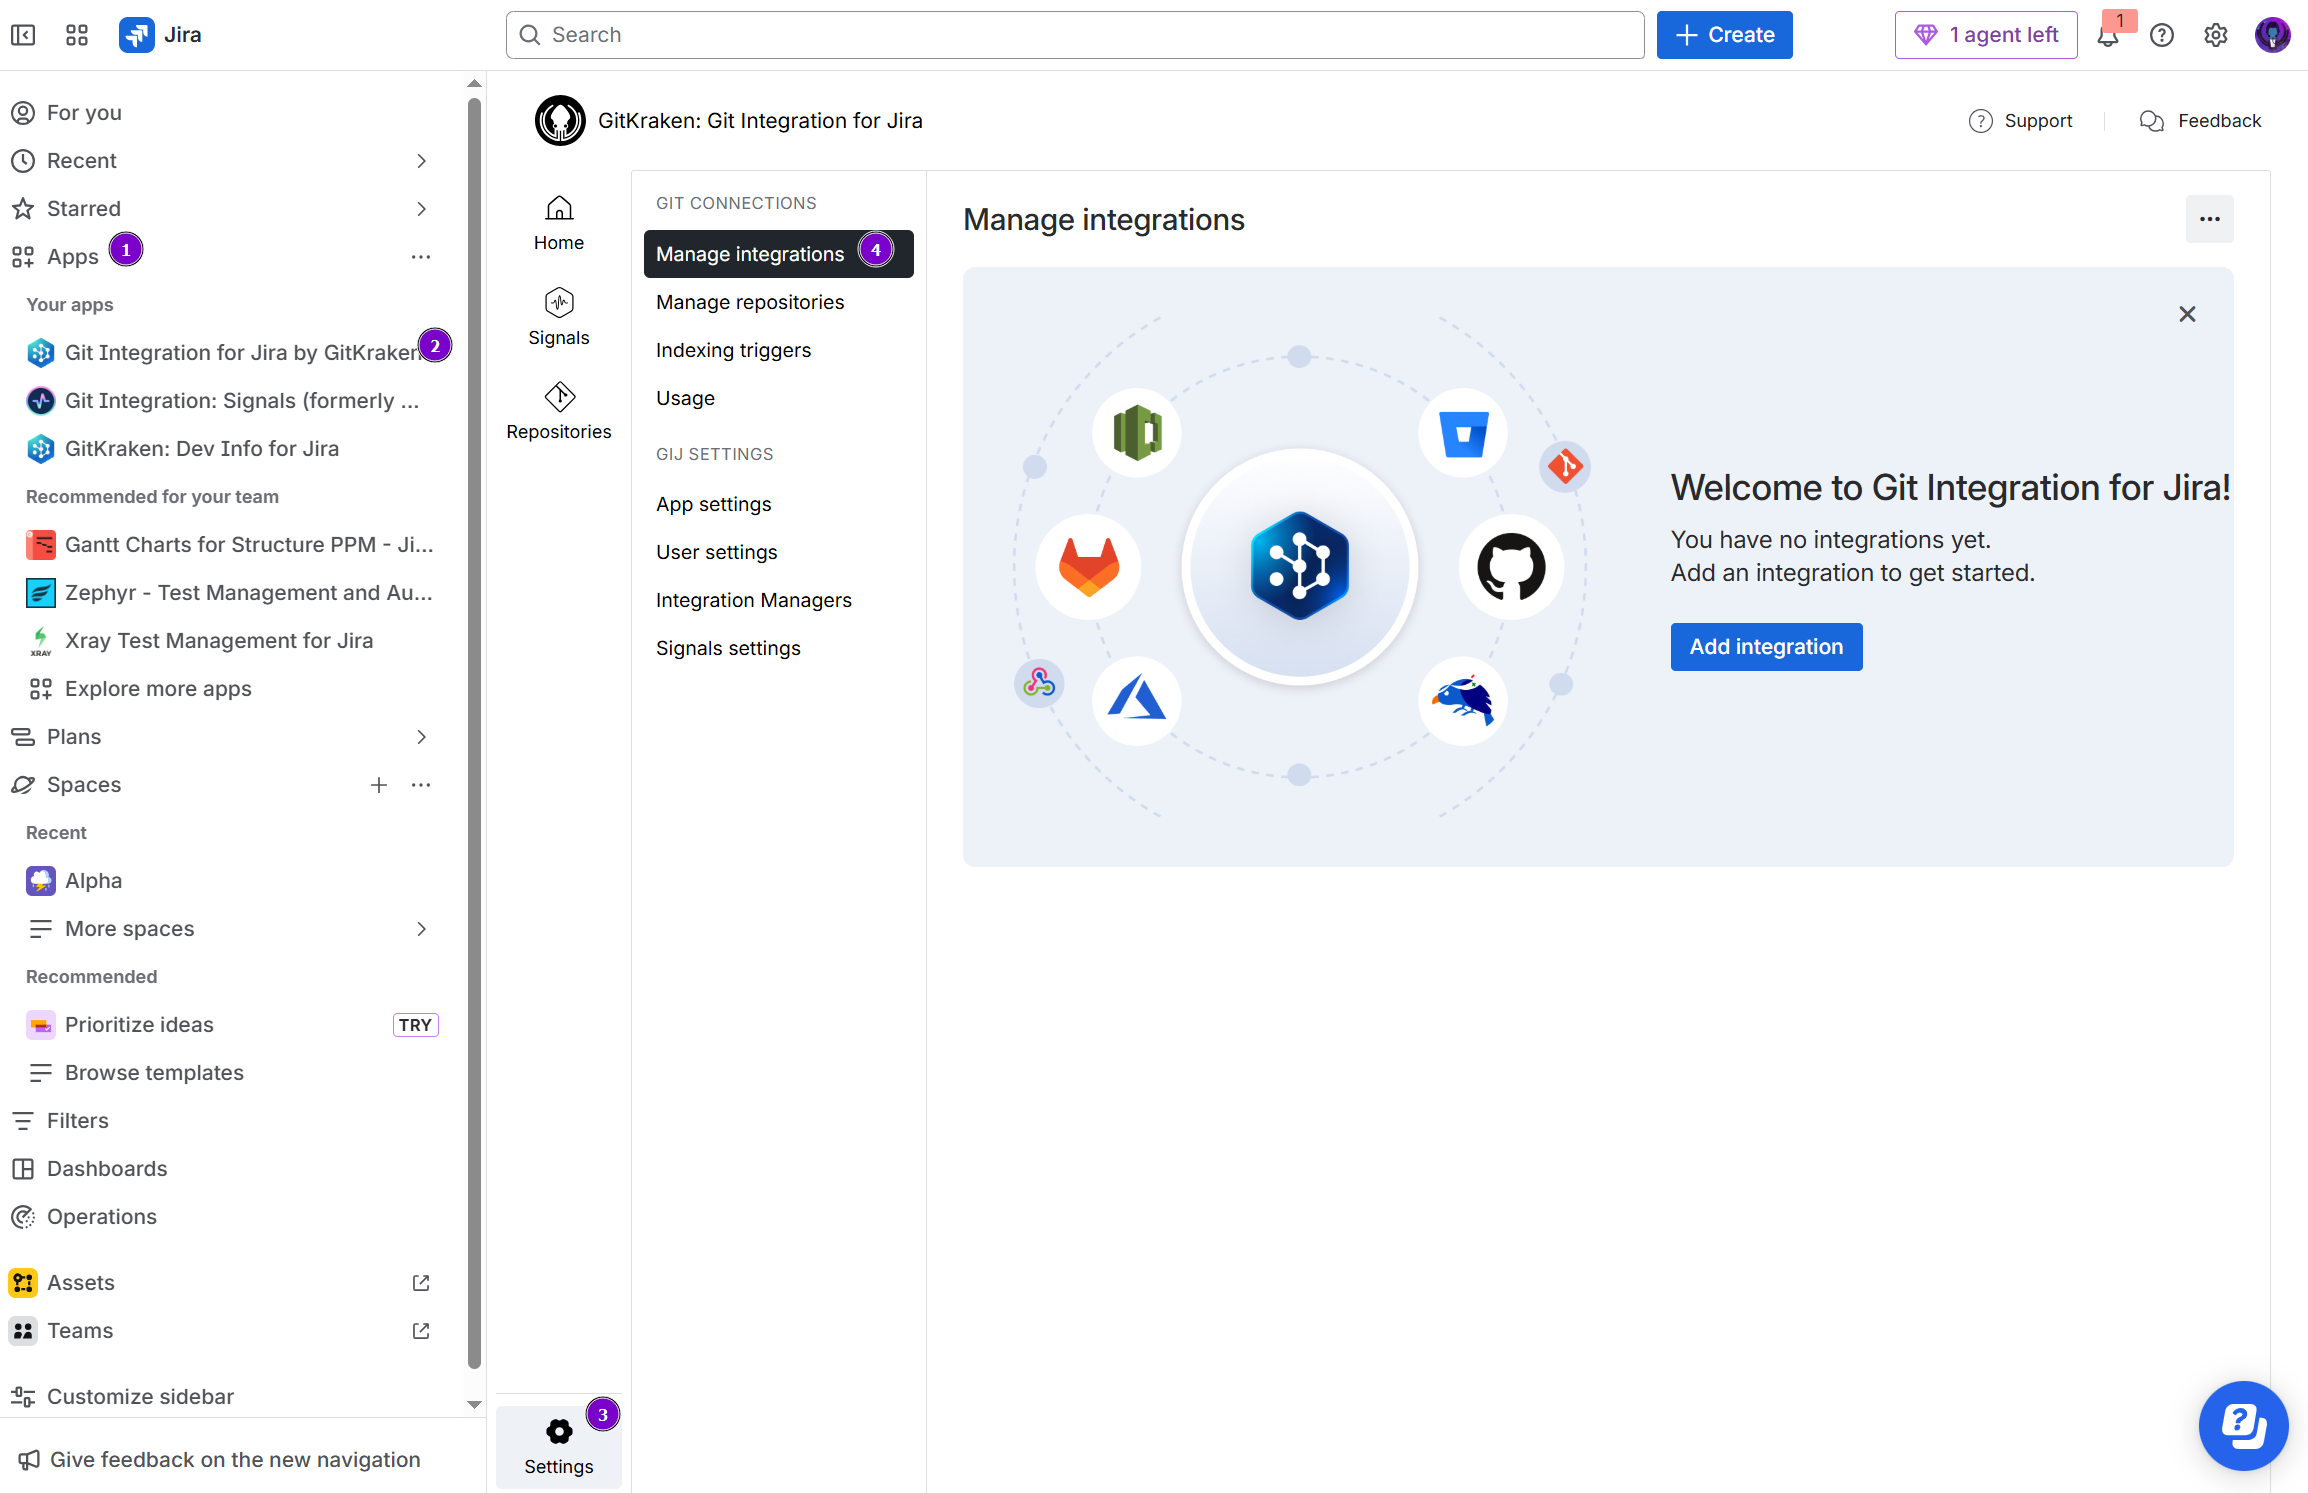
On your Jira side bar, go to Apps ➜ Git Integration for Jira, then Settings ➜ Manage Integrations
-
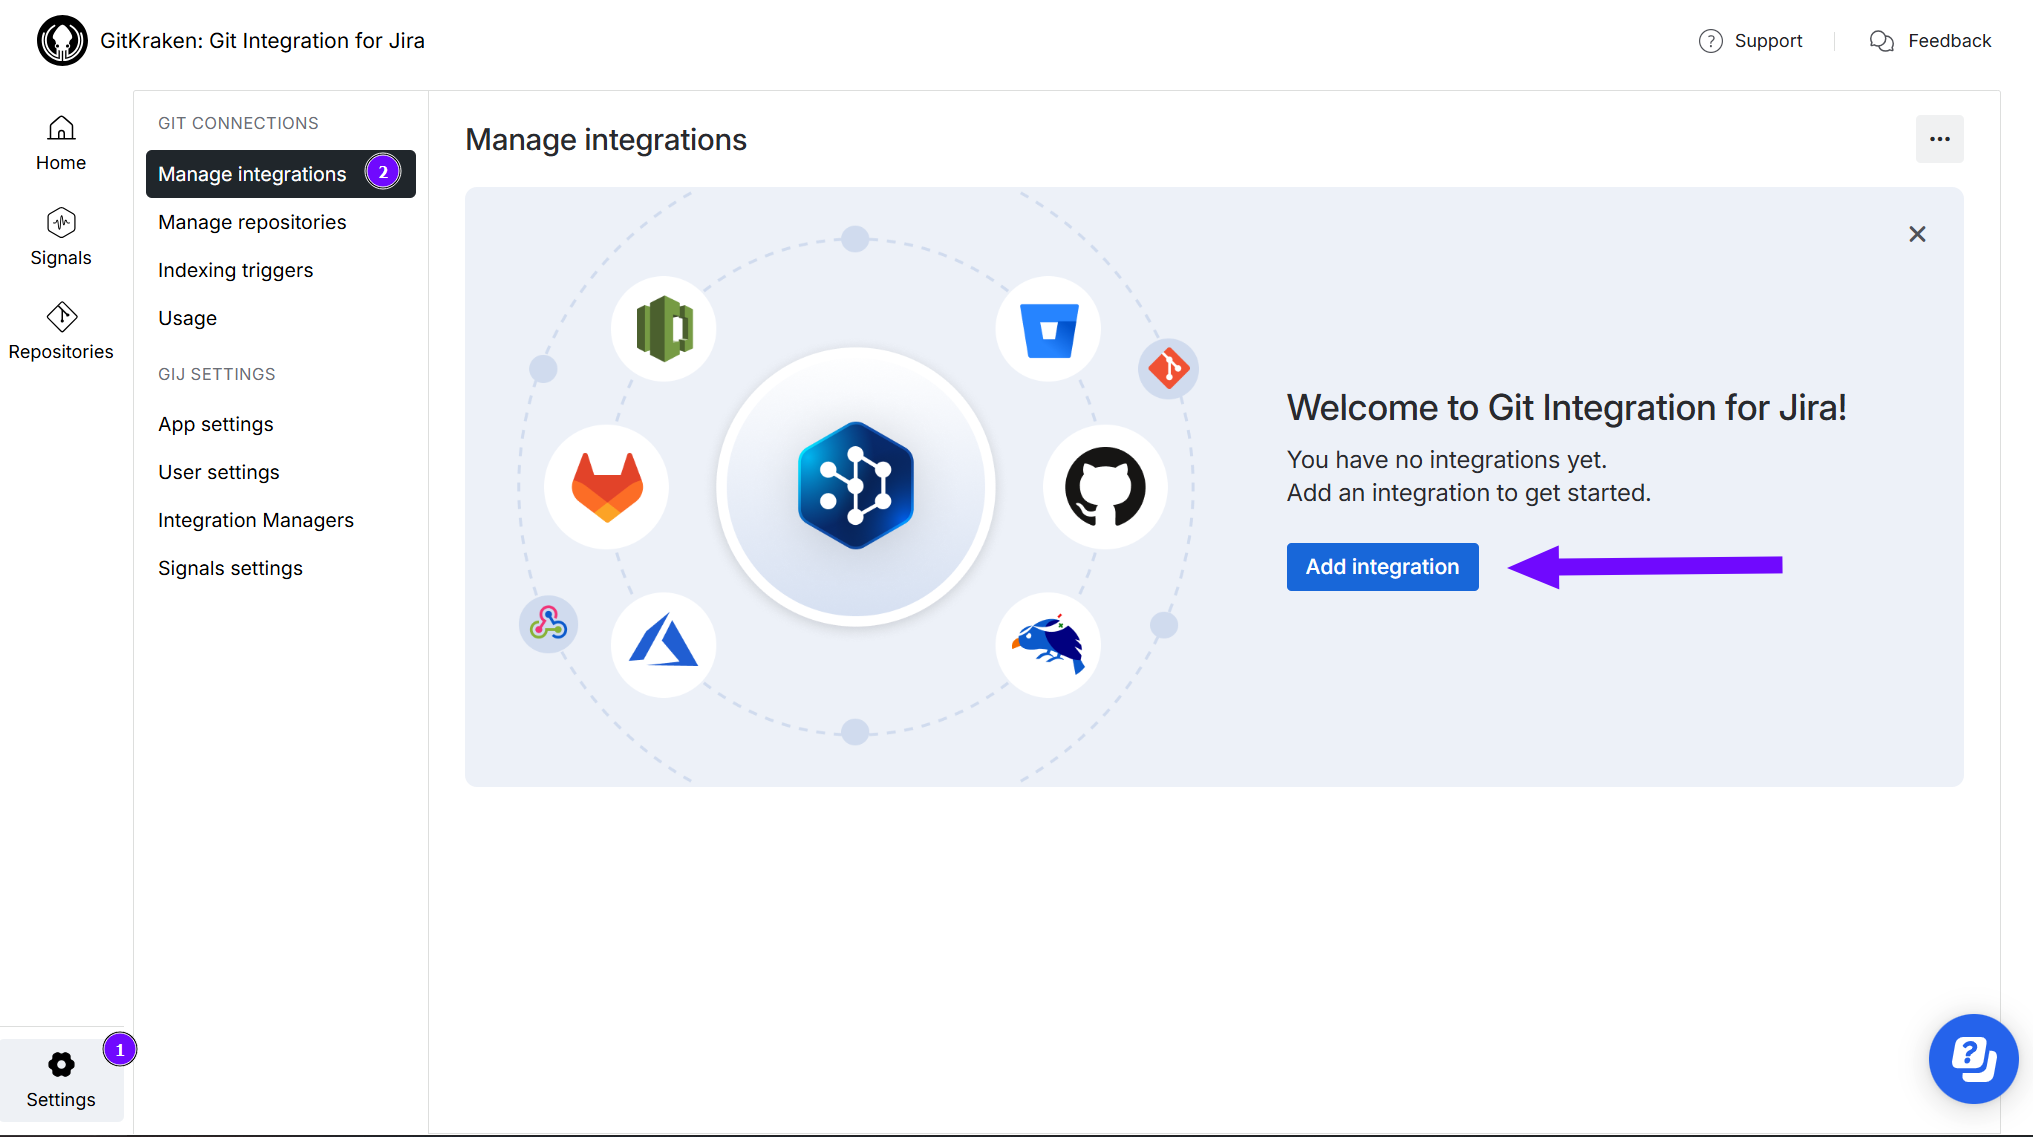
On the Manage integrations page, click Add integration.
-
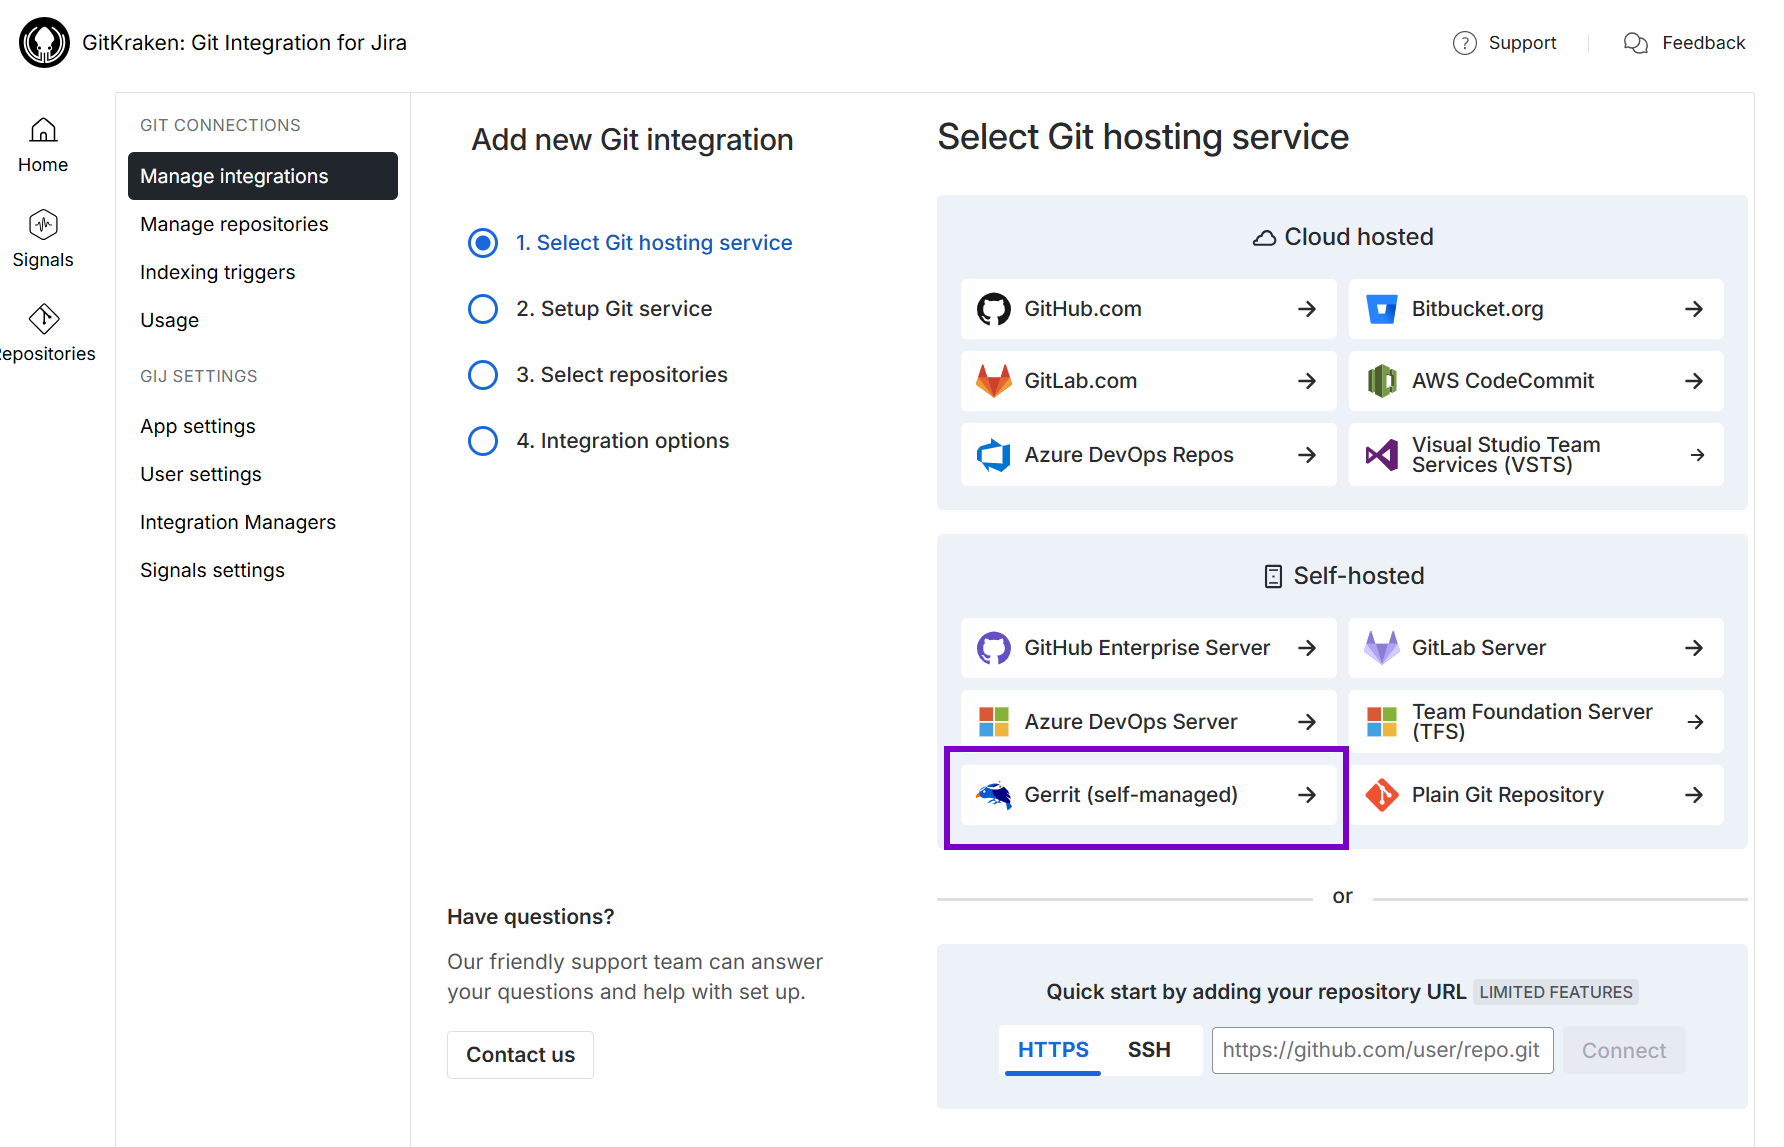
For the following screen, click Gerrit (self-managed) to start integration with this git service.
-
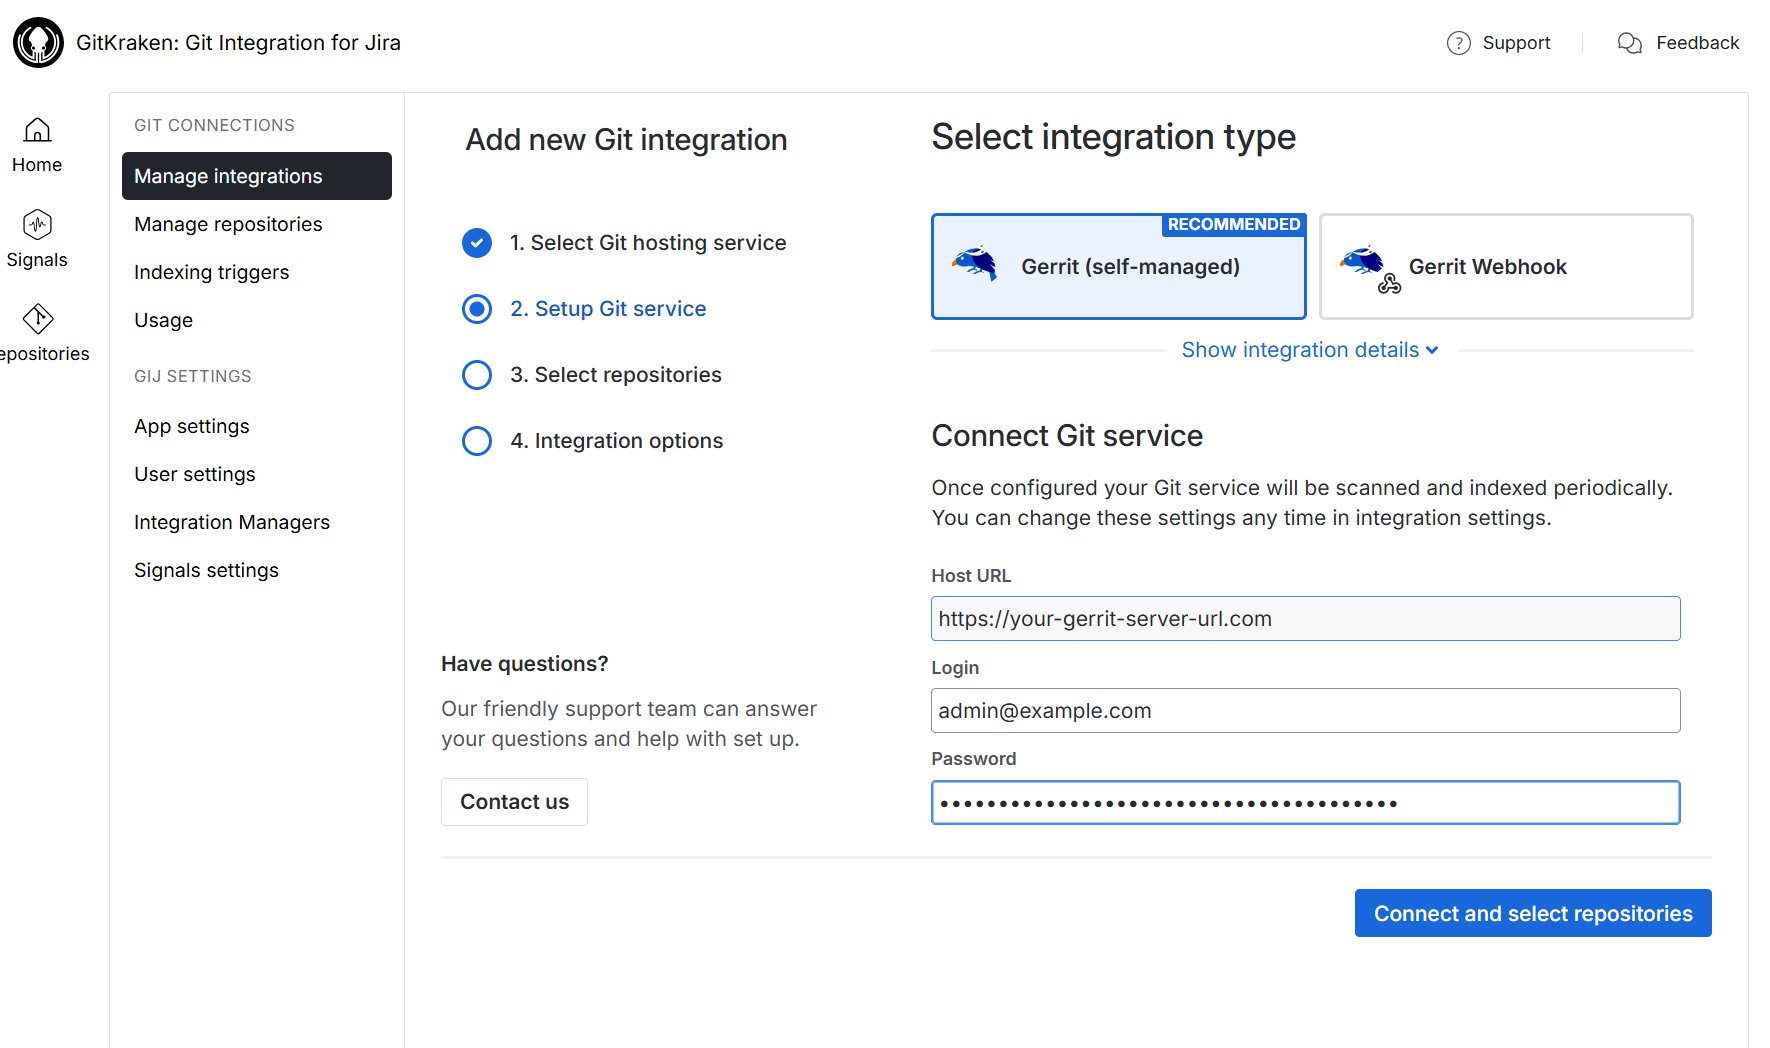
On the following screen, click on the Git service integration panel for your integration type.
-
For this guide, continue with the default selected type for Gerrit integration.
-
We recommend the default full feature integration for this git service.
-
UNDER CONSTRUCTION For Gerrit webhook indexing integration, see this article instead.
-
Enter the Host URL of your Gerrit server.
-
Provide the User name and Password/Token for this Gerrit server.
-
-
Click Connect and select repositories to proceed to the next step.
-
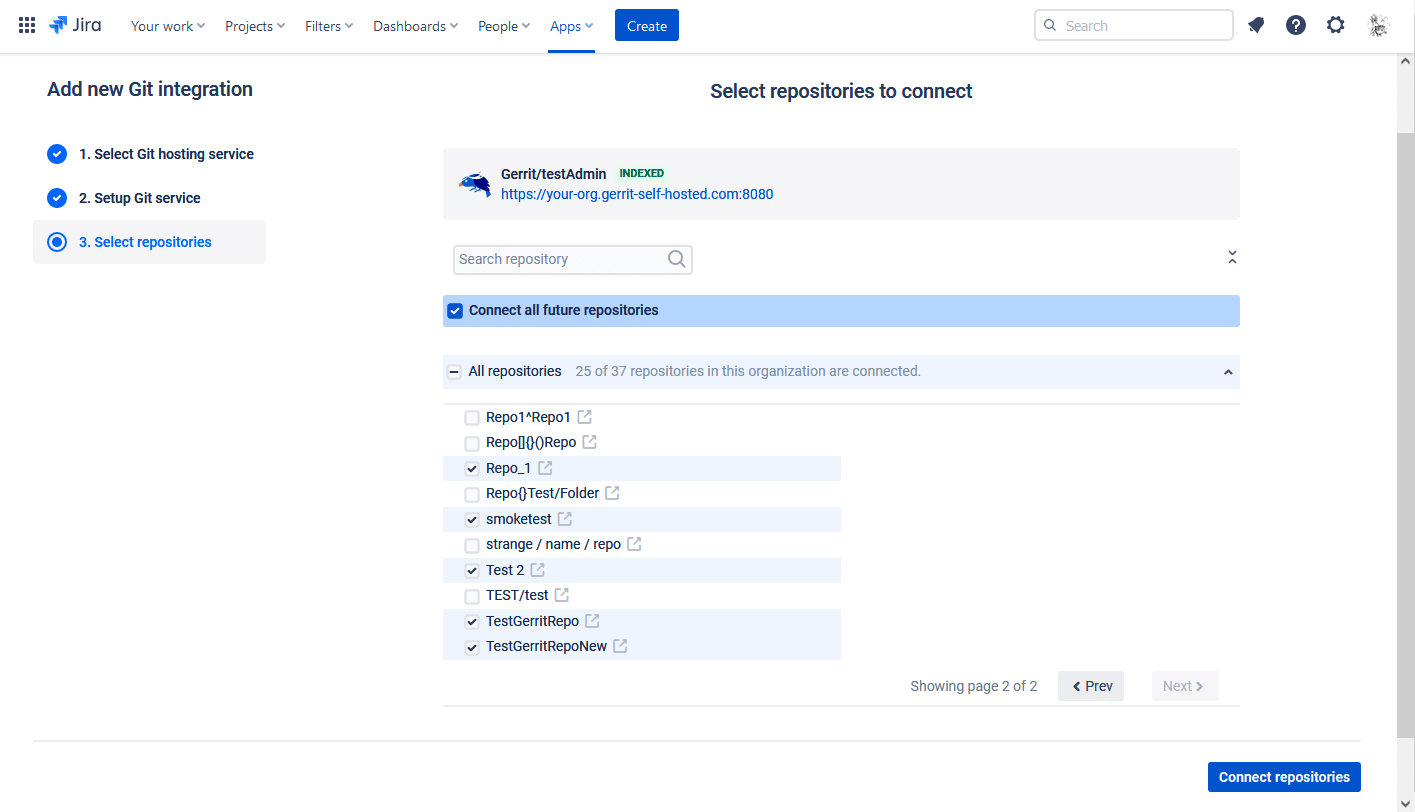
On the following screen, the Git Integration for Jira app will read all available repositories from your Gerrit account.
-
Repositories of the logged-in Gerrit user can be automatically connected to Jira Cloud. Repositories that are added or removed from GitLab will be likewise connected or disconnected from Jira Cloud. (Connect all future repositories)
-
Use the search options to filter displayed repositories for the current screen.
-
Connect all repositories and organizations or select specific repositories to connect for this integration.
-
-
Click Connect repositories to complete this setup.
The Gerrit git repositories are now connected to Jira Cloud.
Single repository (Manually connect via SSH/HTTP/HTTPS)
BigBrassBand recommends to use the Git service integration for Gerrit.
Use this section for setting up single repository connections or connecting single repositories via SSH.
Login to your Gerrit account. Obtain the repository URL from the Gerrit repository project page. Use either SSH or Anonymous HTTPS.
-
On your Jira Cloud dashboard menu, go to Apps ➜ Git Integration: Manage integrations.
-
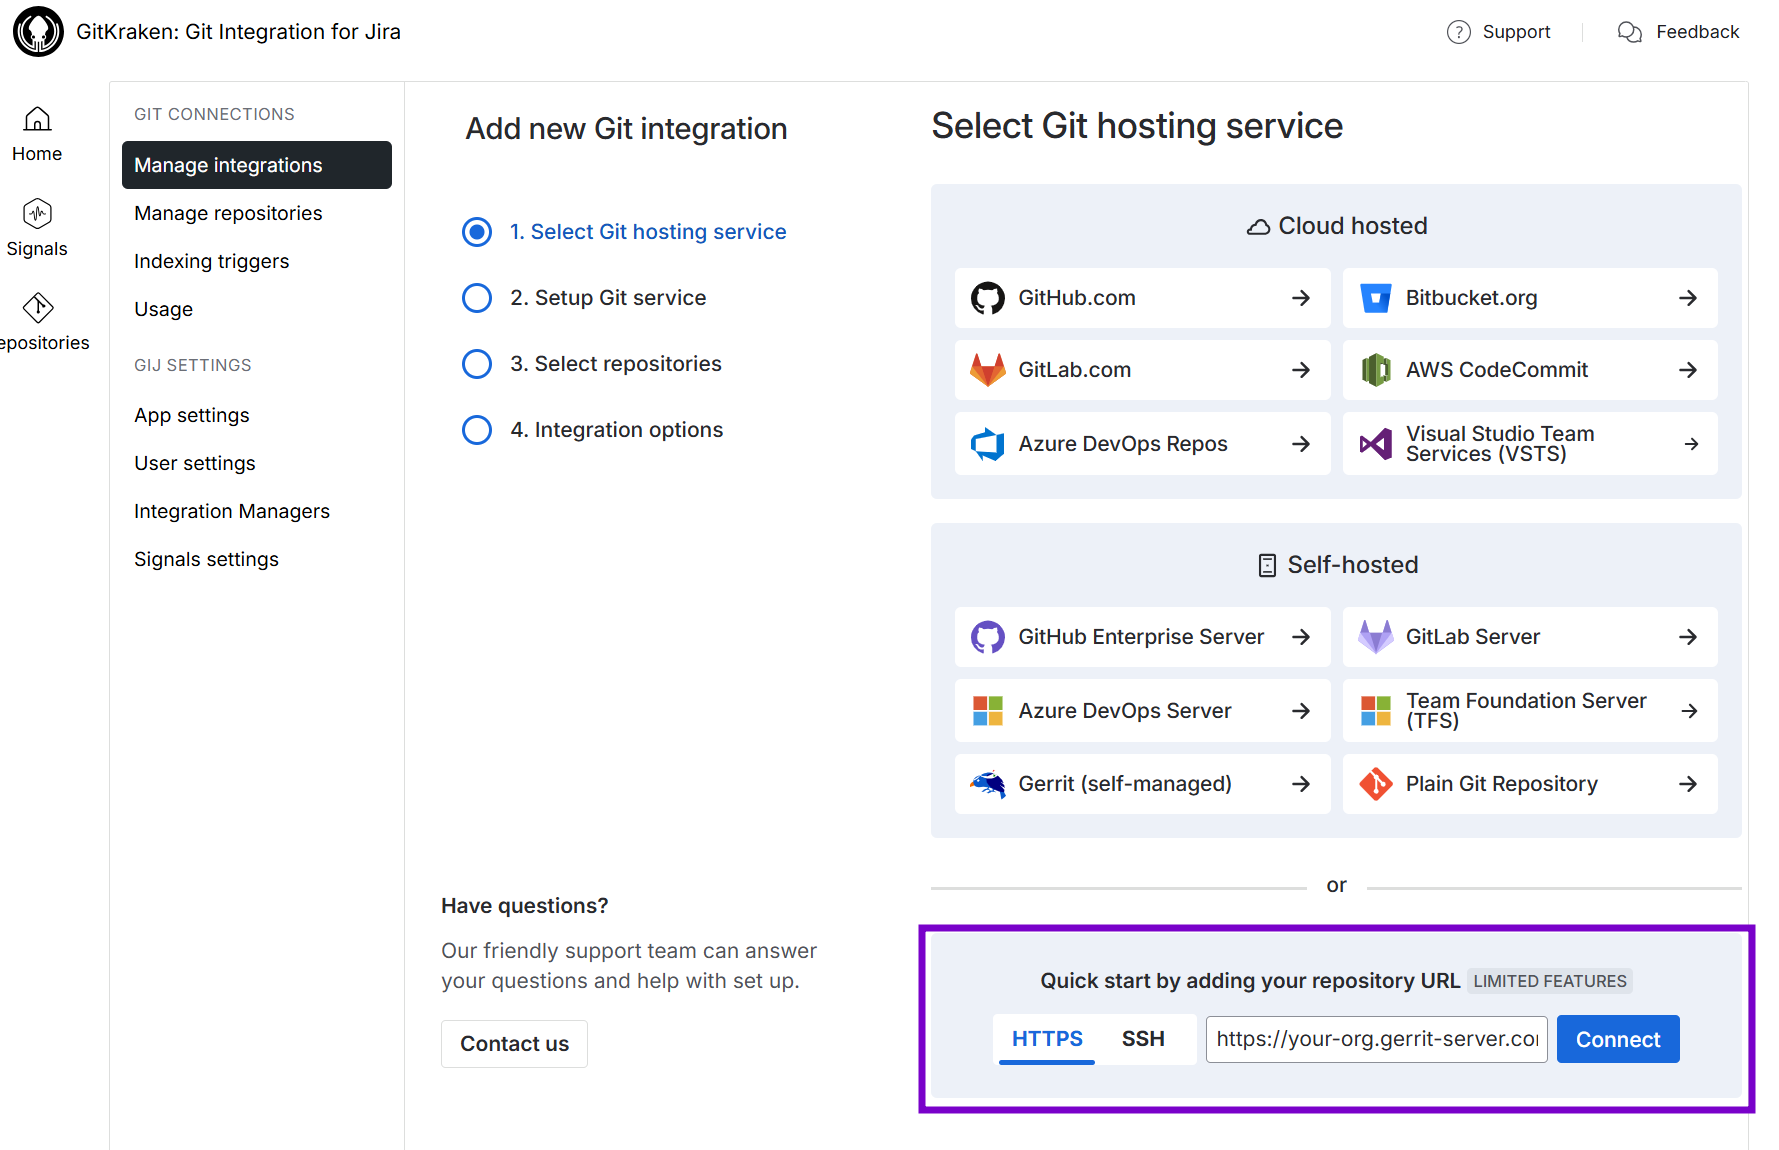
On the following screen, click Add integration.
-
Paste the git clone URL from Gerrit web portal in the provided box.
(For example:http(s)://<your.org.com>/<repo_name>) -
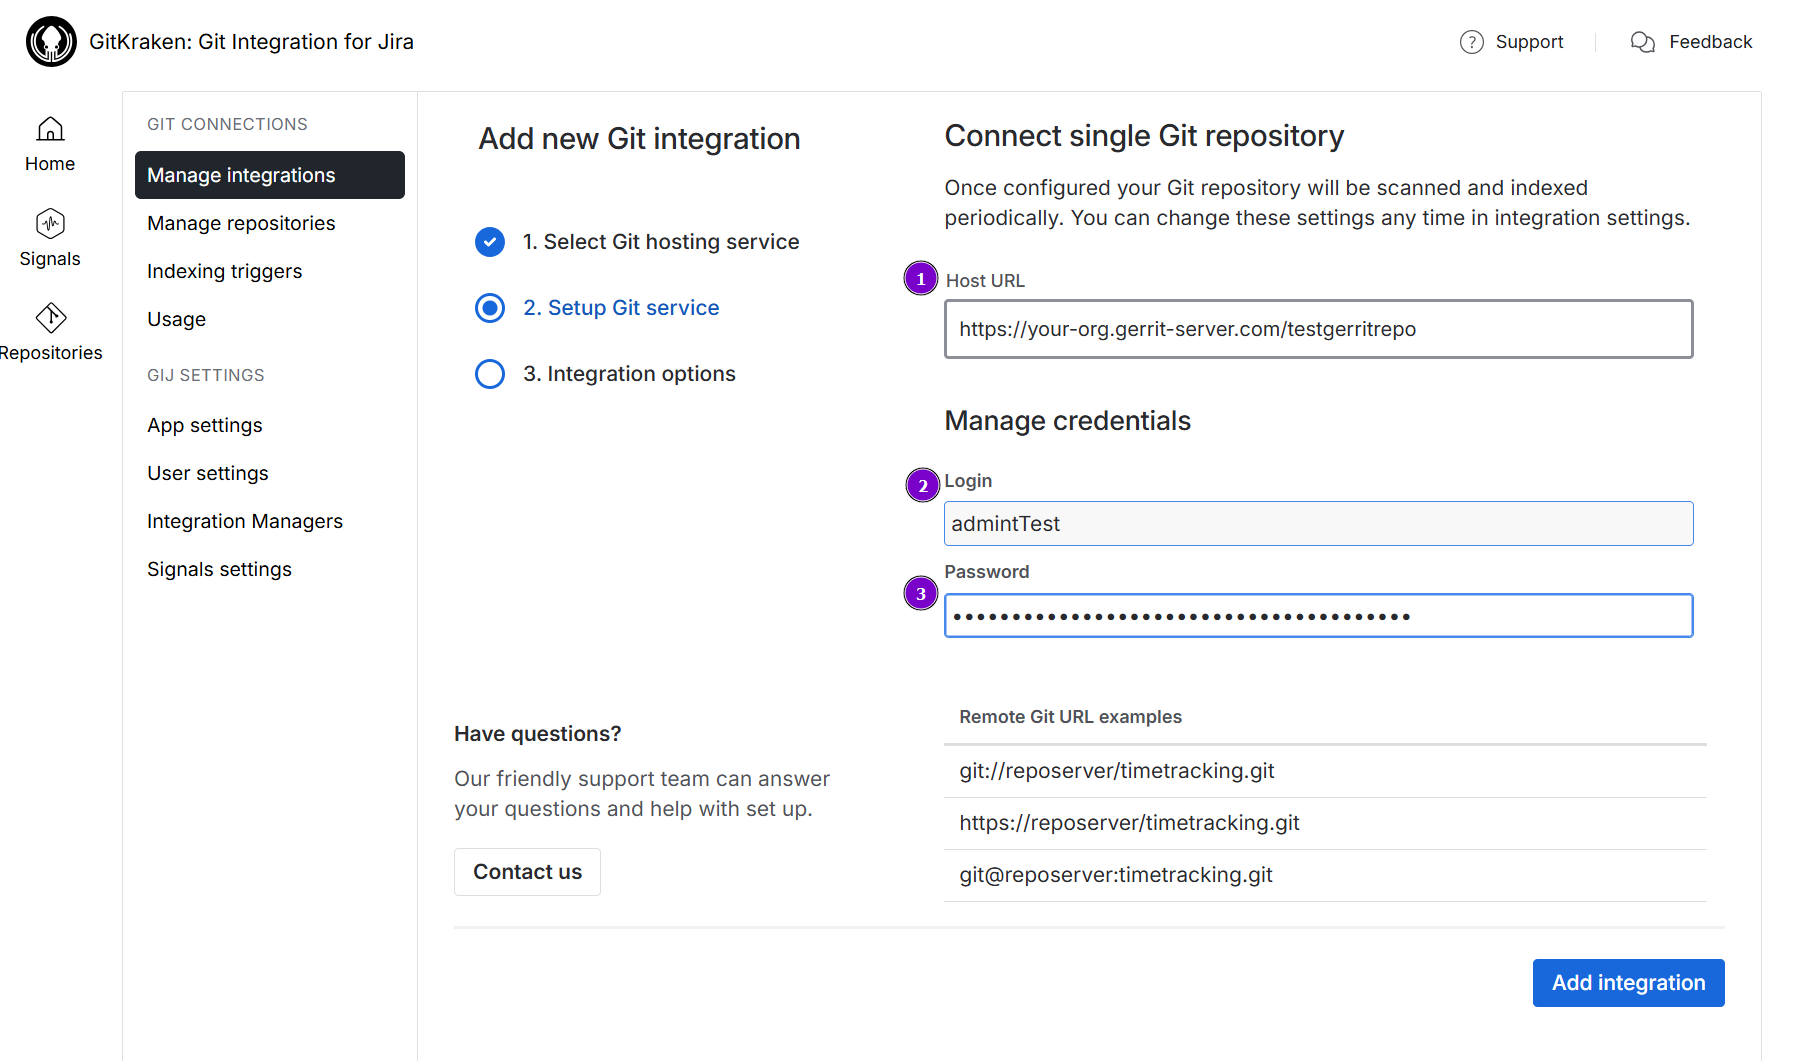
Click Connect to proceed. The following screen is displayed.
-
Enter Host URL for this integration.
-
Enter Username on the provided box.
-
Enter Password/Token on the provided box.
-
-
Click Add integration to complete this process.
The repository is now connected to Jira Cloud.
Setting up Gerrit web links
Web links are automatically configured for Gerrit repositories connected via Git service integration. We recommend to use the Git service integration for Gerrit account connections. Note that if the repository is part of a Gerrit integration, web linking settings are not available.
For single repository connections, the web linking setup is optional (!Actions ➜ Edit integration ➜ Feature settings).
Viewing git commits in Jira Cloud
-
Perform a git commit by adding the Jira issue key in the commit message. This will associate the commit to the mentioned Jira issue.
-
Open the Jira issue.
-
Scroll down to the Activity panel then click the Git Commits tab.
-
Click View full commit to view the code diff.
For more information about this feature, see Documentation: Linking git commits to Jira issues.
Default branch
Most git integrations allow changing of the default branch of the repository/project other than “master”. This change is reflected in the Repository Settings of the Git Integration for Jira app on the next reindex. Full feature integrations support this function where Git Integration for Jira app gets the default branch from almost all integrations and apply this setting at repository level.
For the case with Gerrit, the default main branch is always “master”.
More Integration Guides
Azure DevOps | Visual Studio Team Services (VSTS)
Azure DevOps Server | Team Foundation Services (TFS)
Gerrit (this page)
Introduction to Git integration
Last updated: December 2025
