Last updated: June 2025
GitKraken allows you to connect to GitLab Self-Managed (CE or EE), enabling repository discovery, pull request creation, and SSH key management within your self-hosted GitLab environment.
Note: All self-hosted server integrations, including GitLab Self-Managed, require an Advanced subscription tier or higher.
Benefits
- Create new repositories with optional .gitignore and license files.
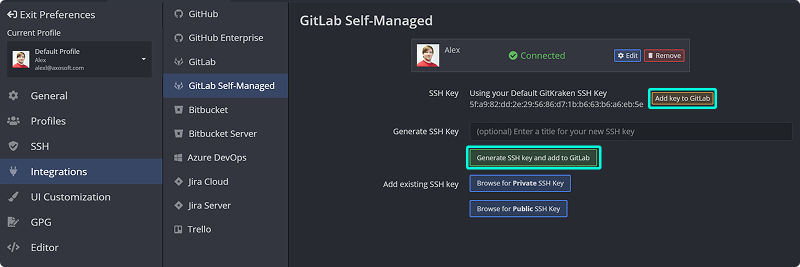
- Automatically generate an SSH key and upload it to GitLab Self-Managed.
- Save authentication credentials using profiles.
- Clone from your GitLab Self-Managed repository list.
- Add and manage remotes for GitLab Self-Managed.
- Create and view pull requests.
- Manage GitLab Self-Managed Issues.
GitLab Self-Managed Authentication
Note: GitKraken supports any version of GitLab Self-Managed released within the past year.
To authenticate:
- Navigate to Preferences > Integrations in the upper-right corner.

- Choose Gitlab Self-Managed. Enter your GitLab Self-Managed host domain. Click and follow the link.

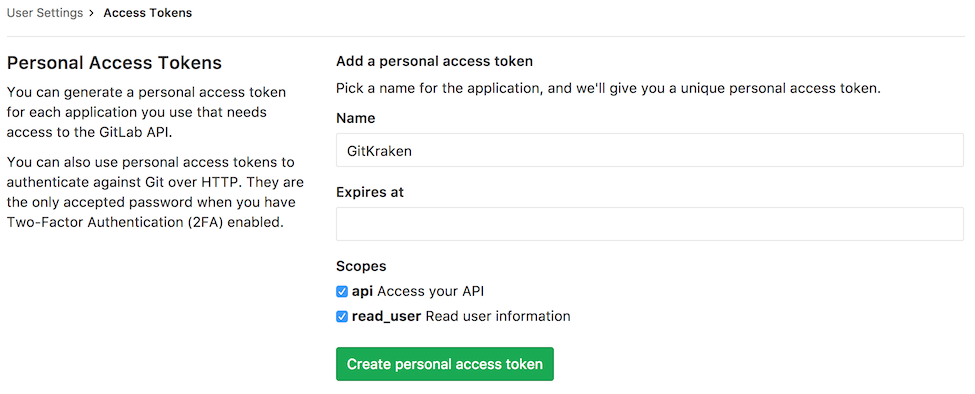
- In your browser, log in and generate a token. Required scopes:
apiandread_user. Leave expiration blank.

- Copy and paste the token into GitKraken, then click .

Generating an SSH Key for GitLab Self-Managed
Note: GitKraken uses the SSH key from Preferences > SSH unless overridden with a GitLab-specific key or a system SSH Agent.
- Open Preferences > Integrations.
- Click .

You can also:
- Use for an existing SSH Default.
- Use Add existing SSH key to upload a saved key manually.
Connecting to Multiple GitLab Self-Managed Accounts
GitKraken supports one GitLab Self-Managed account per profile. Use multiple profiles with GitKraken Pro to manage separate accounts.
