
Last updated: March 2026
Use this page to create Local or Cloud Workspaces in GitKraken Desktop so you can organize repositories, run multi-repository actions, review pull requests across a group of repos, and share workspace context with a team. Cloud Workspaces require connected integrations, while Local Workspaces stay on your machine until you convert them.
Requirements and limits
- Workspace types: Local Workspace or Cloud Workspace
- Cloud Workspace requirement: The relevant hosting service integration must be connected in Preferences > Integrations
- Local Workspace scope: Stored on your machine until you convert it
- Cloud Workspace scope: Accessible across machines and shareable with teams or users
- Multi-repository actions: Clone, Fetch, Pull, Open, Locate, and Remove are available from the Workspace toolbar
- Conversion path: Local Workspaces can be converted to Cloud Workspaces after connecting a supported integration
| Workspace type | Stored where | Shareable | Requires integration | Cross-device access |
|---|---|---|---|---|
| Local Workspace | On your machine | No | No | No |
| Cloud Workspace | In your GitKraken account and connected service context | Yes | Yes | Yes |
GitKraken On-Premise users: Cloud Workspaces are not available in Serverless or Self-Hosted Server deployments. Use Local Workspaces to organize repositories in those environments. Features that depend on Cloud Workspaces, including Workspace Insights and Team Launchpad, are also not available.
Quick Start
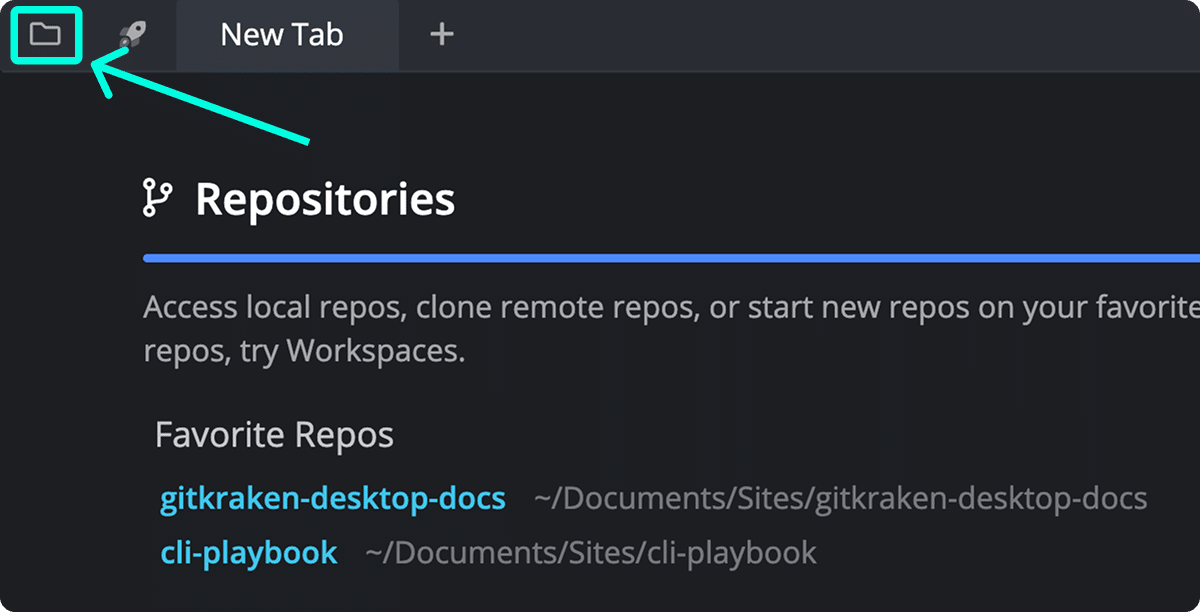
To open the Workspaces view: Click the folder icon in the top-left or press Alt + O (Windows/Linux) or Cmd + O (Mac).
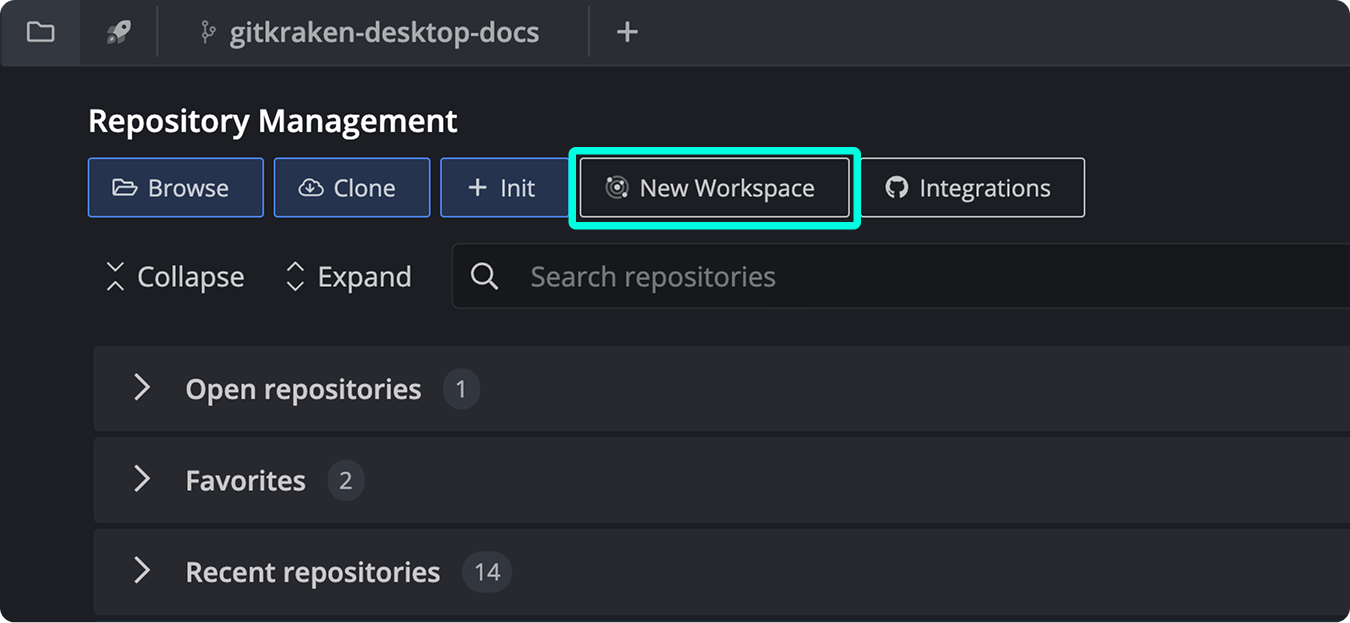
To create a Cloud Workspace:
- Click + New Workspace and select Cloud Workspace.
- Name the Workspace, select a hosting service, and choose repositories.
- Optionally share with teams or users and add an icon and description.
To create a Local Workspace: Click New Workspace, select Local Workspace, name it, and browse to select repositories or a directory.
To act across multiple repositories: Select the checkboxes next to repositories, then use the toolbar to Fetch, Pull, Clone, Open, or Remove them in bulk.
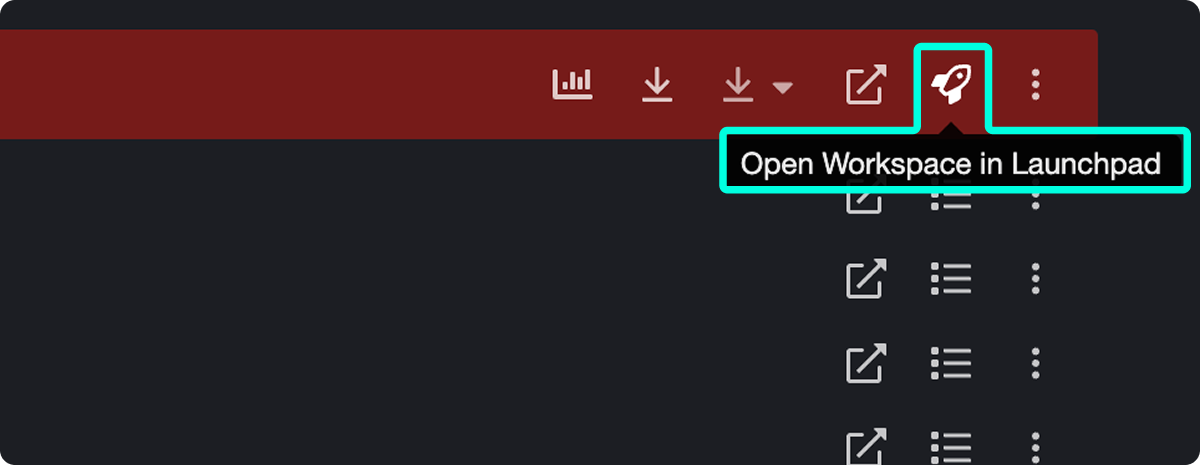
To view pull requests for all repos: Open a Cloud Workspace and click the Insights or Launchpad icon to see PRs across the entire Workspace.
To convert a Local Workspace to Cloud: Open the Workspace and click Create cloud workspace. Requires a connected integration under Preferences > Integrations.
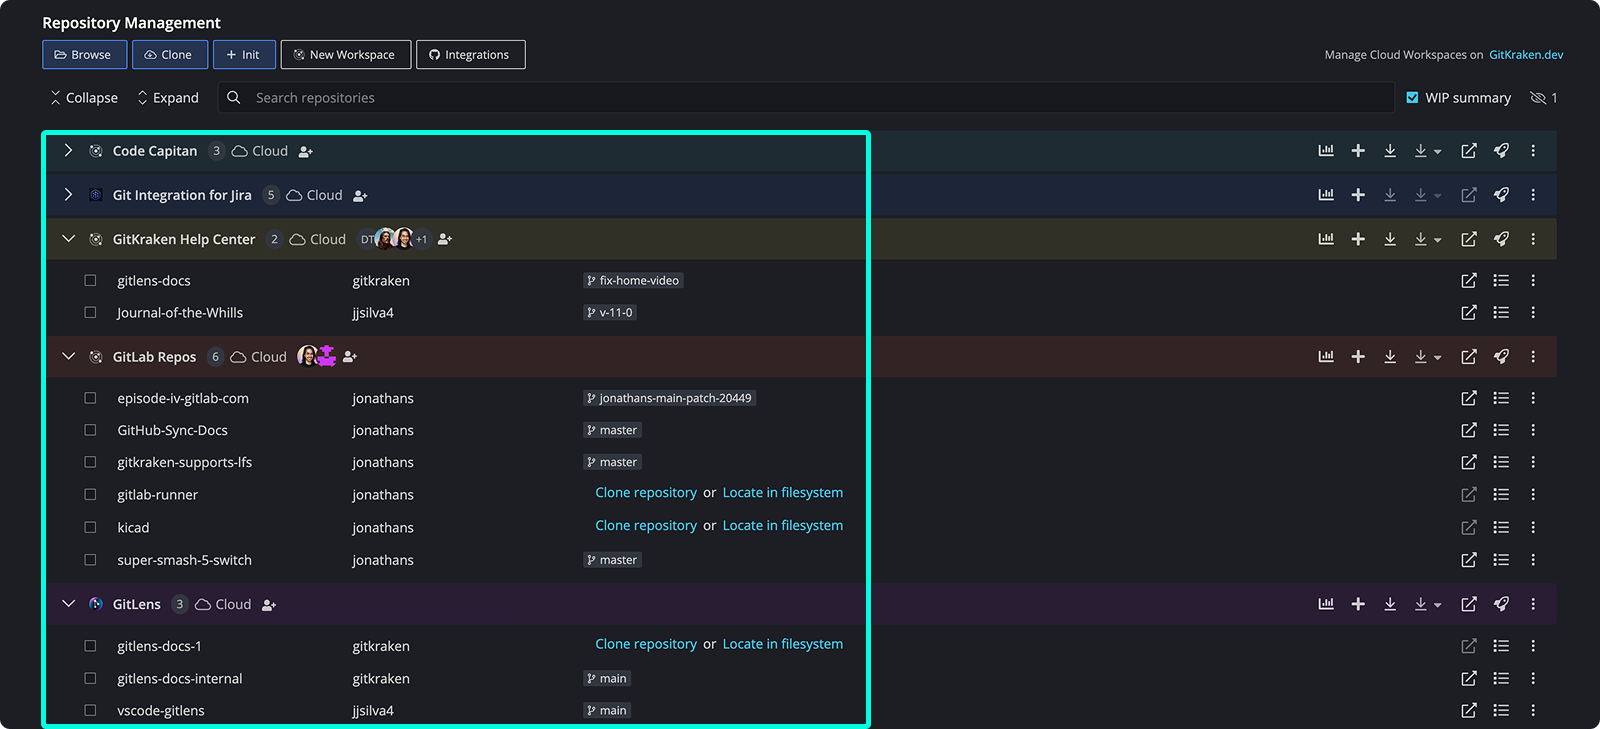
Workspaces are accessible from the Repository Management tab.
How to access your Workspaces
To access the Repo Management tab:
- Click on the folder icon at the top left.
- Or use the keyboard shortcut Alt + O (Windows/Linux) or Cmd + O (Mac).
How Cloud Workspaces work
Cloud Workspaces are accessible from any machine and can be shared with selected teams in your organization. They allow for multi-repository actions and centralized pull request management.
Note: Cloud Workspaces are not available in GitKraken On-Premise Serverless or Self-Hosted Server deployments. See How Local Workspaces work for the supported alternative in those environments.
Use a Cloud Workspace when: you need to share repository groups across machines or with teammates. Don’t use a Cloud Workspace when: the repo list is only for your local machine and does not need shared or synced workspace context.
Watch the overview:
How to create a Cloud Workspace
- Click .
- Select “Cloud Workspace”.
- Name your Workspace and select the hosting service.
- Choose repositories to add.
- (Optional) Add an icon, description, and share with teams or users.
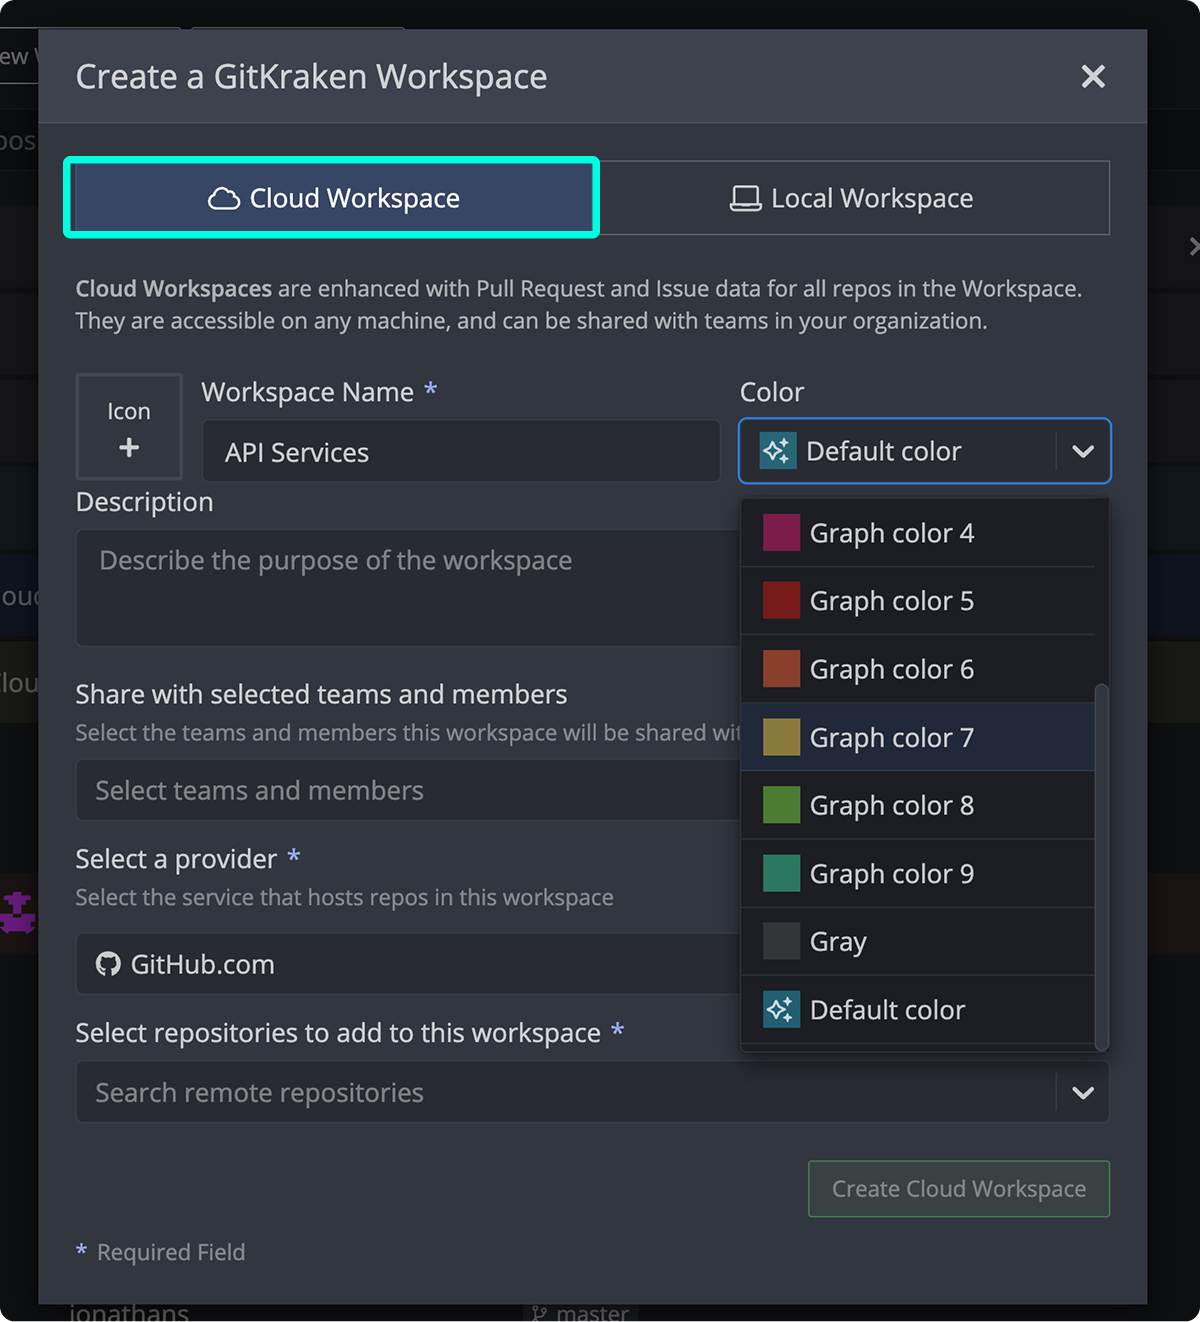
Note:
The integration for the desired service must be connected under Preferences > Integrations.
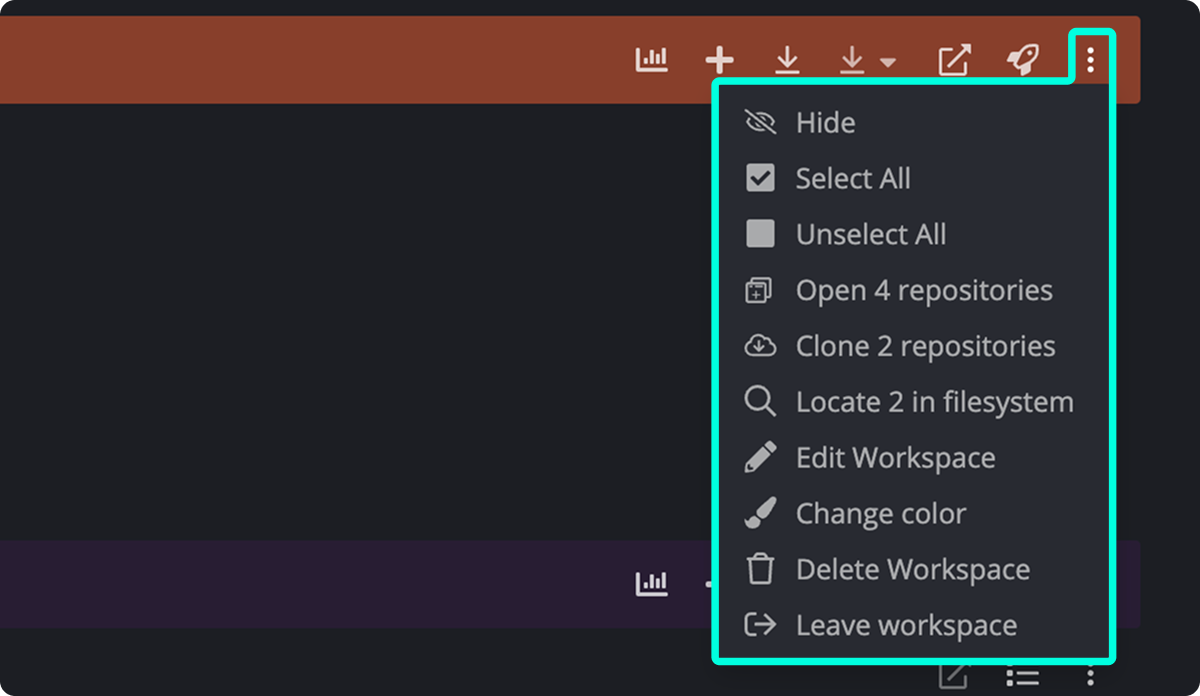
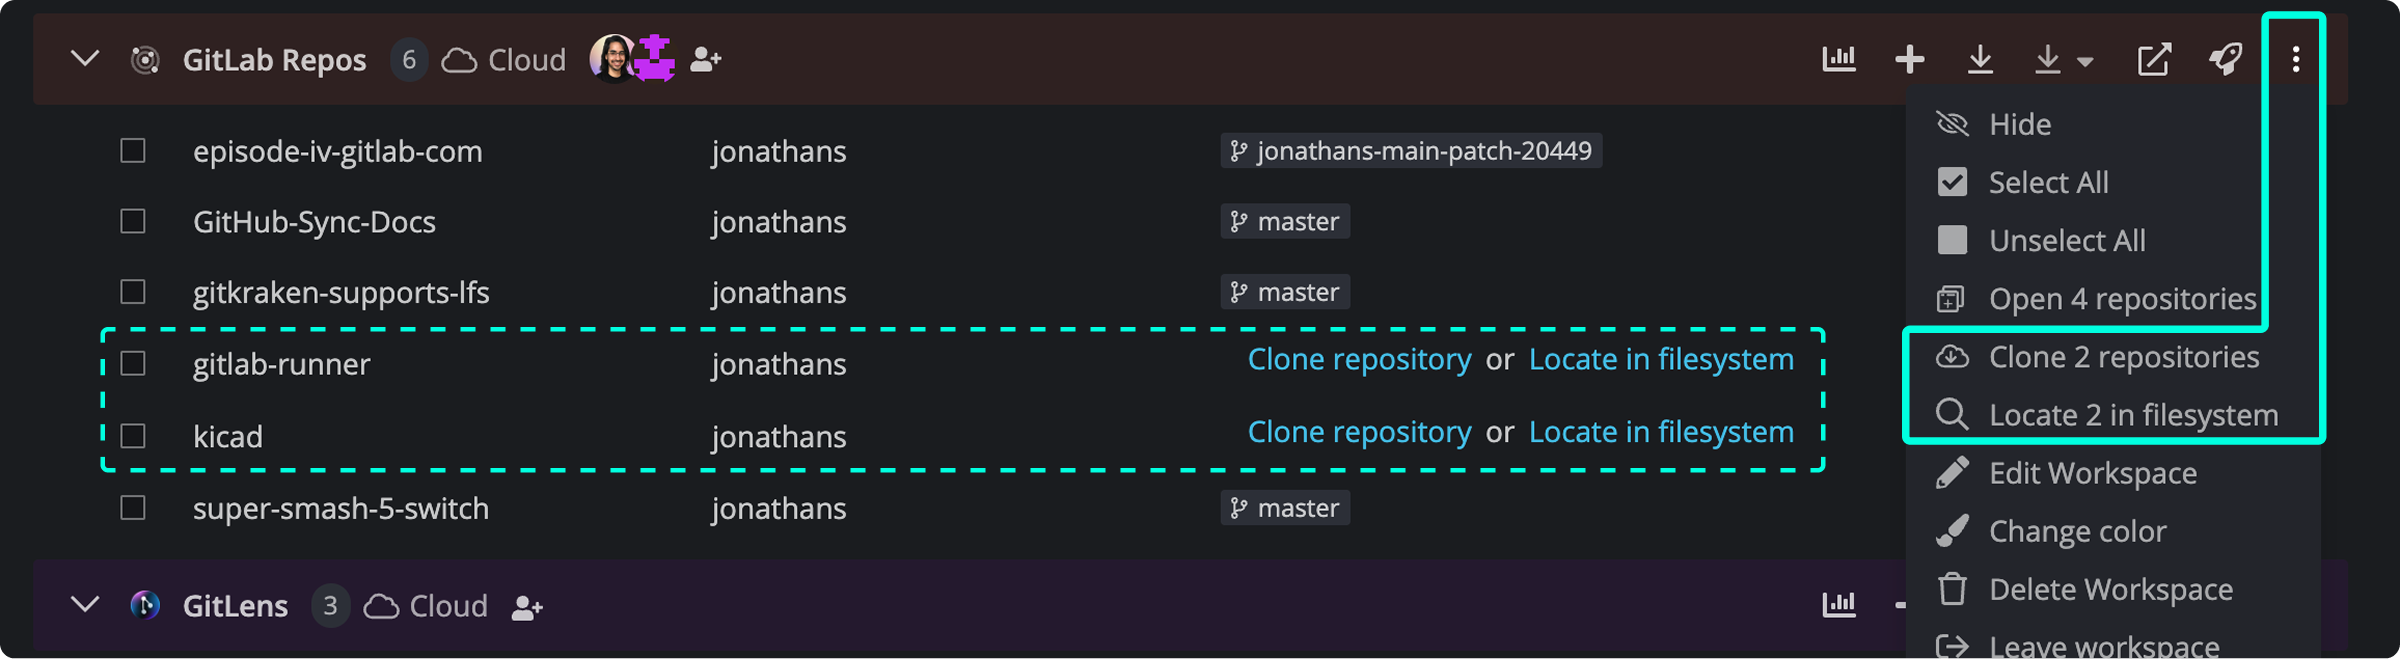
How to run multi-repository actions in a Cloud Workspace
To take action across multiple repositories:
- Select the checkboxes next to the desired repositories.
- Choose an action from the toolbar at the top.
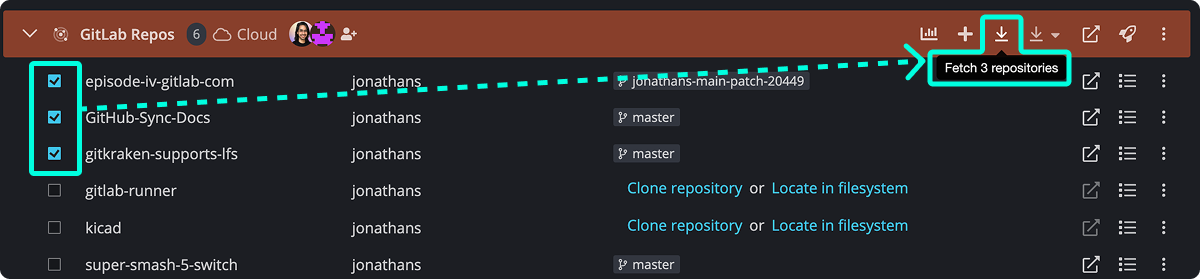
More options are available via the ellipsis menu.
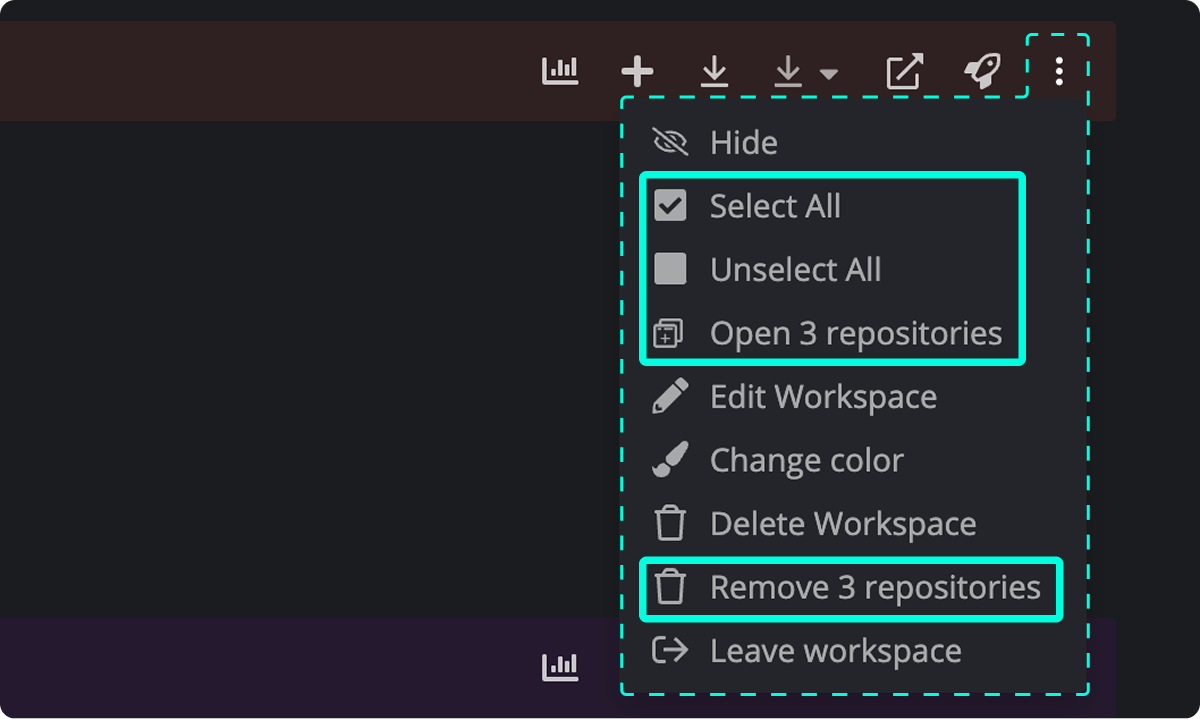
| Action | Description |
|---|---|
| Clone |
Clone all selected repositories. HTTPS is used by default unless SSH is configured in your settings. Only available if repositories aren’t already cloned. |
| Fetch | Fetch all selected repositories. |
| Pull |
Pull all selected repositories. Customize pull behavior from the dropdown menu. |
| Open in GitKraken Desktop or an external editor | Open all selected repositories in GitKraken or your default editor. |
| Locate in filesystem | Reveal local paths of selected repositories or update their location. |
| Remove | Remove selected repositories from the Workspace. |
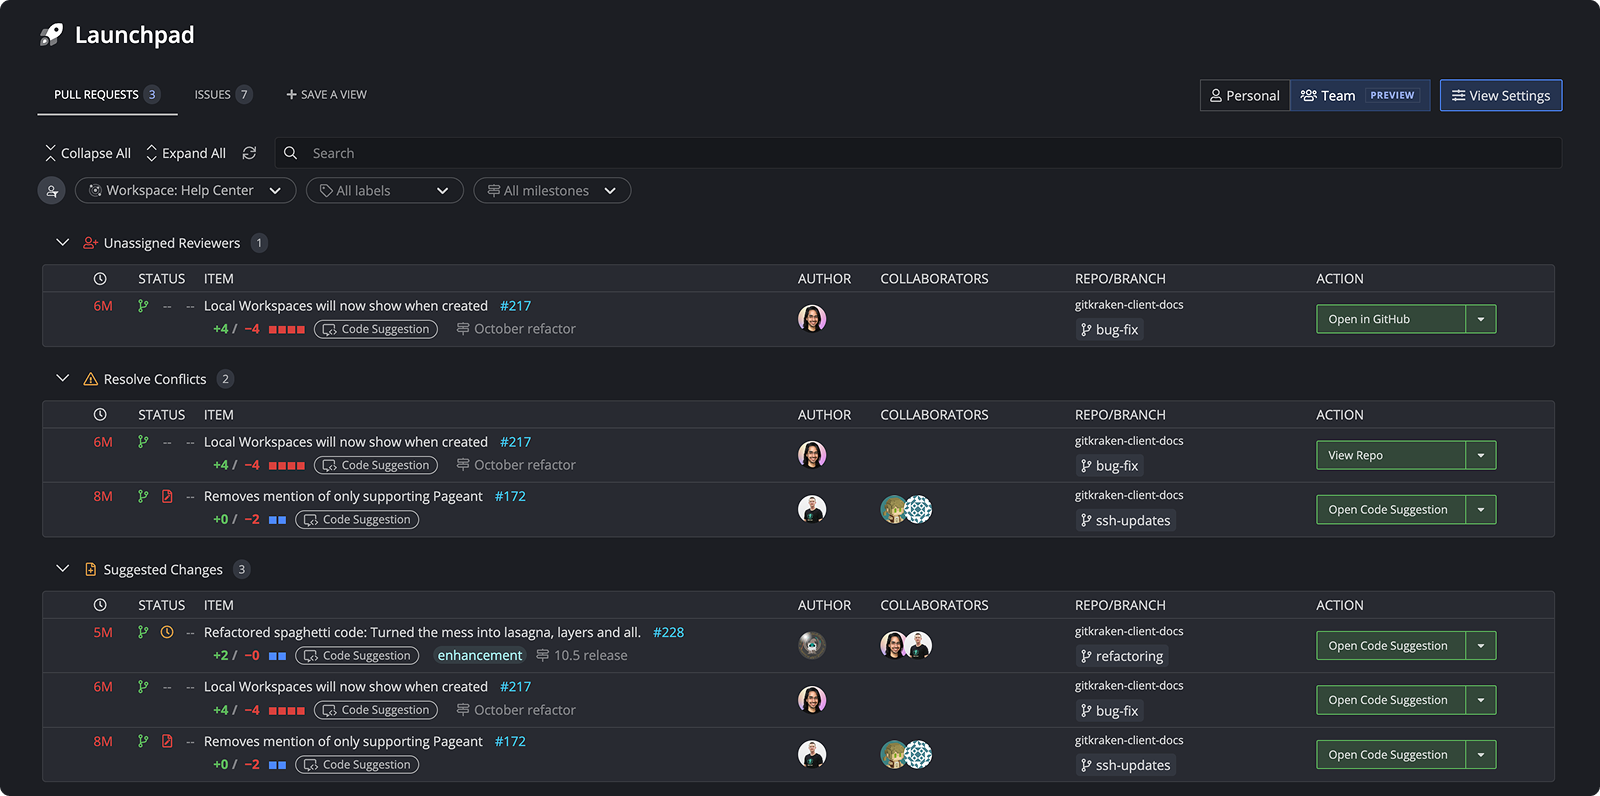
How to view Workspace pull requests in Launchpad
Access open pull requests for all repositories in a Workspace directly from Launchpad.
How Local Workspaces work
Use a Local Workspace when: you want a private repository grouping stored only on your machine. Convert to a Cloud Workspace when: you need cross-device access, sharing, or integration-backed workspace features.
How to create a Local Workspace
To create a Local Workspace:
- Click .
- Select “Local Workspace.”
- Name your Workspace.
- Browse to select one or more repositories. You can choose:
- Individual repositories
- A directory of repositories
- A VS Code Workspace file (
.code-workspace)
- (Optional) Add an icon and description.
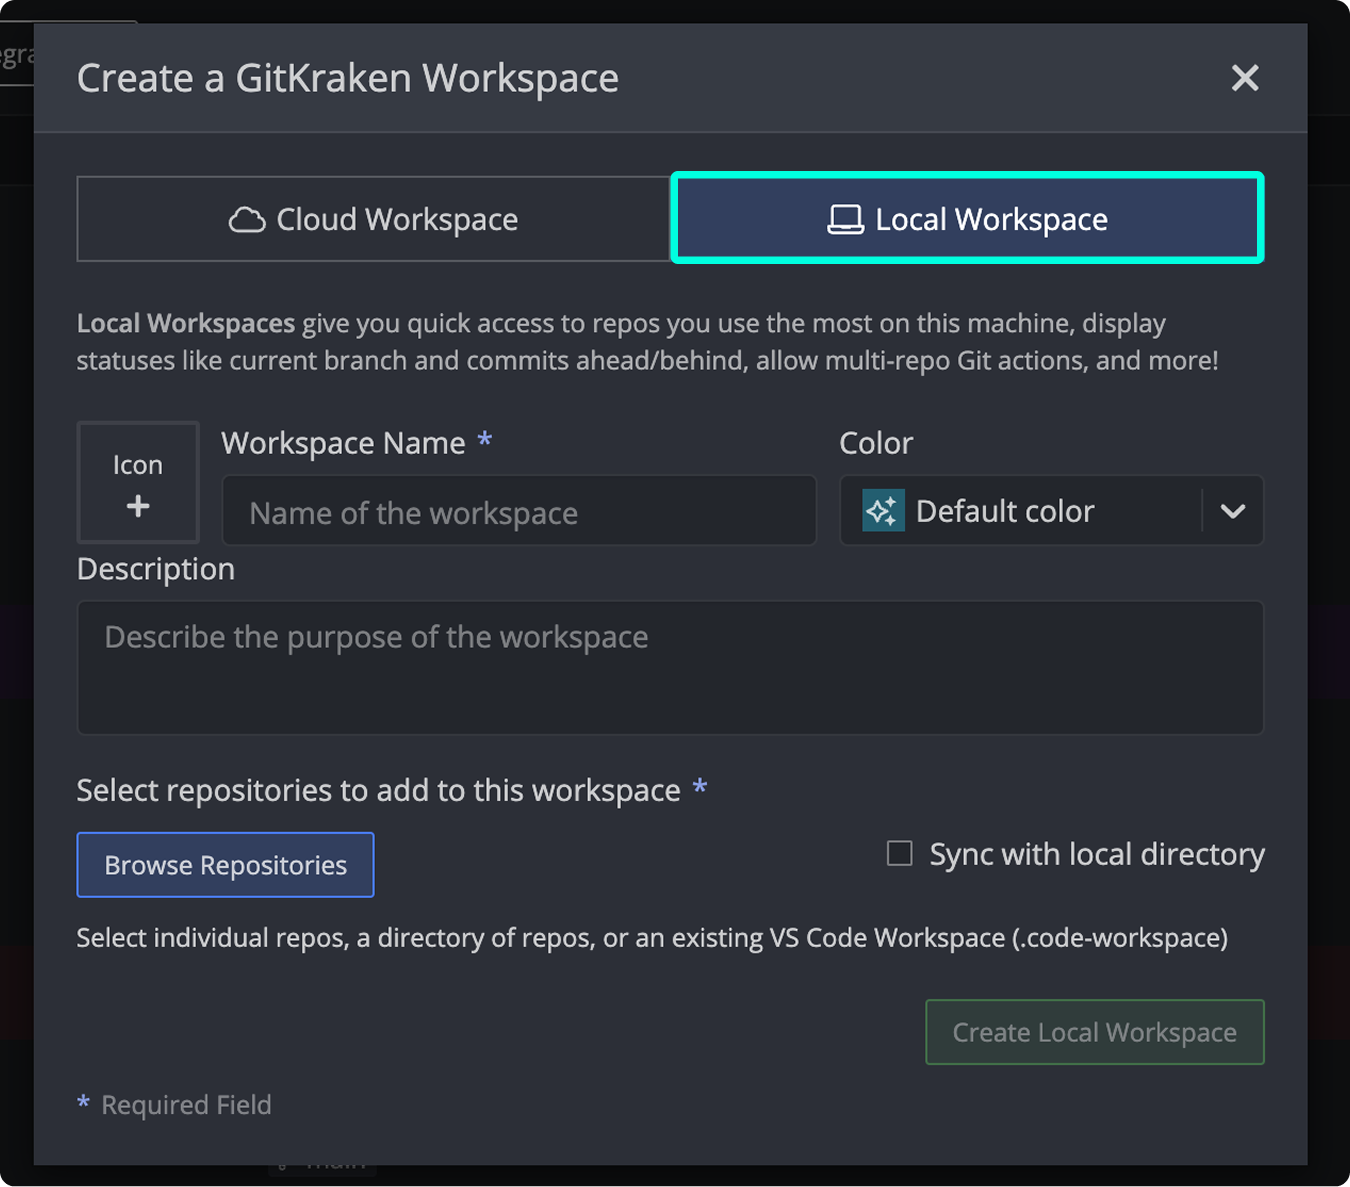
To automatically add all repositories in a selected folder, enable the Sync with local directory option.
How to run multi-repository actions in a Local Workspace
You can take actions across multiple repositories within a Local Workspace:
- Select the checkboxes next to the repositories.
- Use the action toolbar at the top to:
- Fetch: Update all selected repositories.
- Pull: Sync selected repositories with the latest changes. Use the dropdown to customize pull behavior.
- Open: Launch selected repositories in GitKraken or your default external editor.
- Remove: Delete selected repositories from the Workspace.
How to convert a Local Workspace to a Cloud Workspace
To enable sharing and enhanced visibility:
- Open your Local Workspace.
- Click Create cloud workspace.
- Choose a provider and select repositories to include.
- (Optional) Add additional repositories from the same provider.
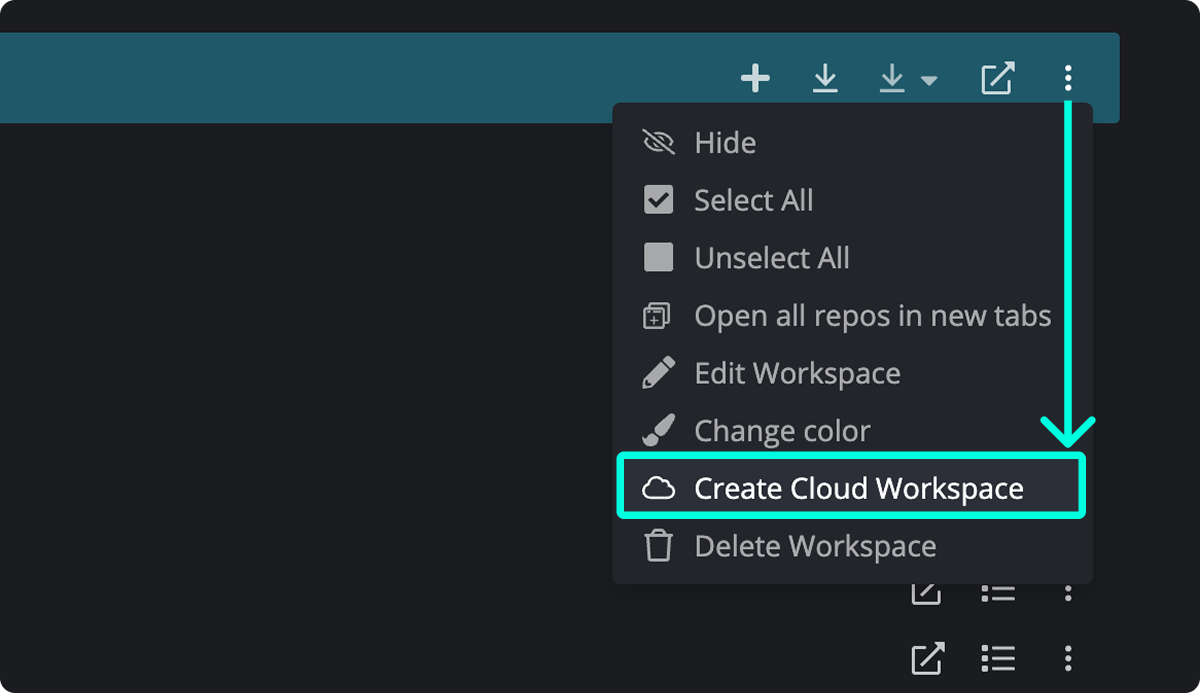
Note:
Ensure the provider integration is connected under Preferences > Integrations before creating a Cloud Workspace.
How to edit a Workspace
To edit a Workspace, click the ellipsis next to the Workspace name.
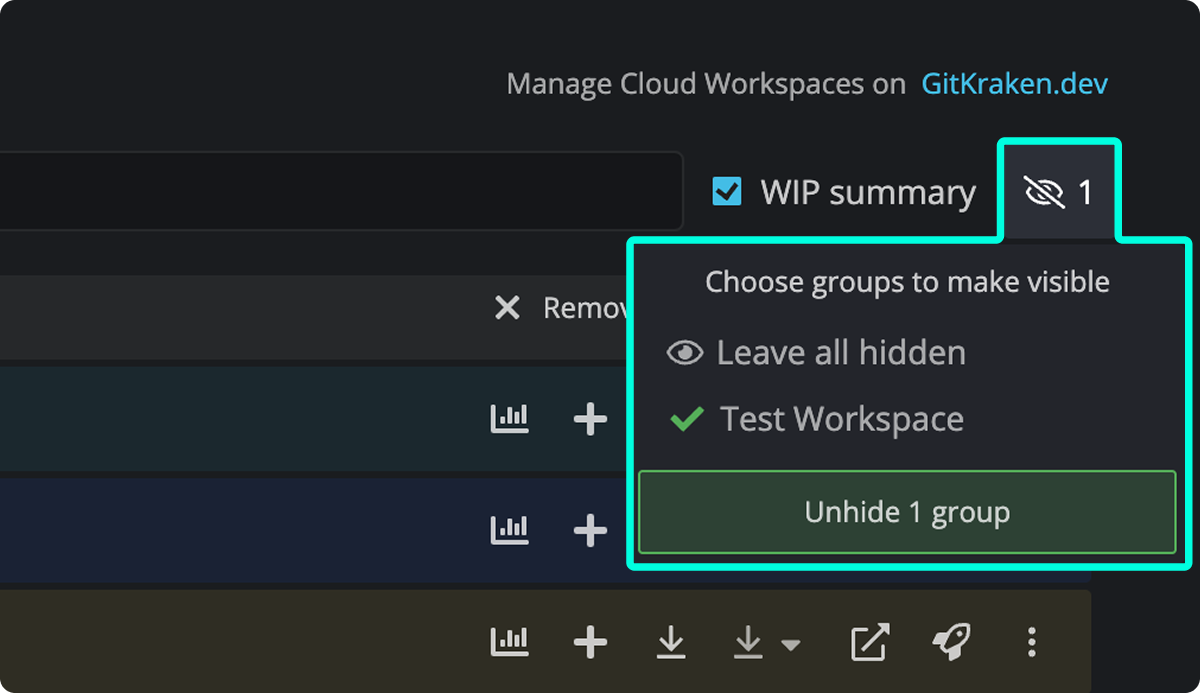
How to hide a Workspace
Hide a Workspace to reduce clutter. Hidden groups (e.g., Recents, Favorites) can be shown again using the icon.
How to select or unselect repositories
Manually select repositories for targeted multi-repo actions like Fetch or Pull.
How to open, clone, or locate repositories
Open repositories in GitKraken Desktop or your preferred editor. You can also clone or locate repositories within the file system.
How to edit Workspace details
Customize your Workspace’s name, color, description, and access permissions.
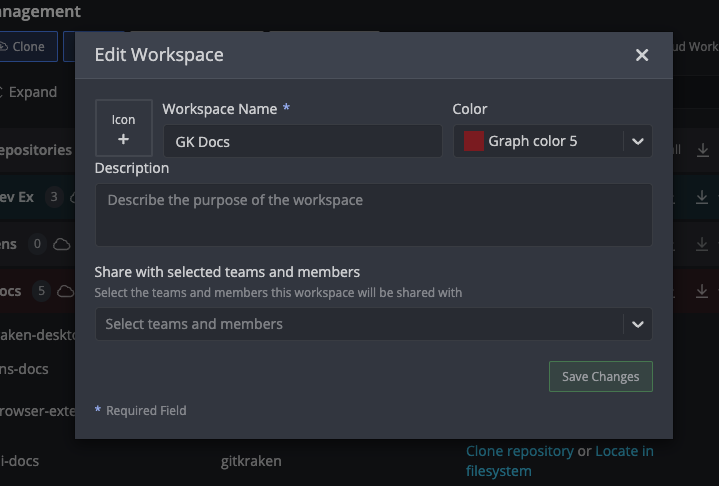
How to change Workspace color
Use color to visually organize and prioritize Workspaces. Select Change color from the three-dot menu.
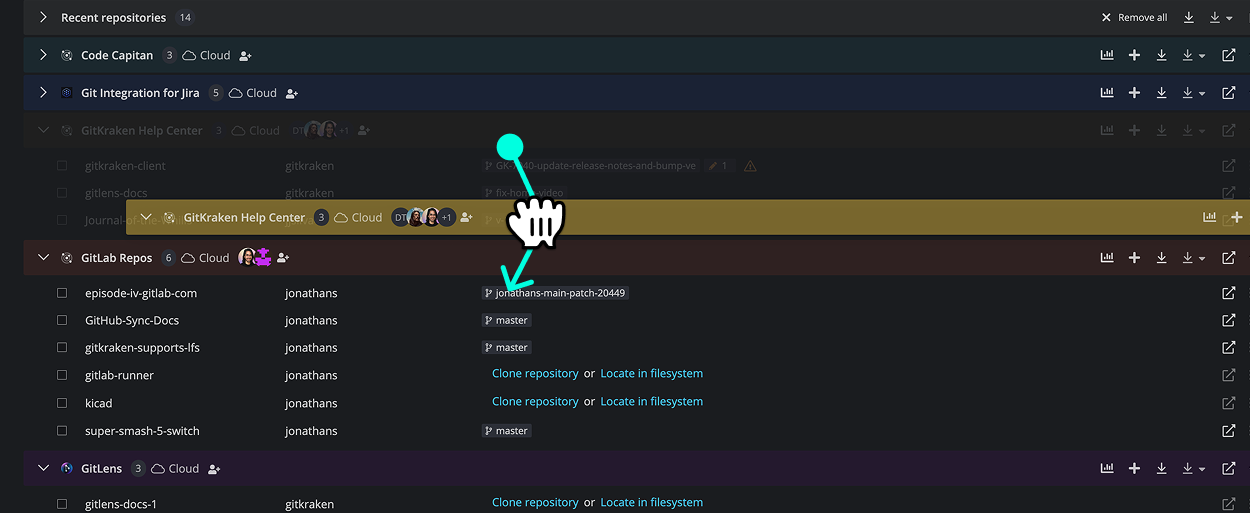
How to reorder Workspaces
Drag and drop Workspaces to arrange them in the desired order.
How to use Insights to visualize pull request history
Note: GitKraken Insights is not available in GitKraken On-Premise Serverless or Self-Hosted Server deployments. Insights requires a connection to gitkraken.dev.
GitKraken Insights helps you understand how pull requests are merged into your repositories. It provides:
- A visual history of your repository’s development
- Insight into pull request trends and team workflows
- Support for GitHub.com, Bitbucket.org, GitLab.com, and Azure DevOps (Hosted)

To launch GitKraken Insights:
- Open a Cloud Workspace.
- Click the Insights icon in the upper-right of the Workspace header.
This will open a new browser tab showing insights for that Workspace on GitKraken.dev.
For more details, visit the GitKraken.dev Insights documentation.
Azure DevOps requirements for Workspace Insights
To use Workspaces and Insights with Azure DevOps:
- You must enable Third-party application access via OAuth in Azure.
- Navigate to Organization Settings > Policies in your Azure DevOps dashboard.
Learn more from Microsoft’s official guidance: Change application connection & security policies for your organization.
Workspace changelog
Take a trip down memory lane, and see how Workspaces have evolved over time.
| Version | Highlight |
|---|---|
| 10.4 | Insights now on gitkraken.dev |
| 10.3 | New look for Repo Management tab |
| 10.1 | Customize your Repository Management tab |
| 10.0.2 | Workspaces merge with Repository Management |
| 10.0 | Focus View becomes Launchpad |
| 9.5 | Multi-pull + Share Workspace |
| 9.2 | Issue View added (now in Launchpad) |
| 9.1 | Insights for Azure DevOps |
| 9.0 | Local & Cloud Workspaces + Insights |
| 8.9 | Team Overview added |
| 8.8 | Workspace Overview added |
| 8.6 | Bitbucket support added |
| 8.5 | Azure DevOps support added |
| 8.4 | Workspace pull requests added |
| 8.2 | Workspaces introduced |
