
Last updated: April 2026
Use this getting started guide to learn a basic GitKraken Desktop workflow: clone a repository, create a branch, make and stage changes, commit them, push the branch, and merge the work back. It is aimed at new Git users who need a practical first path through the product rather than a reference page.
Requirements and limits
- This page is a beginner workflow guide, not a full reference for every GitKraken Desktop option or edge case.
- You need access to a Git repository you can clone, change, commit to, and push from GitKraken Desktop.
- Merging and pushing steps depend on your remote permissions and repository policy.
- If merge conflicts occur, you may need separate merge-conflict guidance beyond this introductory walkthrough.
Quick Start
- Clone a repository: Go to File > Clone Repo, paste a repository URL or browse your connected Git hosting service, and click Clone the repo.
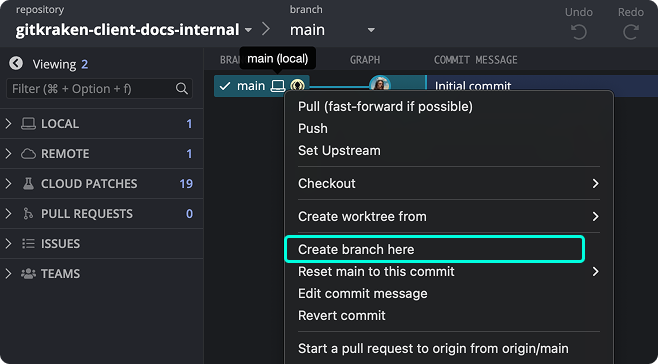
- Create a branch: Right-click any commit in the graph and select Create branch here. Name it and press Enter.
- Make changes: Edit files in your working directory. Saved changes appear under the WIP node in the Commit Graph.
- Stage changes: Click the WIP node to open the Commit Panel. Click files to stage them, or press Cmd/Ctrl + Shift + S to stage all.
- Commit: Enter a commit message and press Cmd/Enter (macOS) or Ctrl/Enter (Windows/Linux).
- Push: Click Push in the toolbar to upload your branch to the remote.
- Merge: When your work is ready, check out the target branch and right-click your feature branch to select Merge.
If merge conflicts occur, GitKraken Desktop opens the Merge Tool, where you can select lines from each side and commit the resolution.
How to learn Git with GitKraken
In this series, you’ll learn Git concepts and how to apply them using GitKraken Desktop.
Explore how version control fits into a DevOps workflow by reading our DevOps Tools Report.
GitKraken tutorials
Need help getting started with the product interface? Watch these video tutorials.
How local repositories work
Most Git actions in GitKraken Desktop occur in the local repository, meaning changes are made on your machine.
Local branches are indicated in the graph with the icon.
Git is fast because all changes occur locally, not over a network. Even if a remote server fails, your team retains full copies of the project.
What the .git folder does
This folder contains all the metadata and commit history. If deleted, Git operations like switching branches or pulling remotes won’t work.
What the working directory does
This is your active file state. When switching branches or pulling updates, Git modifies your working directory to match the current branch.
Learn more about Git repositories.
How the example workflow works
Follow this workflow to make your first commit in GitKraken Desktop.
How to create a branch
Right-click main in the Commit Graph and choose Create branch here. Name it develop—a branch for ongoing development.
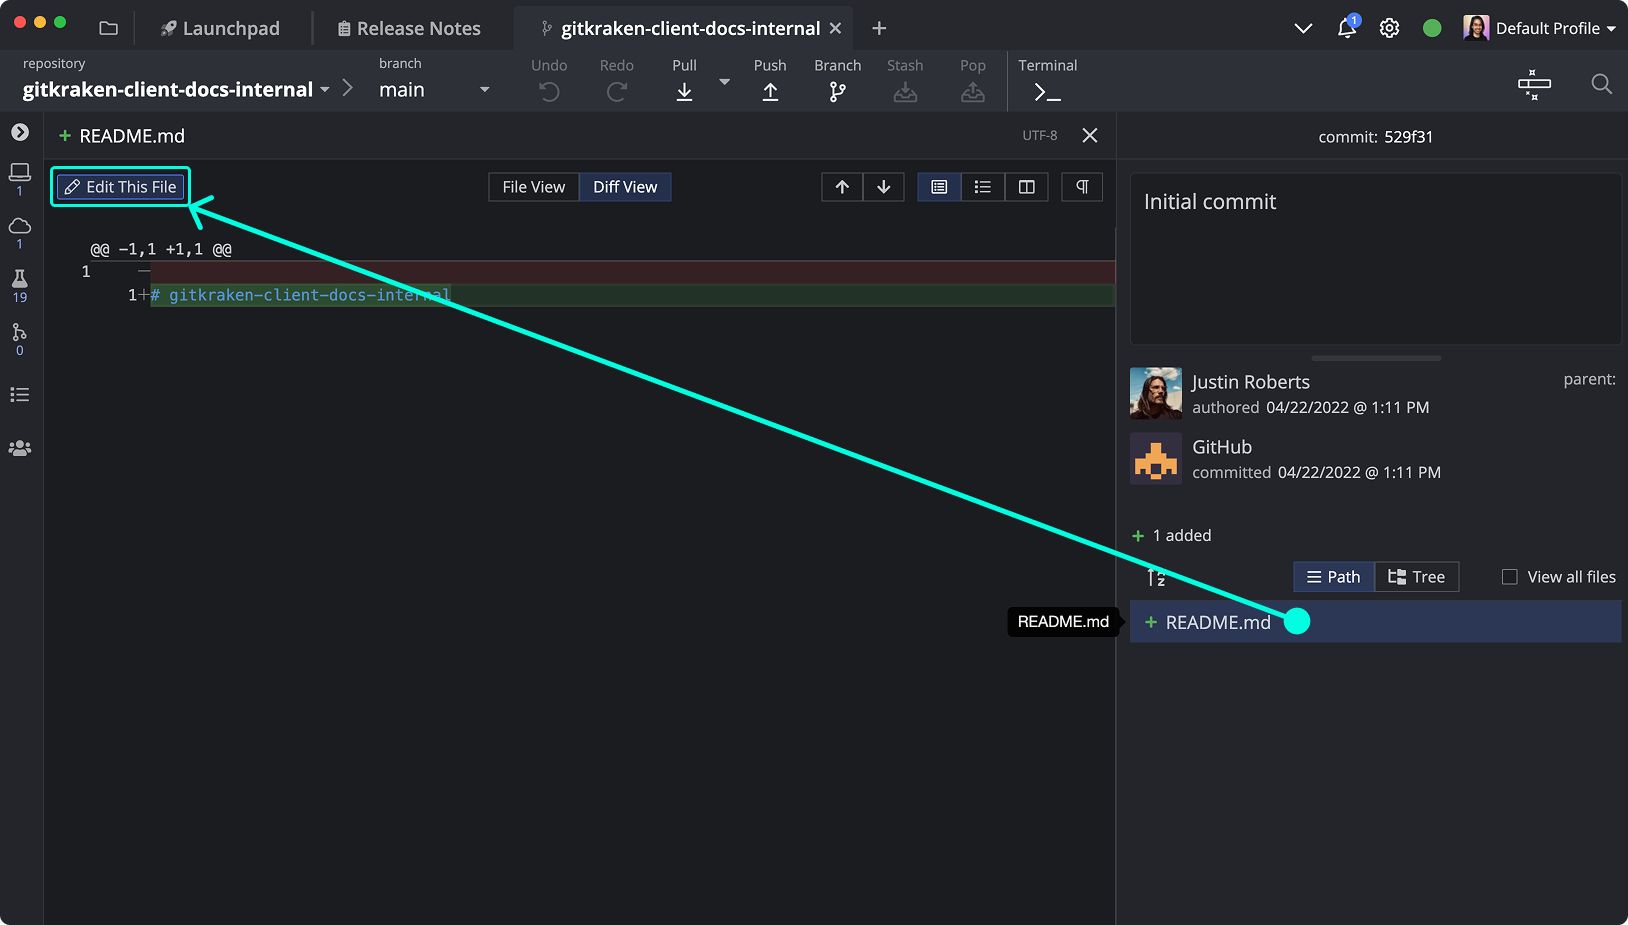
How to modify a file
Edit README.md to reflect your project. You can open this file directly from the Commit Graph.
How to stage and commit changes
After editing, select the //WIP node to view unstaged changes. Stage all with the green button.
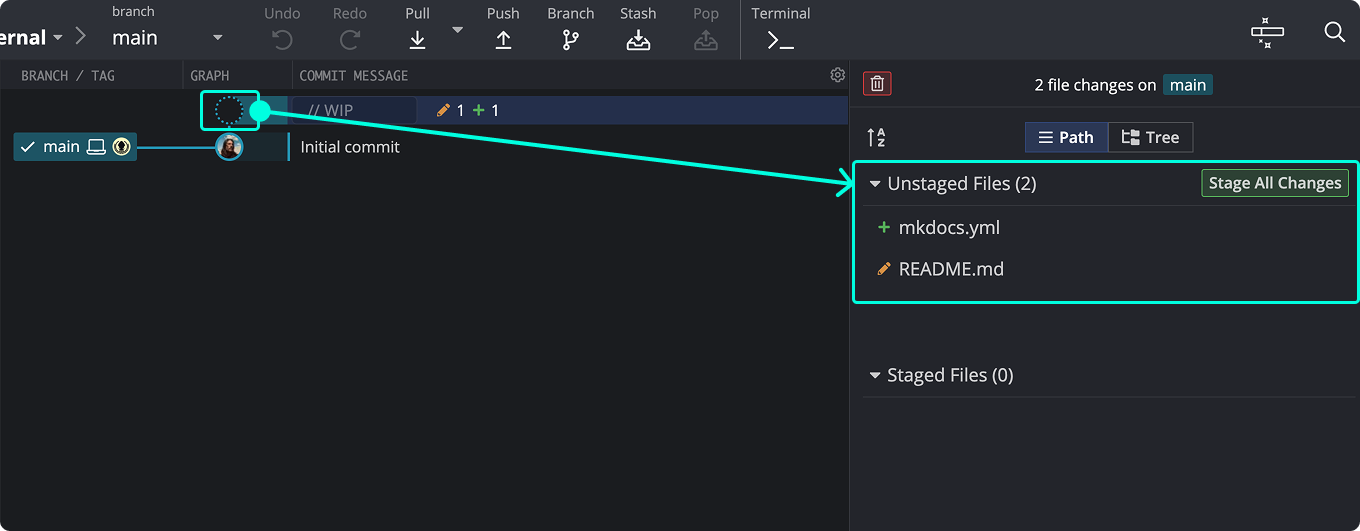
Then enter a commit message and click .
Learn more about staging and committing.
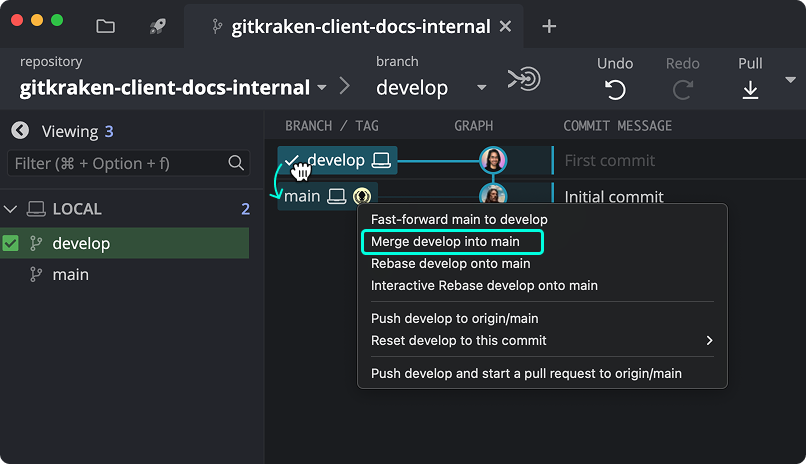
How to merge back to main
When develop is ahead of main, you can merge:
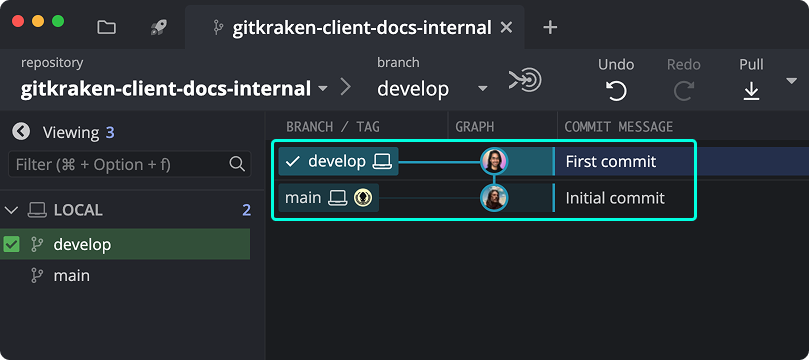
To merge, drag develop onto main in the graph and choose Merge.
Learn more in Branching and Merging.
Getting started summary
This basic workflow sets the foundation for more advanced topics like pushing and pulling and GitFlow.
When you are ready to go further, continue with:
- GitKraken Desktop Interface Guide to learn how the Left Panel, Commit Graph, and Commit Panel fit together
- Manage Git Worktrees in GitKraken Desktop to work on multiple branches in parallel
- GitKraken Terminal Guide to use the embedded terminal
- Coding Agents in GitKraken Desktop to use Agent Sessions View and coding agent workflows
Watch how a commit is made using GitKraken Desktop:
